Create Beautiful Data Entry Forms for Excel (No Code Needed)

Introduction
You know that feeling when you want to create a simple, clean data entry form in Excel, but the moment you start, it feels like assembling a complicated puzzle with missing pieces? That’s the reality for many who’ve tried building VBA user forms—they can look outdated, take forever to build, and honestly, don’t exactly scream “modern.” And while AI tools like ChatGPT can whip up code snippets, they can’t really design or drag-and-drop your way to a sleek form. (Trust me, I asked.) But what if I told you there’s a way to create beautiful, modern Excel data entry forms without writing a single line of code? No coding, no installs, no headaches—just drag, drop, tweak, and done. Sounds like magic? Well, it’s not magic, it’s just a tool I built to make your life easier. In this article, I’ll take you step-by-step through how to build, customize, and use a no-code Excel data entry form that runs right in your browser. Plus, I’ll share some cool extras like how to update or delete records, reconnect your spreadsheet if you refresh the page, and even toggle between light and dark mode. Ready? Let’s dive in.
The Problem with Traditional Excel Data Entry Forms
Let’s be honest: VBA user forms have been the go-to for Excel data entry for years, but they come with some serious drawbacks:
- Old-school look: VBA forms often feel like a blast from the past. They don’t really match the sleek, modern interfaces we’re used to today.
- Time-consuming to build: Designing a decent-looking form takes a lot of effort, knowledge, and patience.
- Limited help from AI: While AI can generate code, it can’t create or design the form for you, so you’re still stuck with manual work.
- Compatibility issues: VBA forms can behave differently across machines, and sometimes require specific setup or permissions.
So, if you’ve ever tried to build an entry form and felt overwhelmed by the process, you’re not alone.
Meet the Drag-and-Drop Excel Data Entry Form Builder
Now, imagine a tool that lets you create a sleek, modern data entry form for Excel with zero coding. You simply drag and drop the fields you want, tweak a few settings, and click a button to generate a fully functional form. It’s like building with Lego blocks, but for your data collection needs. This is exactly what I created: a no-code drag-and-drop form builder that runs entirely in your browser. No installs, no VBA, and it works on any machine. Best of all, it’s completely free. 
Getting Started: Building Your First Form
To start, head over to my website (link below) where you’ll find the form builder ready for action. On the left side, you’ll see all the available field types: text fields, email inputs, number fields, date pickers, drop downs, check boxes, and radio buttons. Building your form is as simple as dragging any of these fields into the form area on the right. For example, you might want to start with a text field for names, an email field, a number field for phone numbers, a date picker, a drop down for subscription types, and a checkbox for preferences. 
Customizing Your Fields
Once you’ve added your fields, click on any one of them to customize its properties. Here’s what you can tweak:
- Label: The name that appears next to the field in the form.
- Placeholder: Sample text inside the input that guides the user.
- Helper text: Small notes that appear below the input for extra guidance.
- Required field: Mark inputs as mandatory to ensure users don’t skip important information.
As you type the label, the form builder automatically updates the card name, making it easier to reorder fields later. 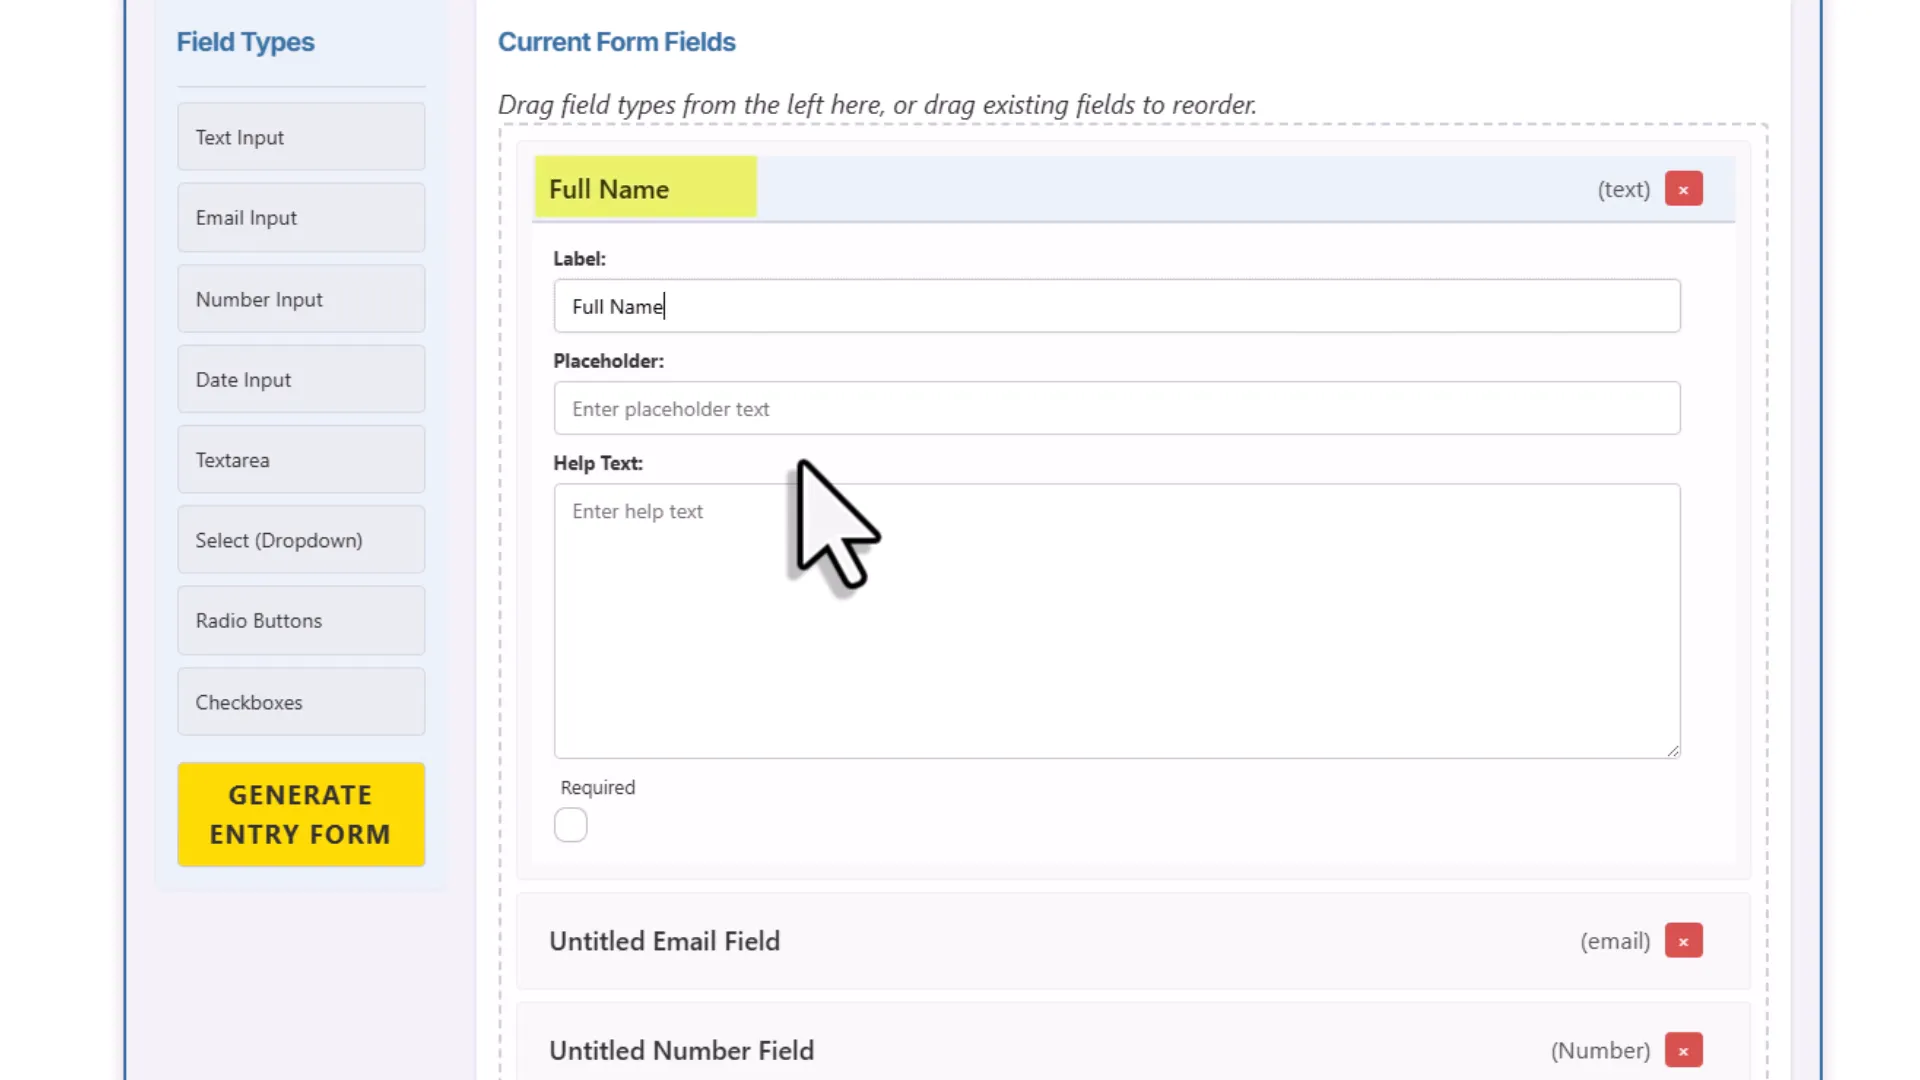 For example, I made my name and email fields required, added placeholders like “Enter your email,” and helper text under the phone number field to guide users on the format.
Handling Options for Select Boxes, Radio Buttons, and Checkboxes
For fields like drop downs, radio buttons, and checkboxes, you can specify the options users will see. The form builder lets you enter two values for each option:
- Option label: What the user sees in the form.
- Option value: What actually gets saved in your Excel file.
By default, the option value is auto-generated by converting the label to lowercase and replacing spaces with underscores (e.g., “Premium Plan” becomes “premium_plan”). This helps keep data consistent and easy to work with later. Of course, you can always edit the value manually if you want. You can add or remove options easily with buttons next to the options list. 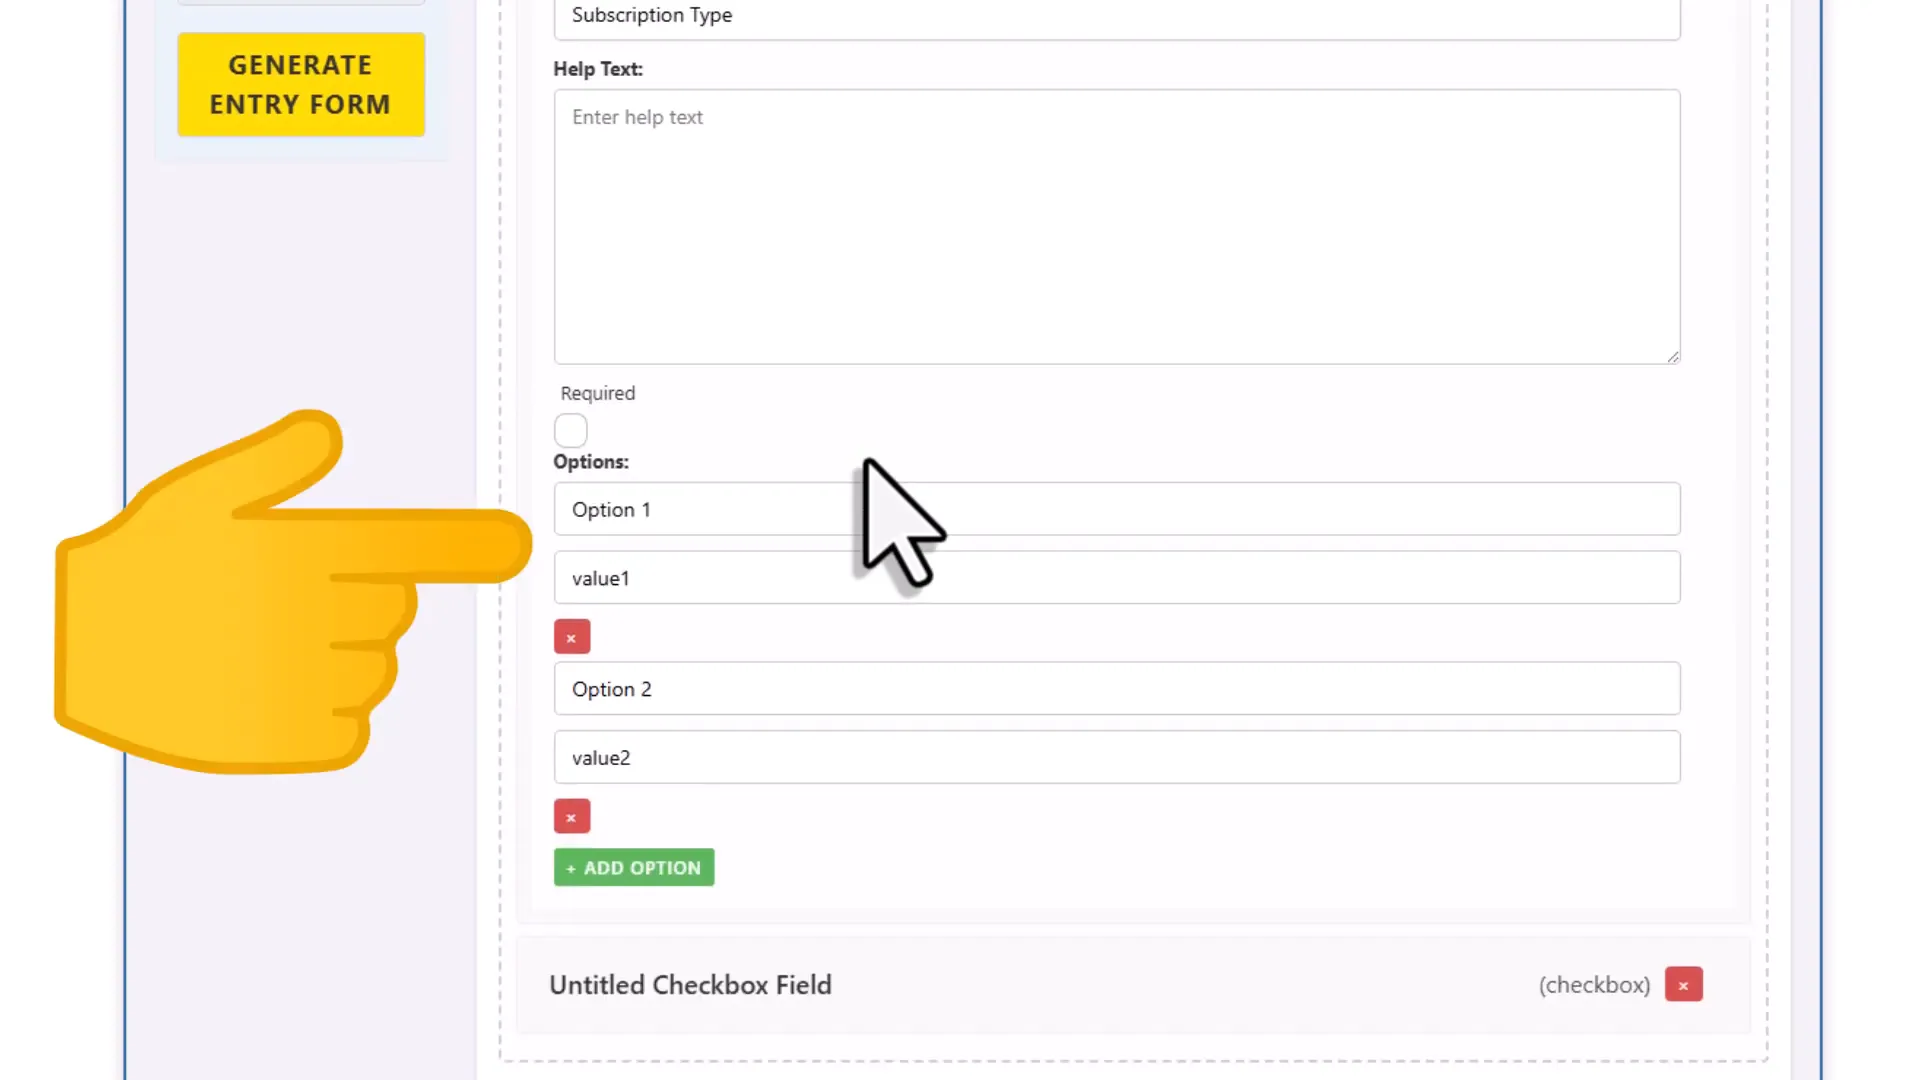
Rearranging and Removing Fields
Once all your fields are in place, you can reorder them by dragging and dropping or remove any field by clicking the “x” button. For example, I moved the date picker to the bottom of my form for a cleaner flow. 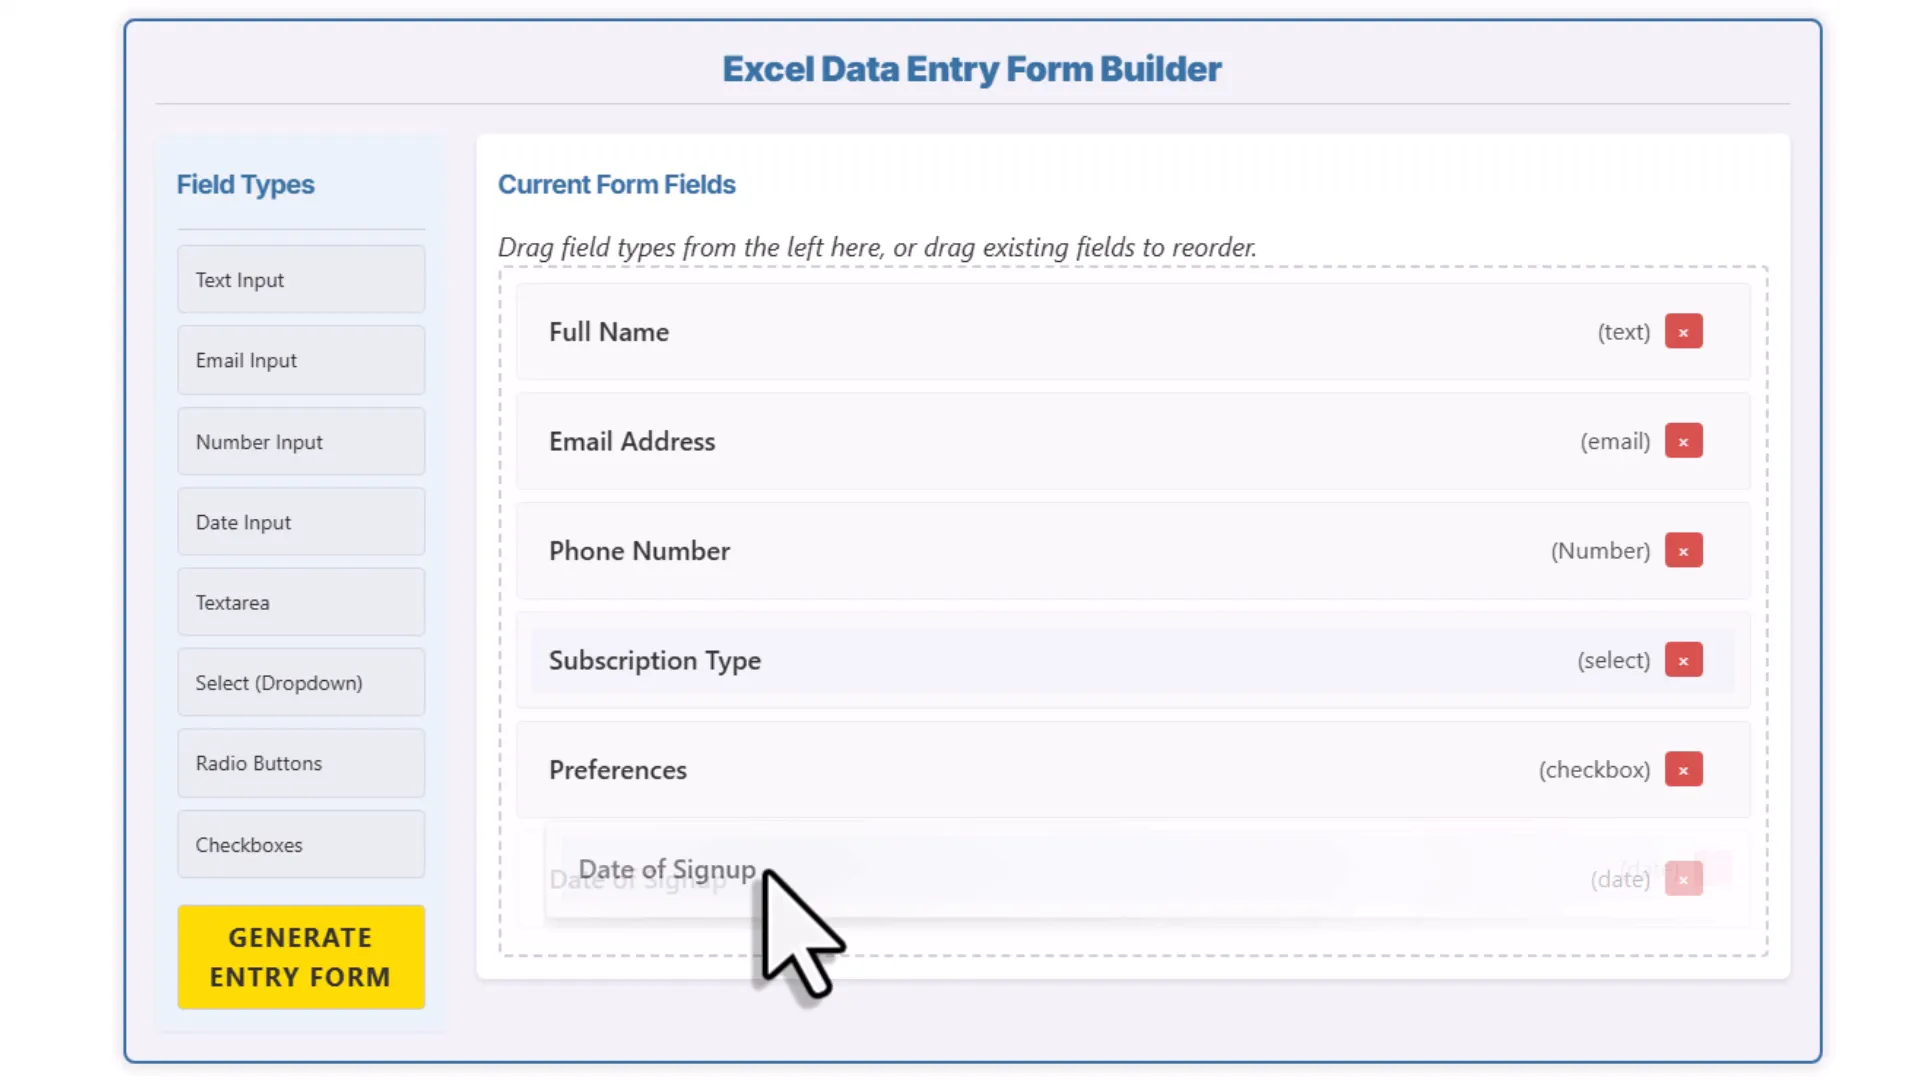
Generating and Downloading Your Excel Data Entry Form
When you’re happy with your form, click the “Generate Form” button at the top. You’ll also see options to change the form’s title and description, which appear above the form when displayed. These changes update instantly in the JSON output, which is the configuration your form uses behind the scenes. 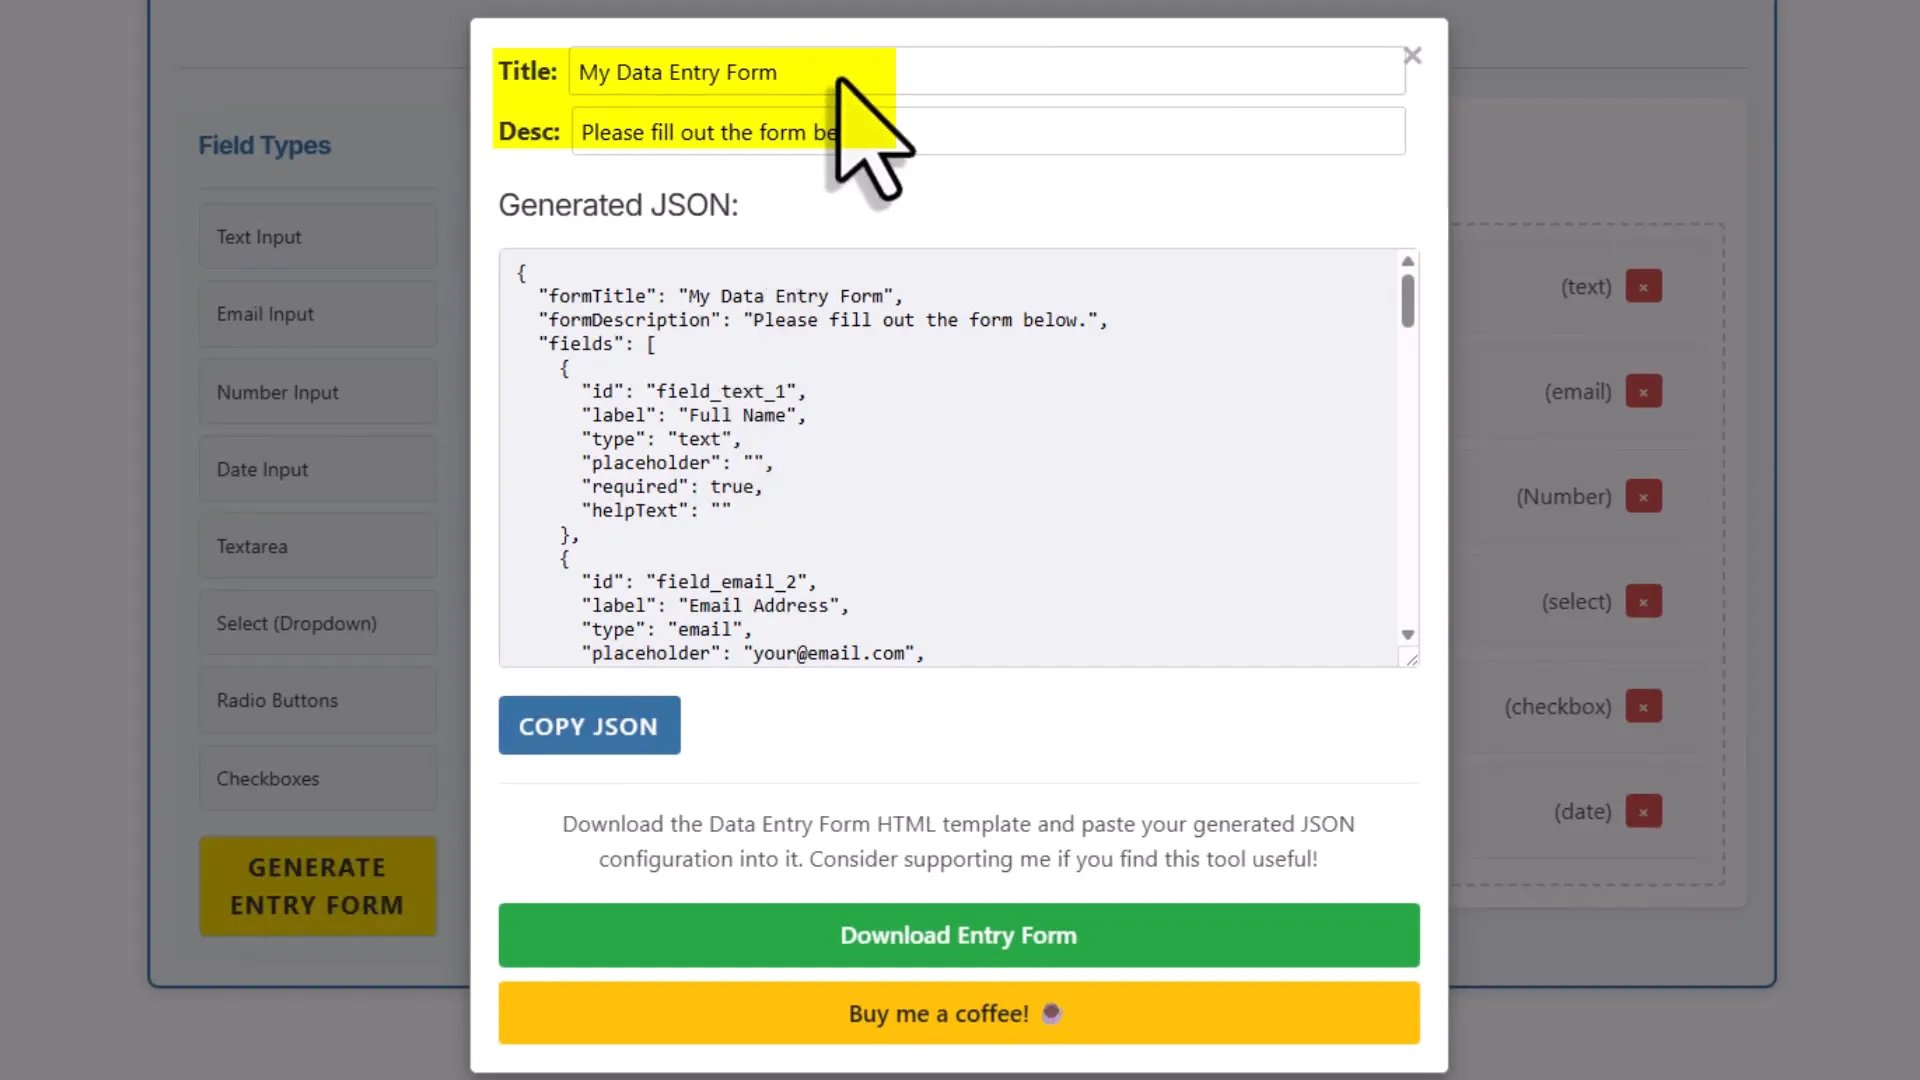 Next, download the form by clicking the “Download” button. This will save a zip folder to your downloads folder containing your entry form as an HTML file and a quick start guide as a PDF.
Setting Up Your Form Locally
Extract the downloaded zip file by right-clicking and selecting “Extract All.” Inside, you’ll find:
- Entry form HTML file: This is your actual form.
- Quick start guide PDF: Helpful instructions to get you going.
Open the HTML file in your browser. Keep in mind, this is a local site running directly on your machine, so no data is sent anywhere—your privacy is intact. 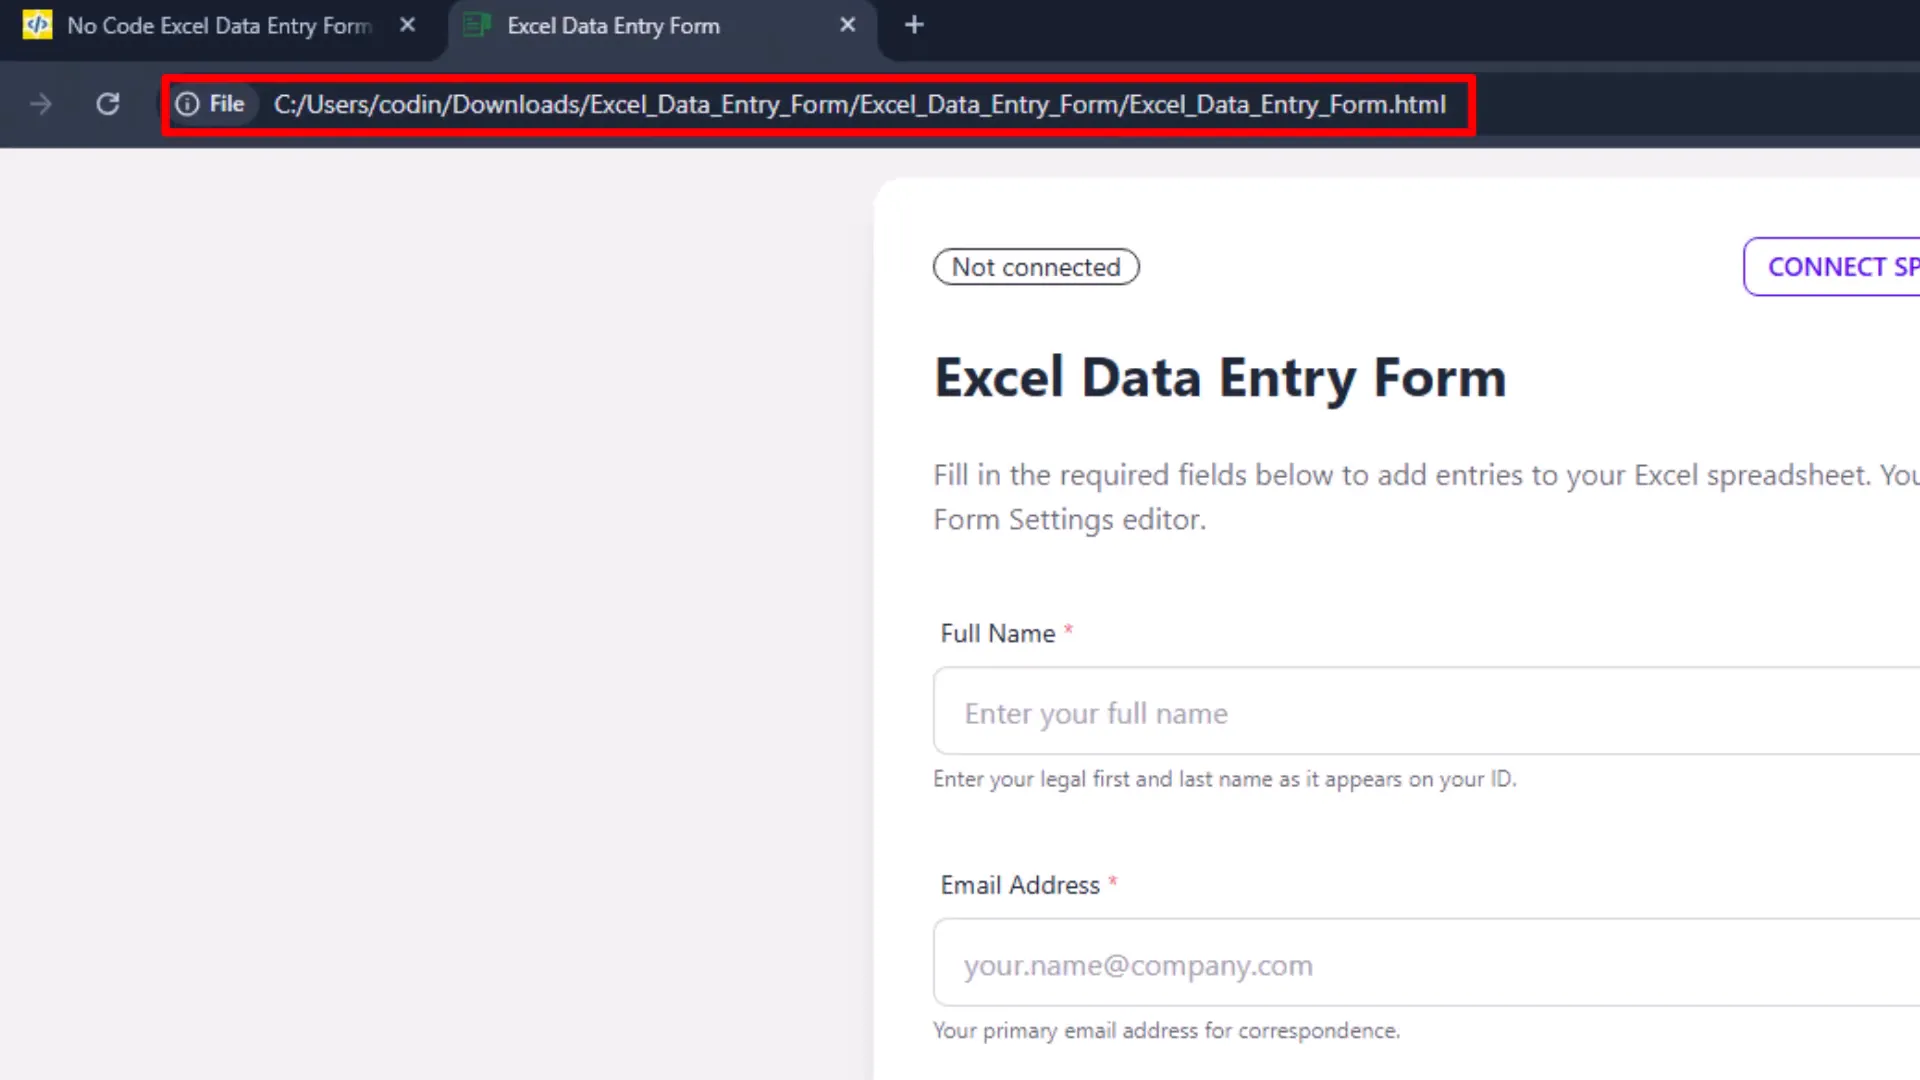 At first, the form shows template data. To use your custom form, go back to the website and copy the JSON configuration from the form builder. Then, in your local form, open the form settings and replace the default JSON with your own. Apply the changes, and voilà—your custom form is ready to use.
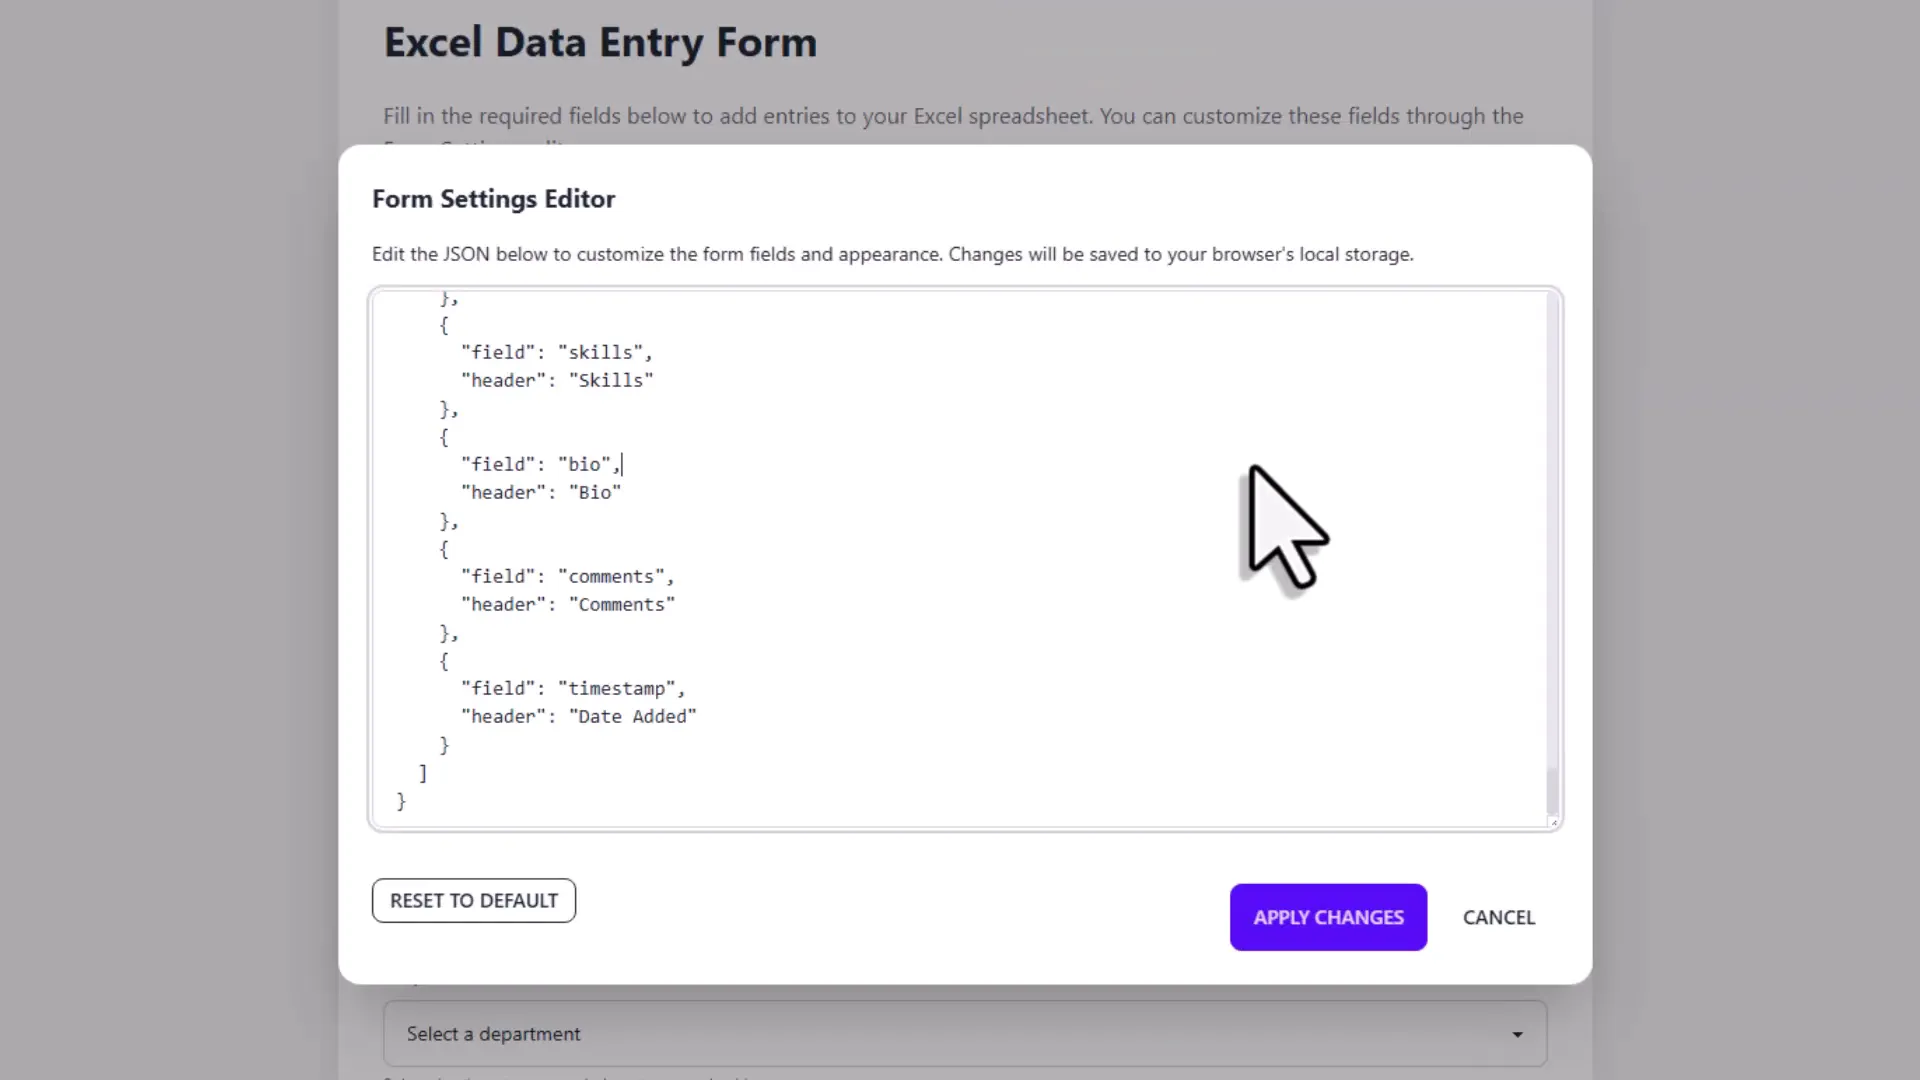
Using Your Excel Data Entry Form
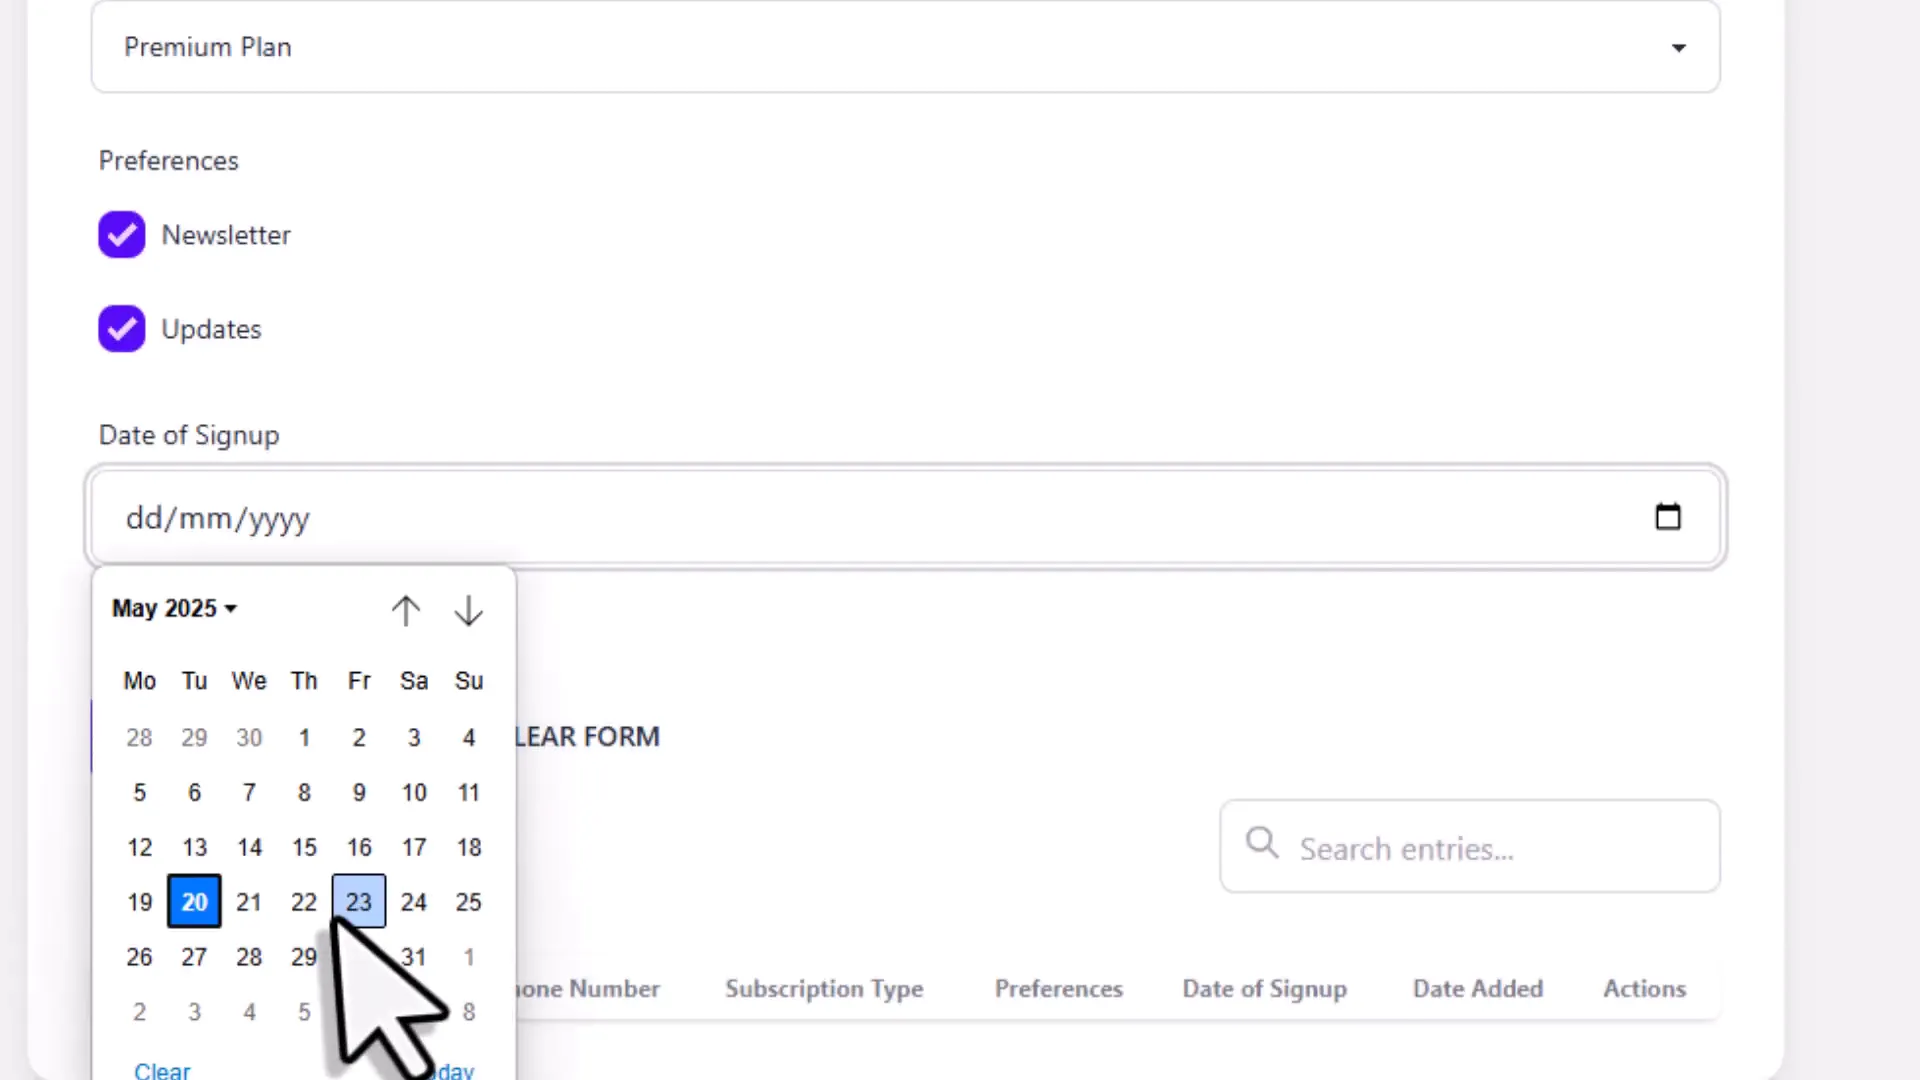
Now for the fun part: entering data. Your form includes all the fields you designed, complete with required markers (little red asterisks), placeholders, and helper texts. 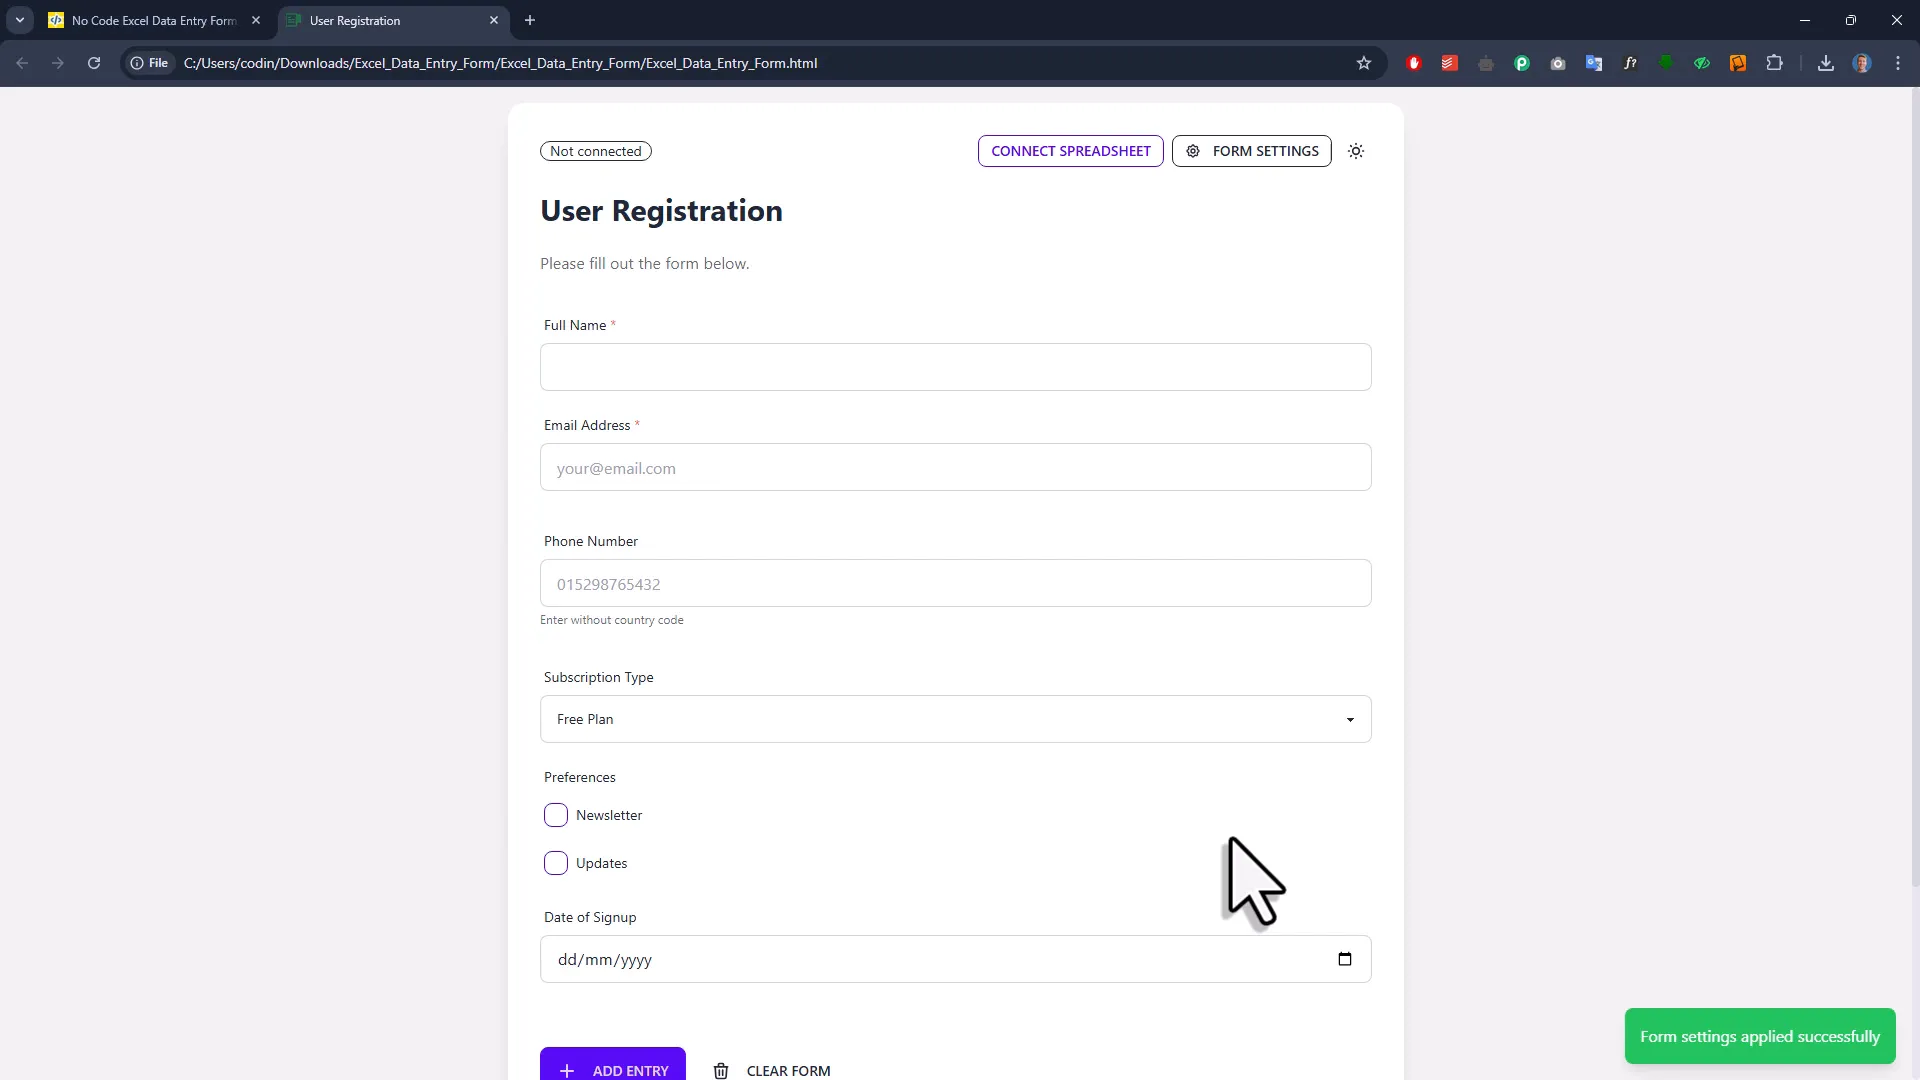
Field Behaviors You’ll Love
Saving Data to Excel
The first time you add an entry, the form will ask you to select a folder to save the Excel spreadsheet. I saved mine to the downloads folder. After saving, you’ll see a success message and your entry appears in the form’s list. 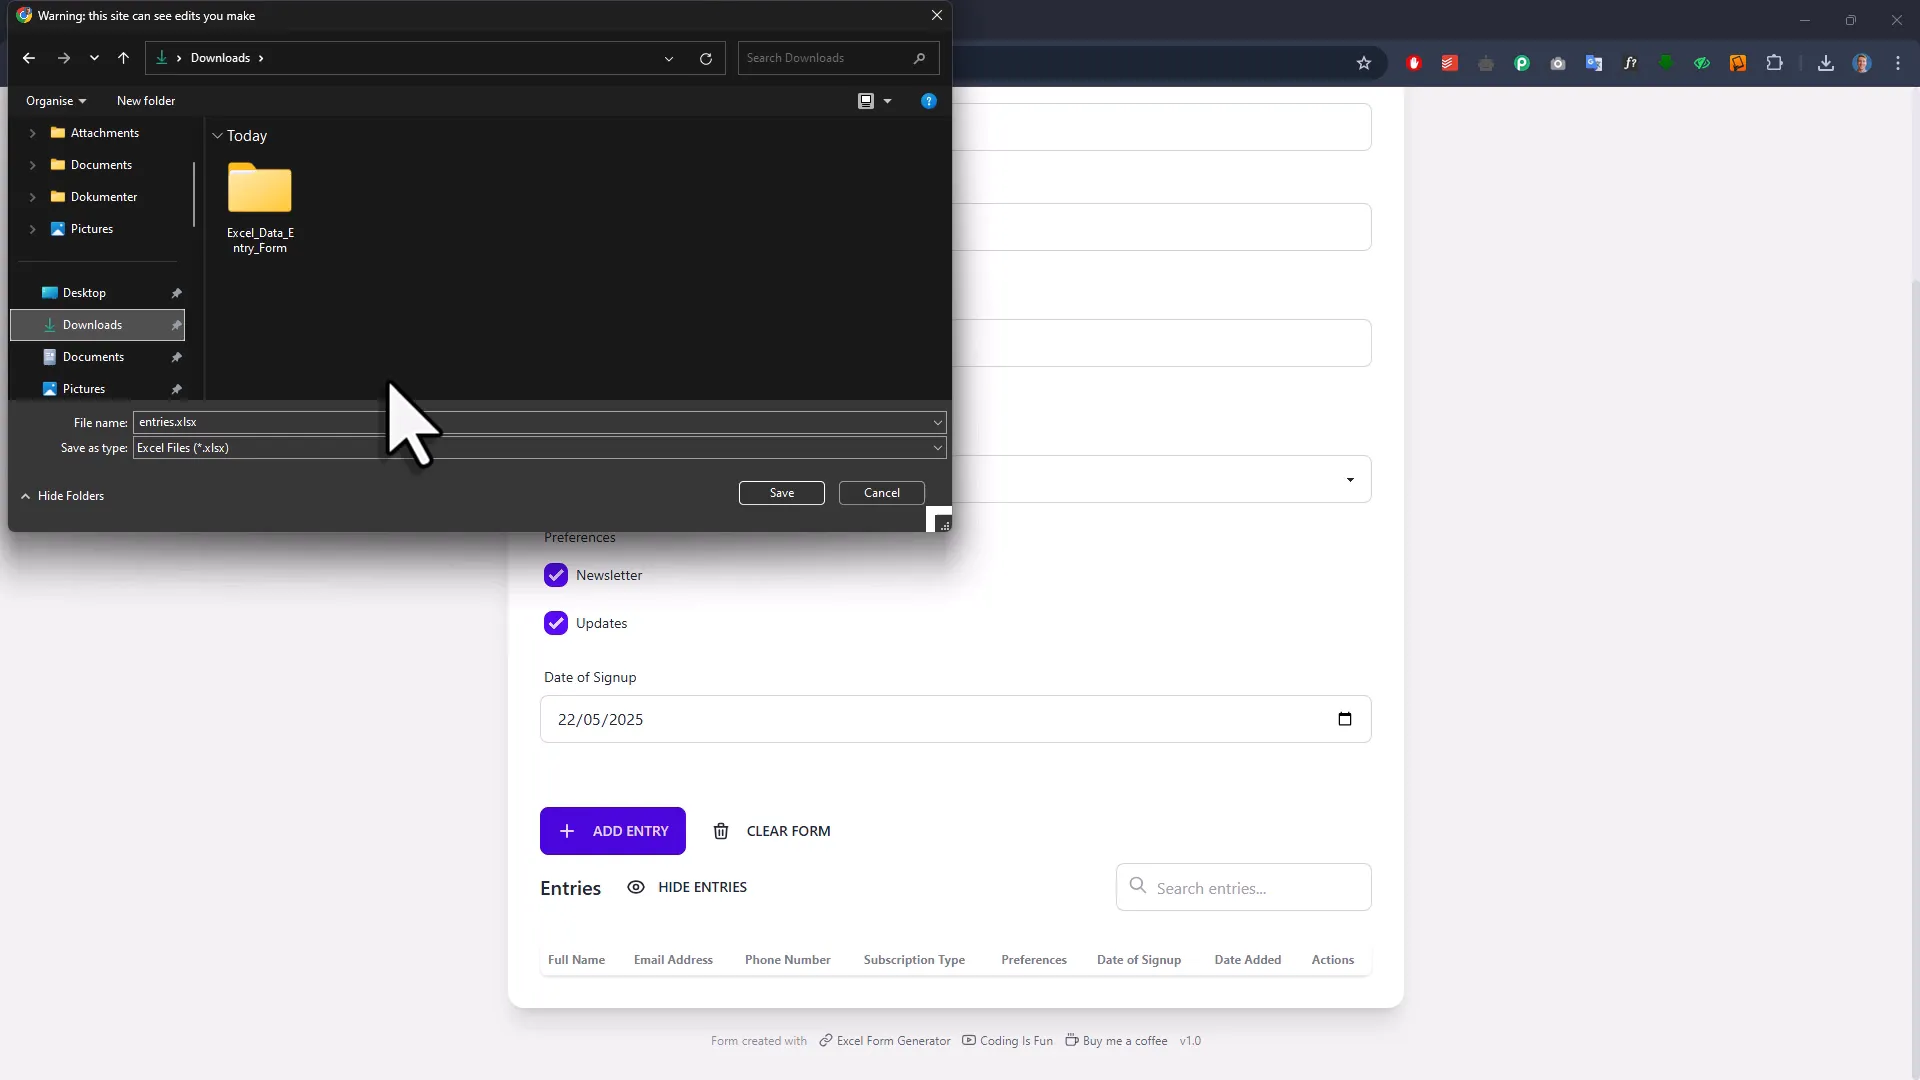 Checking the folder, you’ll find a new Excel workbook with your data. The headers match your field labels, and the values reflect the options you set (including the lowercase subscription type values).
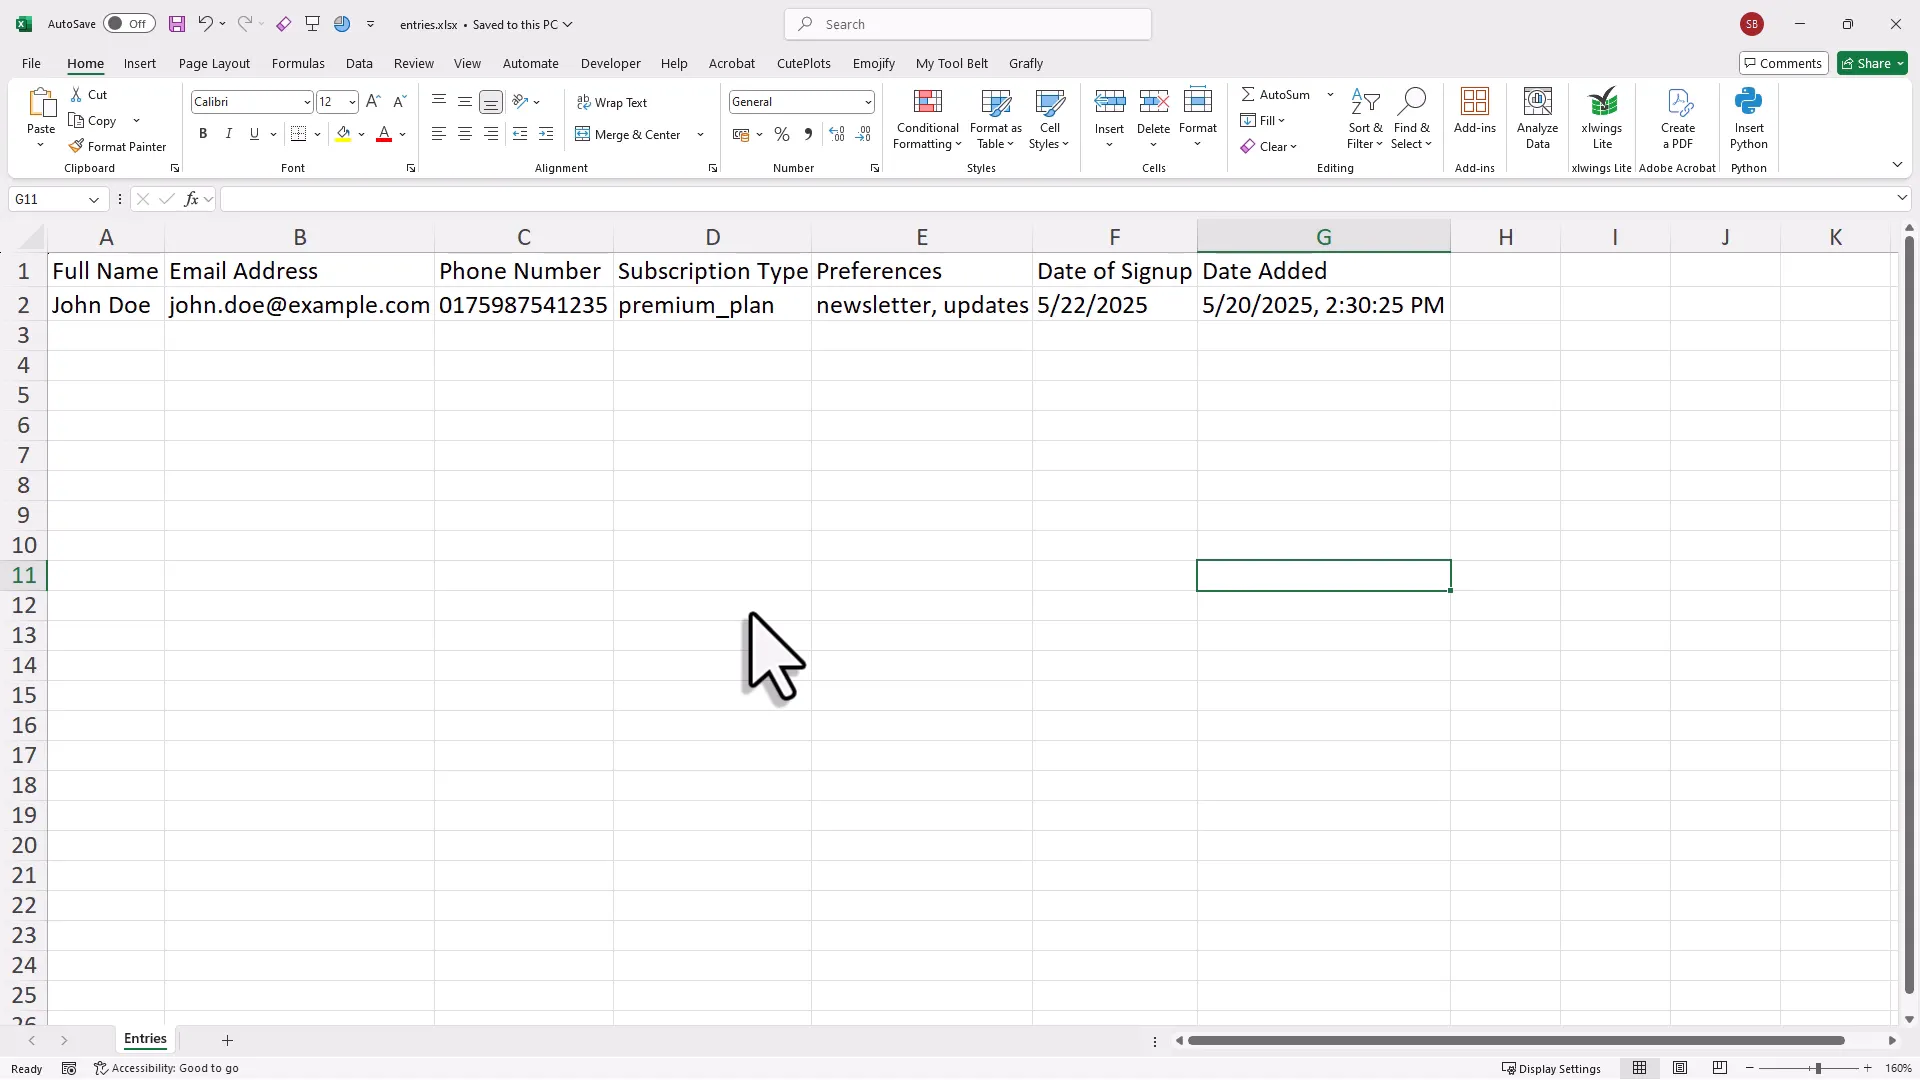
Adding More Entries and Managing Data
Once connected to a spreadsheet, you won’t be prompted again where to save new entries. Just fill out the form and hit “Add Entry” to keep adding records. 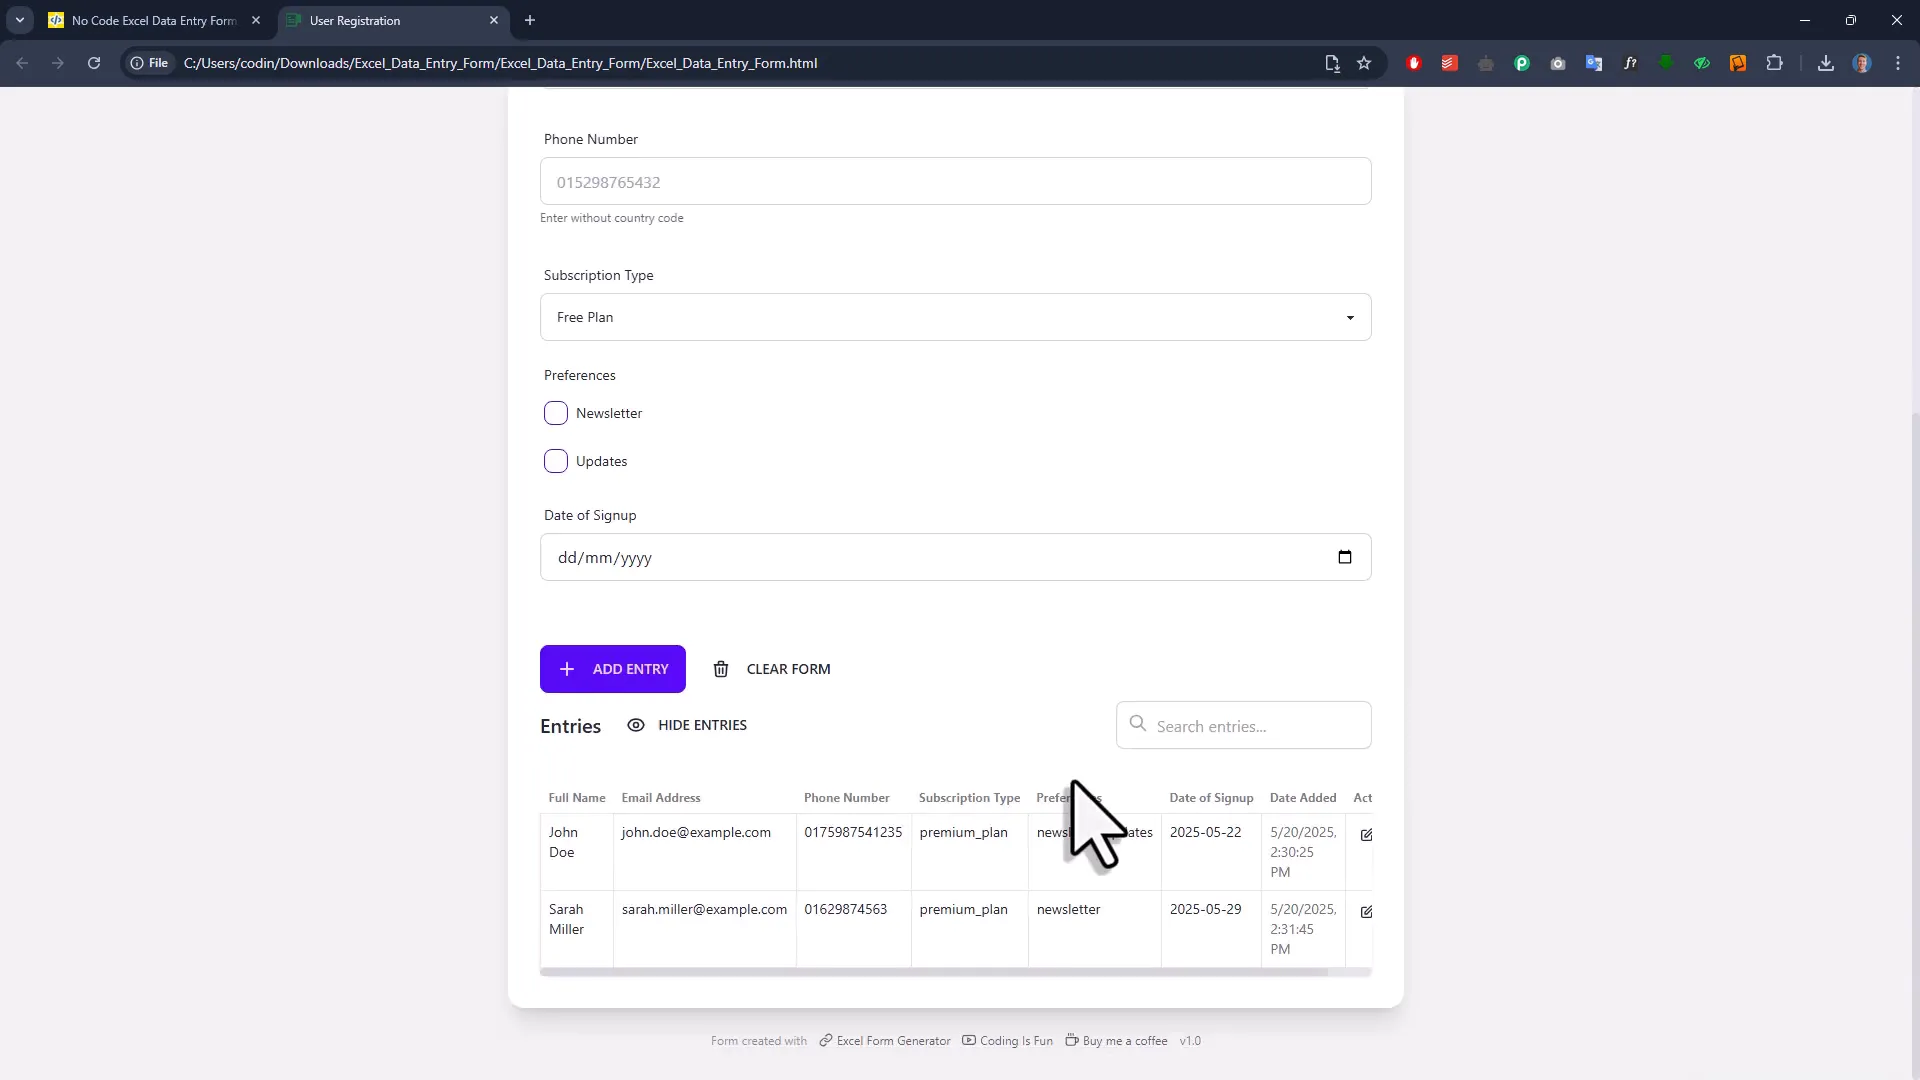 As your list grows, you can hide the entries panel with a click, making your form cleaner, or use the search box to quickly filter records by typing keywords.
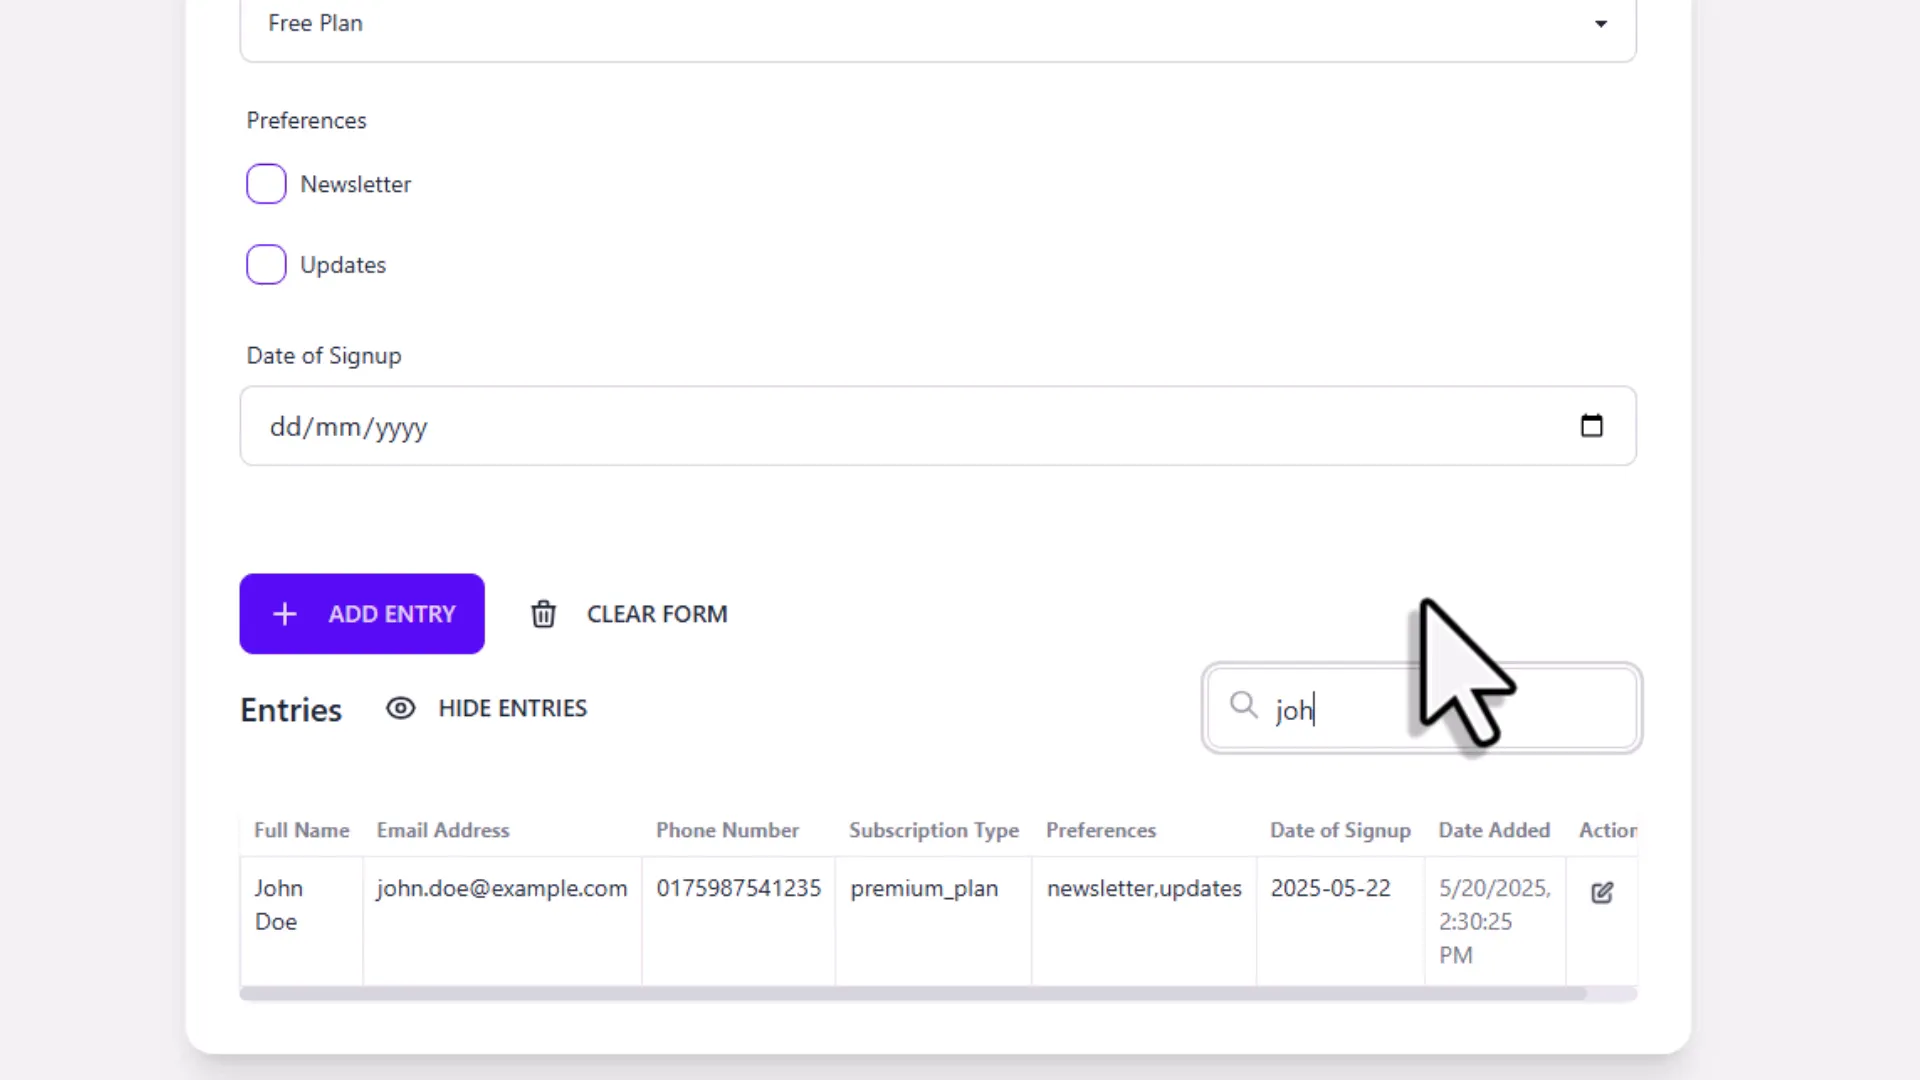
Editing and Deleting Records
Need to update a record? Just click the edit icon in the action column. The form pulls the data from the spreadsheet and fills the fields for easy editing. After making changes, click “Update” and the record updates instantly. 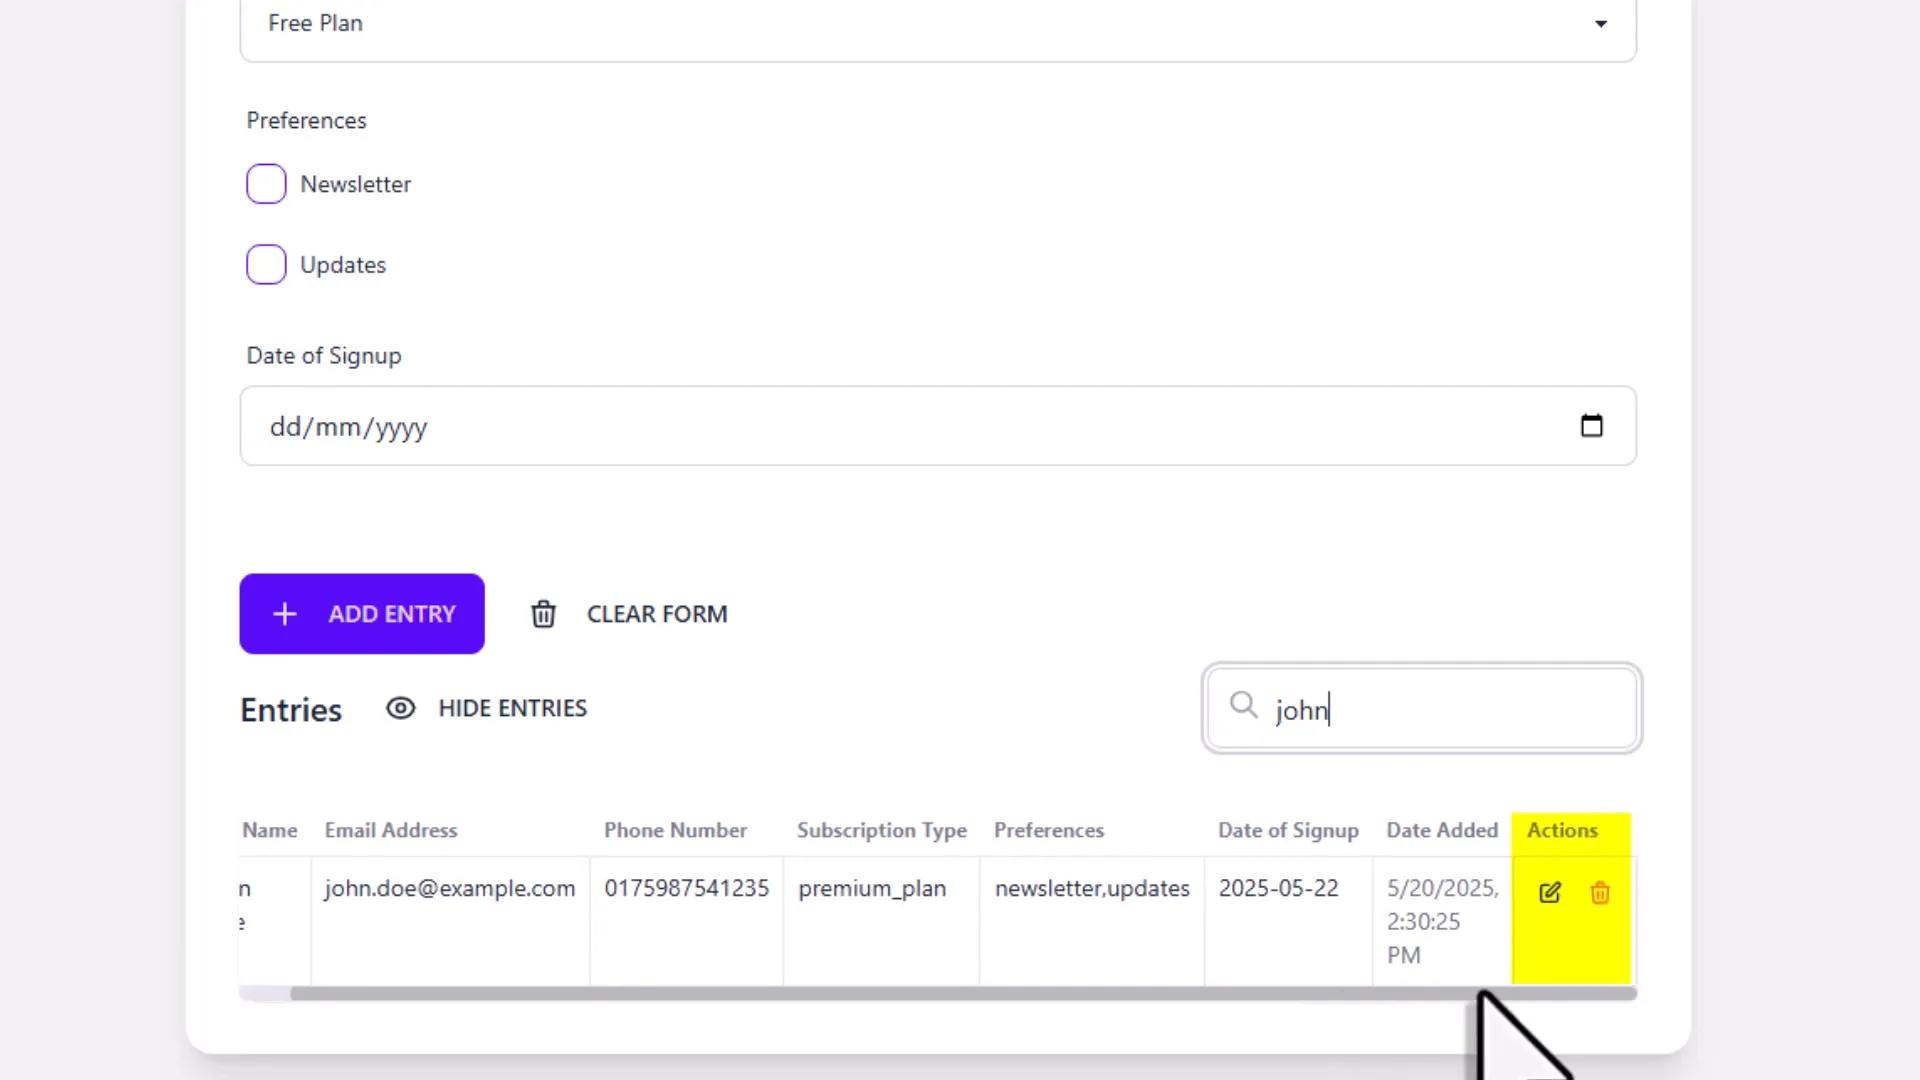 Want to remove an entry? The trash icon lets you delete records directly from the form. You’ll be asked to confirm, so no accidental deletions here.
 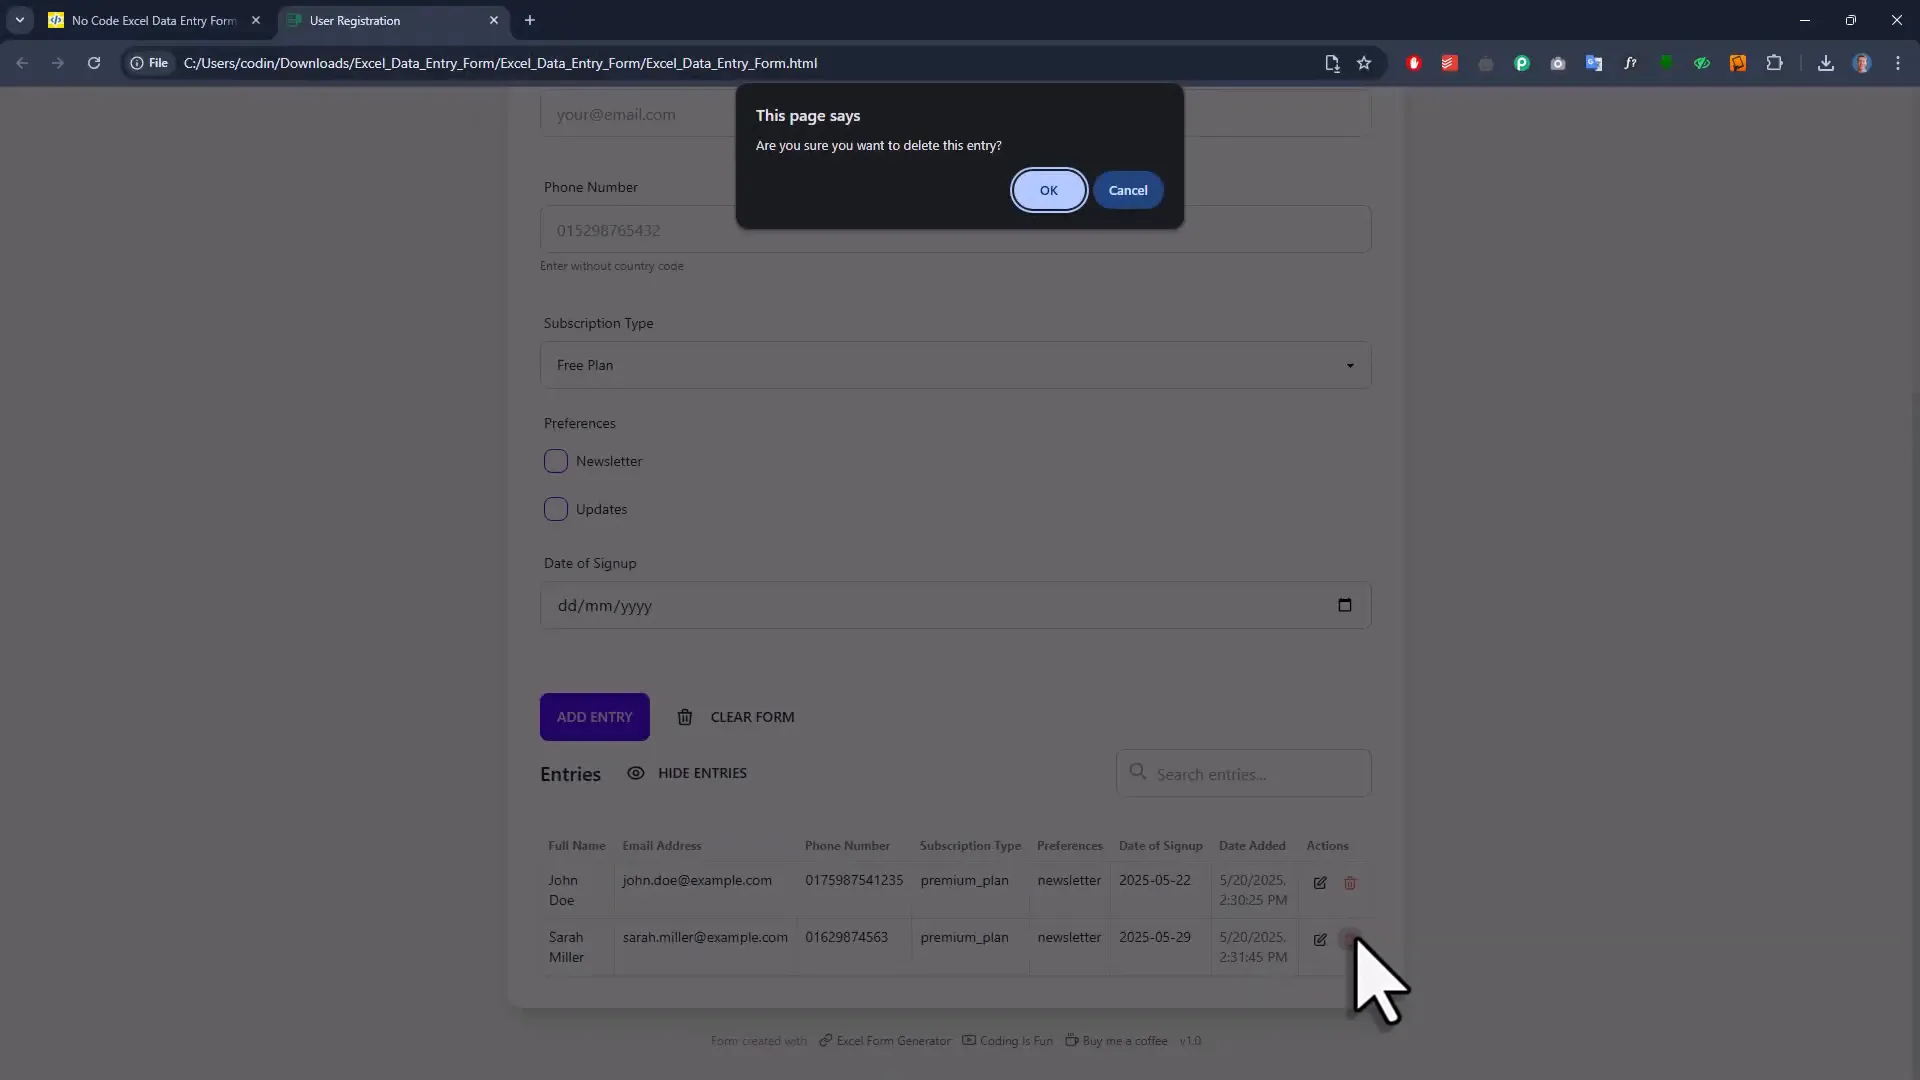 All changes are reflected in the Excel workbook, which you can open anytime to see the latest data.
Excel Integration Flexibility
You don’t have to use the form exclusively to manage your data. You can add, update, or delete entries directly in Excel. Plus, if you already have existing data, simply copy and paste it into the spreadsheet, and the form will work with it seamlessly.
What Happens When You Refresh the Page?
Refreshing the form page will disconnect it from the spreadsheet, hiding the entries list because the connection is lost. But don’t panic—your form settings and input fields remain intact, saved in your browser’s cache. To reconnect, just click the “Connect Spreadsheet” button, select the same workbook, and your data will reappear. 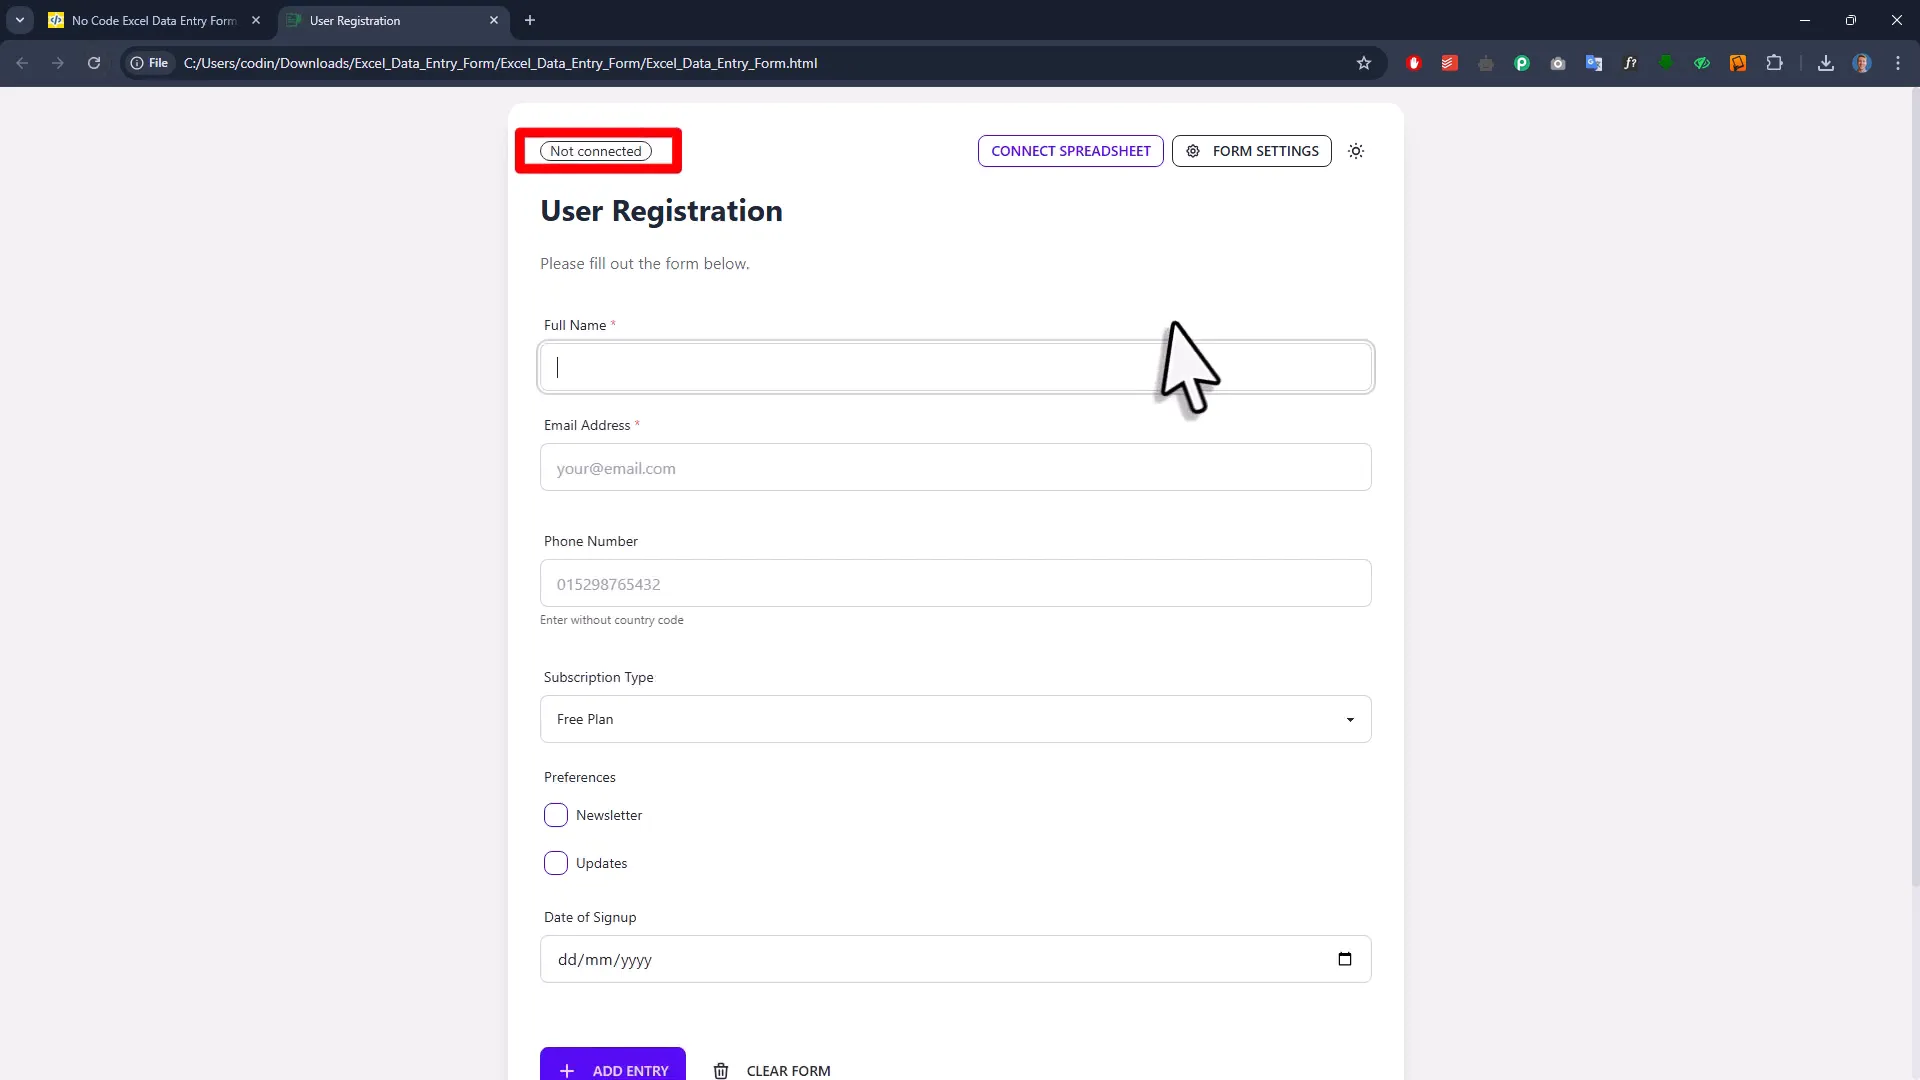
Customizing Your Form Anytime
Want to tweak your form later? No problem. Go back to the form settings and edit the JSON directly. You can update labels, change input types, add placeholders, or anything else you want. Click “Apply,” and your form updates immediately. 
Dark Mode: Because We All Love a Good Theme Switch
One of my favorite features is the ability to switch between light and dark mode with a simple click. This makes working late at night or in low-light environments much easier on the eyes. Just hit the theme toggle button and enjoy the new look. 
Limitations and Browser Recommendations
Now, while this tool is pretty awesome, it does have some quirks worth mentioning:
- The form runs locally on your machine and uses your browser’s file system access API to read and write Excel files. This means it needs a browser that supports this API.
- Currently, the best browsers for this are Google Chrome and Microsoft Edge. If you try Firefox or other browsers, you might get error messages when connecting to the spreadsheet.

Bonus: A Python-Based Form Builder on the Horizon
Oh, and before I forget, if you’re into Python and want a standalone GUI application for your data entry needs, I have another form builder on my website that generates Python code for you. It works similarly—design your form with drag-and-drop, export the Python file, and you get a fully functional app that can create, read, update, and delete records. Stay tuned for a dedicated video on that soon, but meanwhile, feel free to check it out on my site.
Wrapping Up
And there you have it—an easy, modern way to create beautiful Excel data entry forms without writing a single line of code. From drag-and-drop field selection to live email validation, spreadsheet integration, and even dark mode, this tool has everything you need to make data entry a breeze. It’s like having a personal form designer in your pocket—minus the coding headaches and the outdated look. So next time you need a data entry form for Excel, give this no-code builder a try. Your future self (and your users) will thank you. Until then, happy form building!