Build an Excel Data Entry Form with Python (Drag & Drop, No Code)

Introduction
You know that feeling when all you want is a simple, clean Excel data entry form to manage your records, but you end up tangled in clunky old VBA code or complicated software? It’s like trying to bake a cake but instead ending up with a kitchen disaster—flour everywhere, a broken mixer, and still no cake to show for it.
Well, it doesn’t have to be that way. Imagine being able to whip up a custom Excel data entry form in about ten seconds, with no coding headaches, drag-and-drop ease, and built-in features like dropdowns, checkboxes, date pickers, and even sliders. Sounds like magic? It’s not. It’s exactly what I’ve built and want to share with you.
In this article, I’ll walk you through my Excel Data Entry Form generator tool created using Python. This tool lets you design your form visually, generate the application code with a single click, and then run it to add, read, update, and delete Excel records effortlessly. And if you don’t even have Python installed, I’ll show you how to turn your Python script into a standalone executable that works on any Windows machine. Buckle up and let’s dive in!
Why You Need a Custom Excel Data Entry Form
Let’s face it: managing data in Excel can quickly get messy if you don’t have a proper front-end form to enter and edit records. Sure, Excel has built-in forms and VBA userforms, but those often feel outdated, limited, and frankly a pain to maintain.
What if you want a modern, user-friendly form with dropdown menus, radio buttons, date pickers, and sliders? Or something that validates email addresses automatically? And what about the ability to search, update, or delete entries without scrolling endlessly through rows?
This is where my Excel Data Entry Form generator steps in. It’s designed to solve these exact problems by letting you visually design your form and generating a ready-to-run Python app connected to your Excel file. No coding required, no complicated setup.
How the Excel Data Entry Form Generator Works
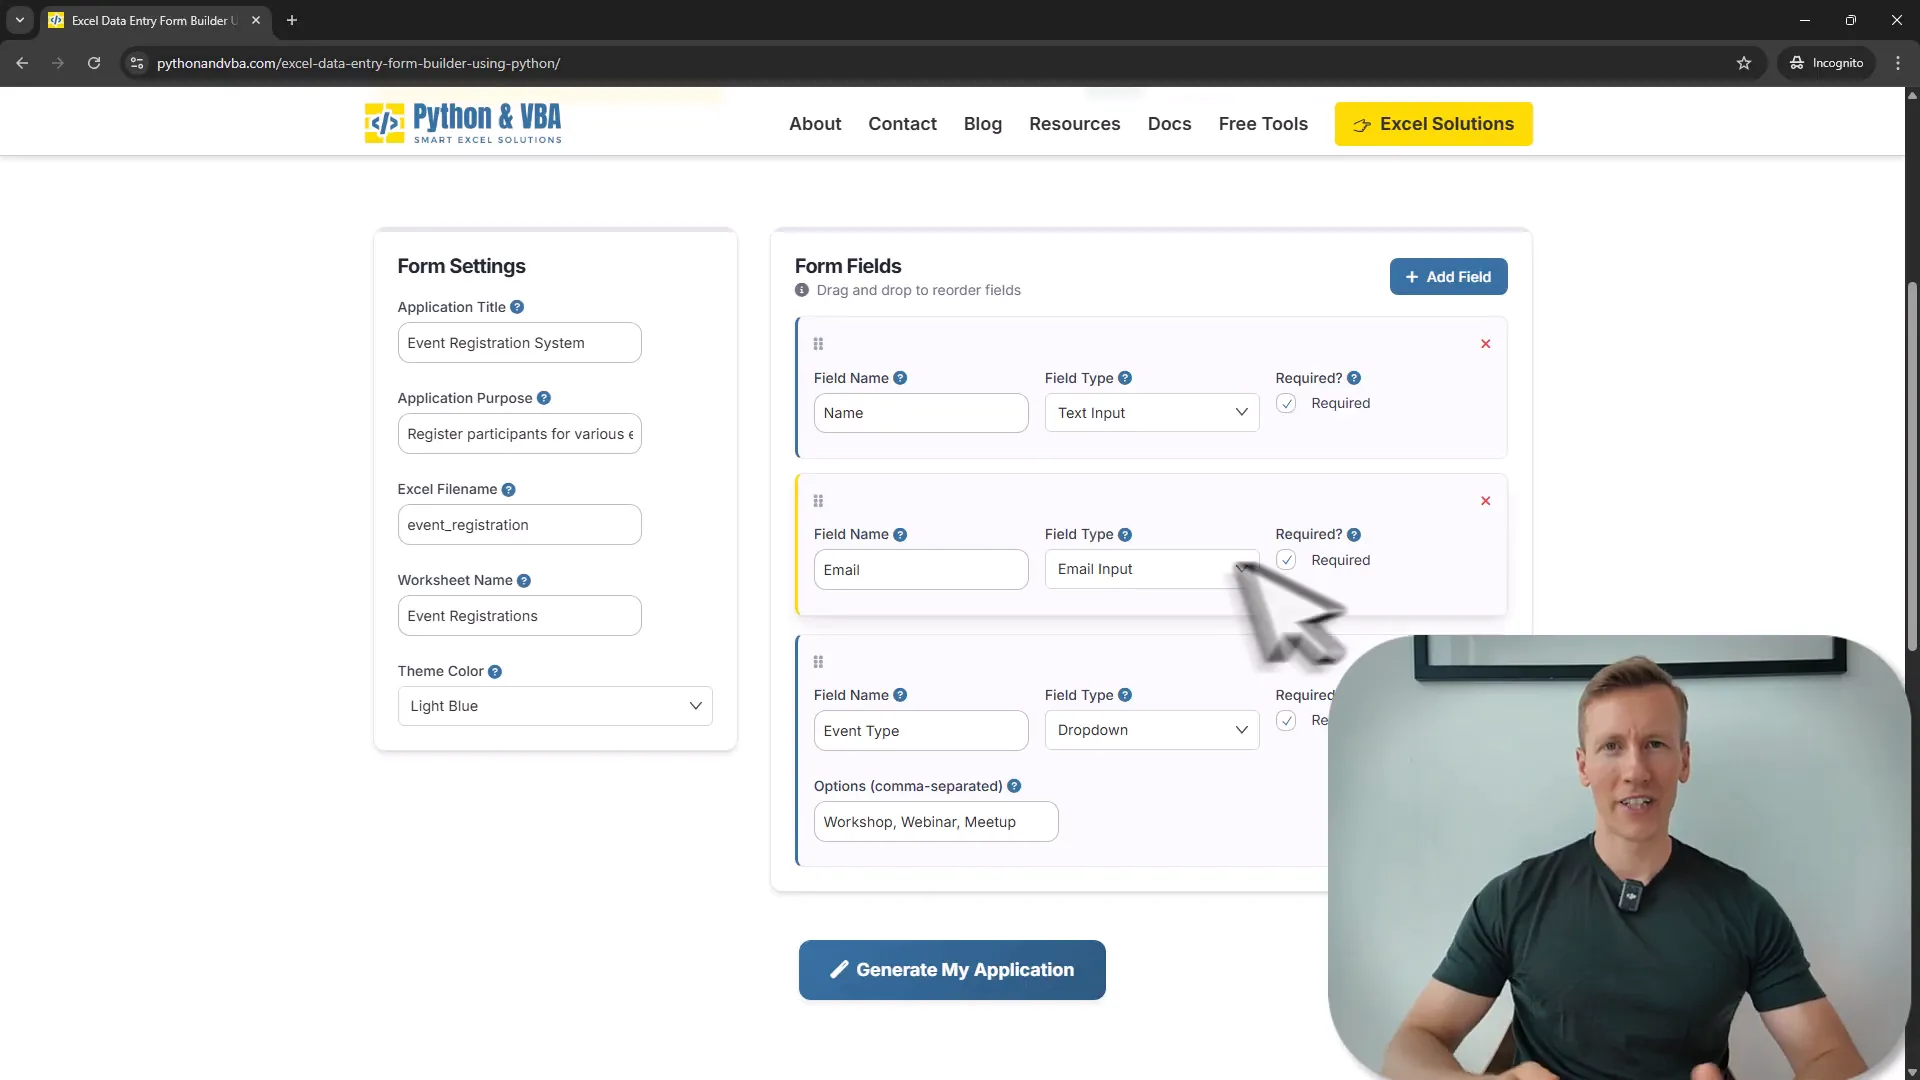
Here’s the gist: you visit my website, where you find a simple interface split into two sections. On the left, you configure your form’s settings — like the app title, description, Excel output filename, worksheet name, and visual theme. On the right, you add and arrange fields for your form.
The fields come in all shapes and sizes. You have text inputs, dropdown menus, checkboxes, radio buttons, date pickers with custom Excel date formats, and even number sliders. Each field can be marked as required, reordered by drag-and-drop, or removed with a click. It’s all about making the form fit your needs perfectly.
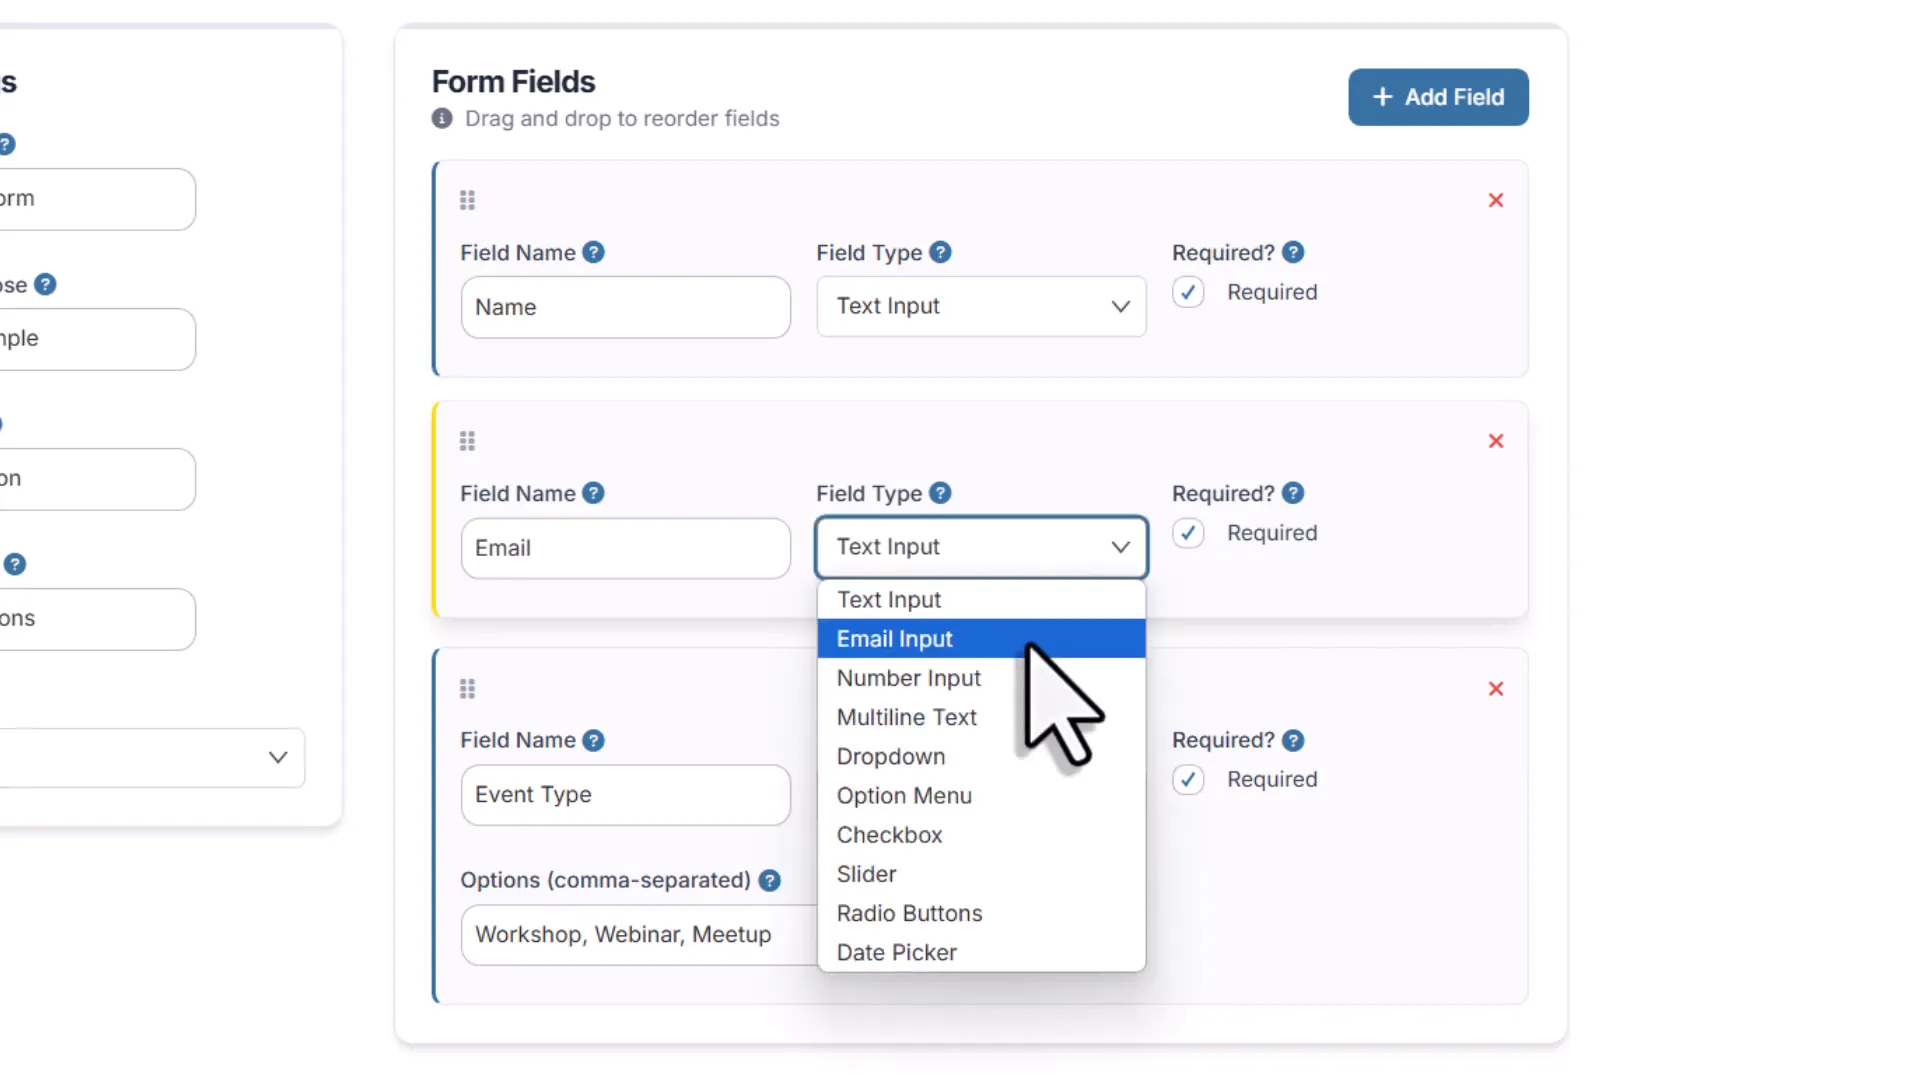
For example, if you want to collect the number of participants, you can add a slider ranging from 1 to 5. Need to capture a date? The date picker not only lets users select a date from a calendar but also formats it exactly how you want it in the Excel file. And if you add an email field, the form will validate that the address looks legit before letting you save the record.
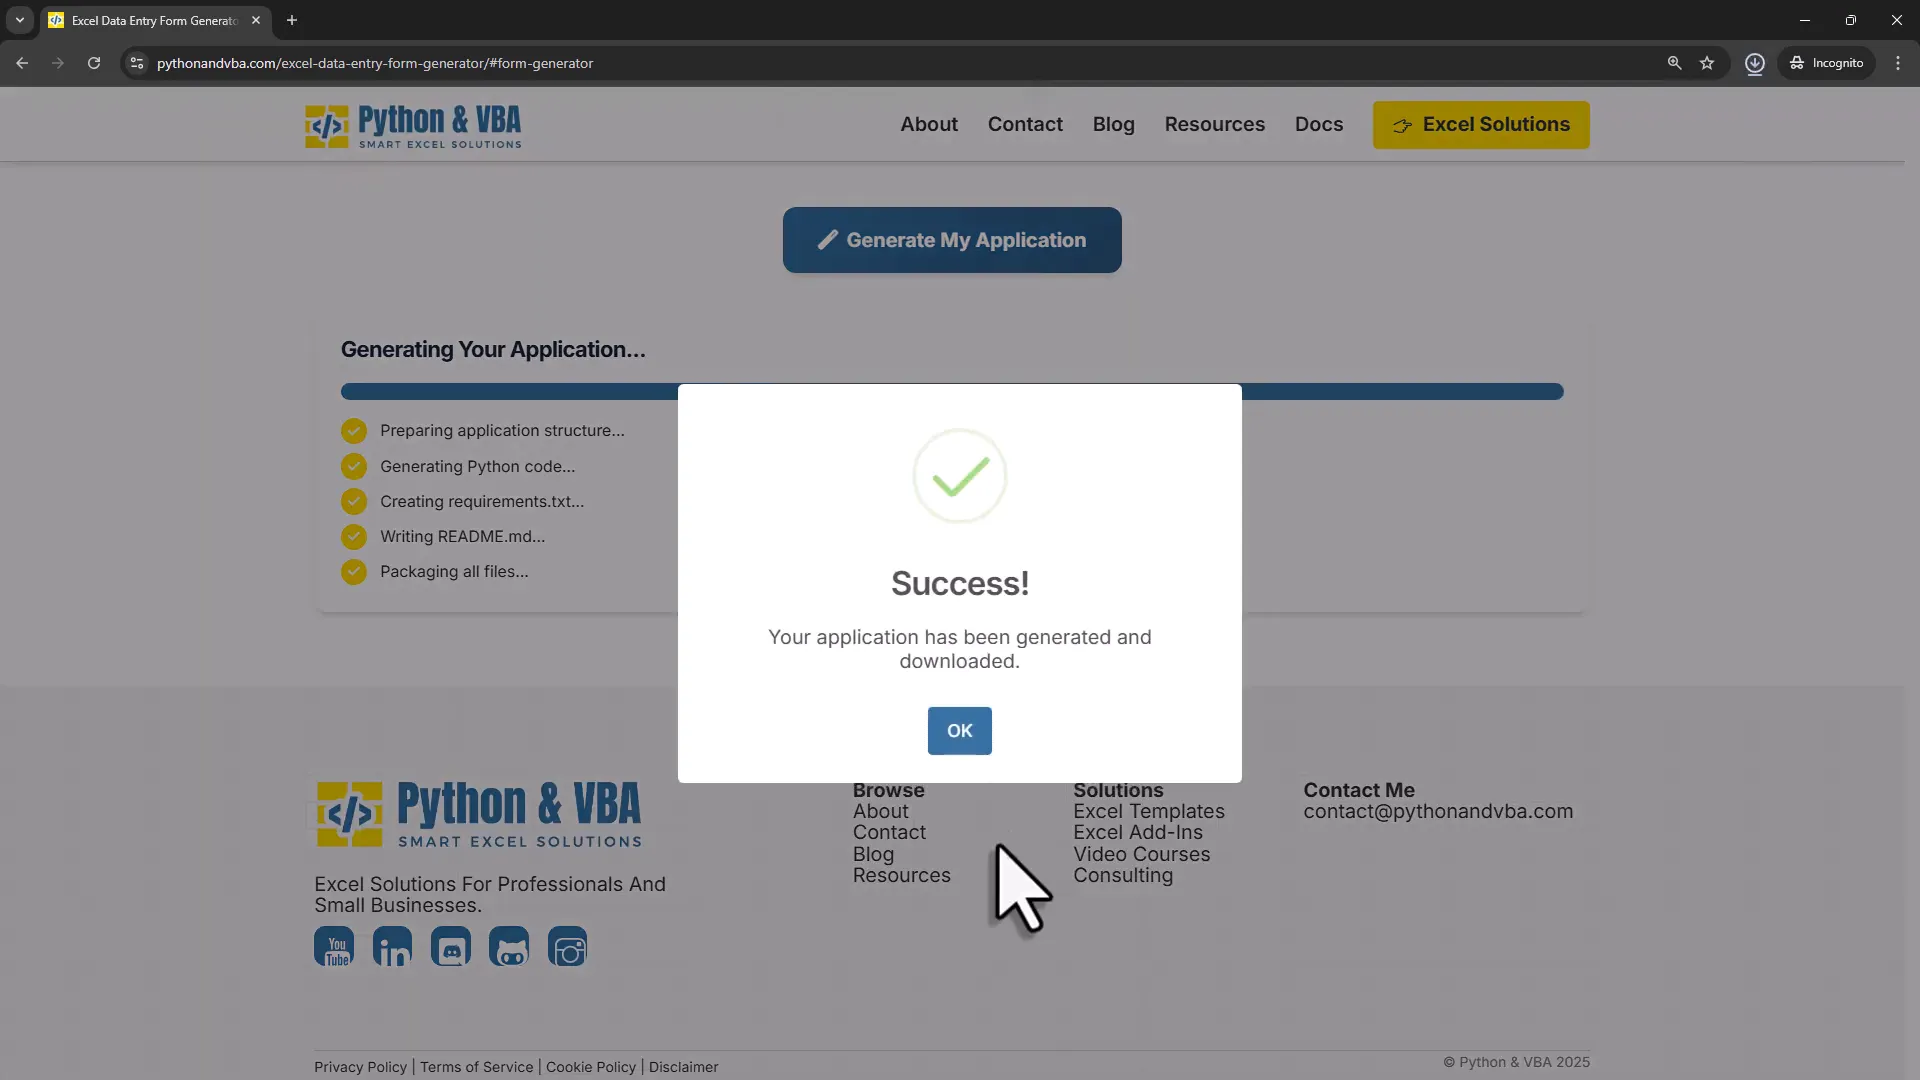
Generating Your Custom Form Application
Once you’re happy with your form design, just hit the “Generate” button. The tool will whip up all the Python code for you and download a zip archive containing everything you need:
- The Python GUI script
- A readme file with instructions
- A requirements file listing dependencies
Extract the files to a folder on your computer, and you’re ready to go.
Setting Up Your Environment and Running the Form
Before running the form, you’ll need to install Python (if you haven’t already) and a couple of Python packages:
- freesamplegui — the GUI framework for building the form interface
- openpyxl — to read/write Excel files
The readme file explains how to install these dependencies. To keep things neat and avoid conflicts with other projects, I recommend creating a virtual environment:
- Open your terminal or command prompt.
- Run
python -m venv myenvto create a virtual environment. - Activate it with
myenv\Scripts\activateon Windows orsource myenv/bin/activateon macOS/Linux. - Install the required packages by running
pip install -r requirements.txtinside this environment.
After that, you can run the form script simply by typing python your_form_script.py. The form window will pop up, and a new “data” folder along with an Excel spreadsheet will be created automatically.
Using the Excel Data Entry Form: Add, Read, Update, and Delete Records
Now for the fun part — actually using the form!
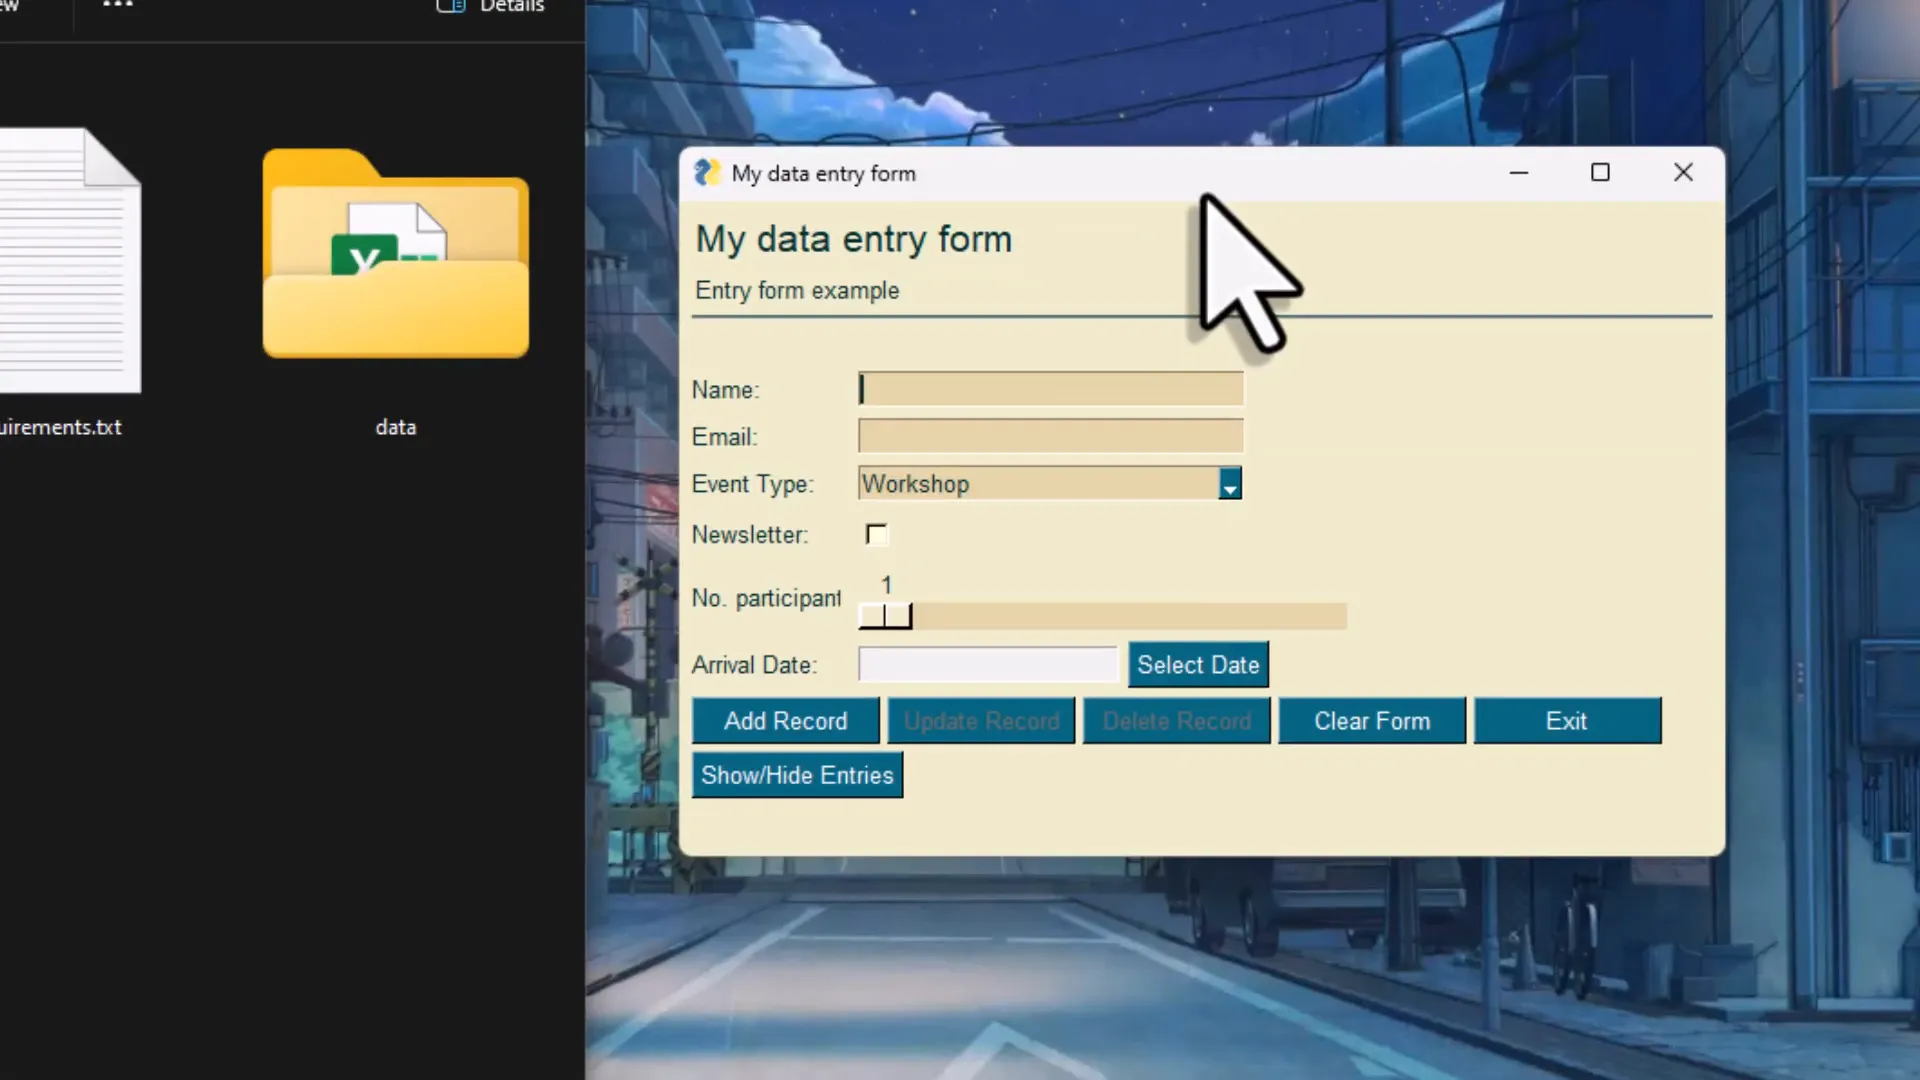
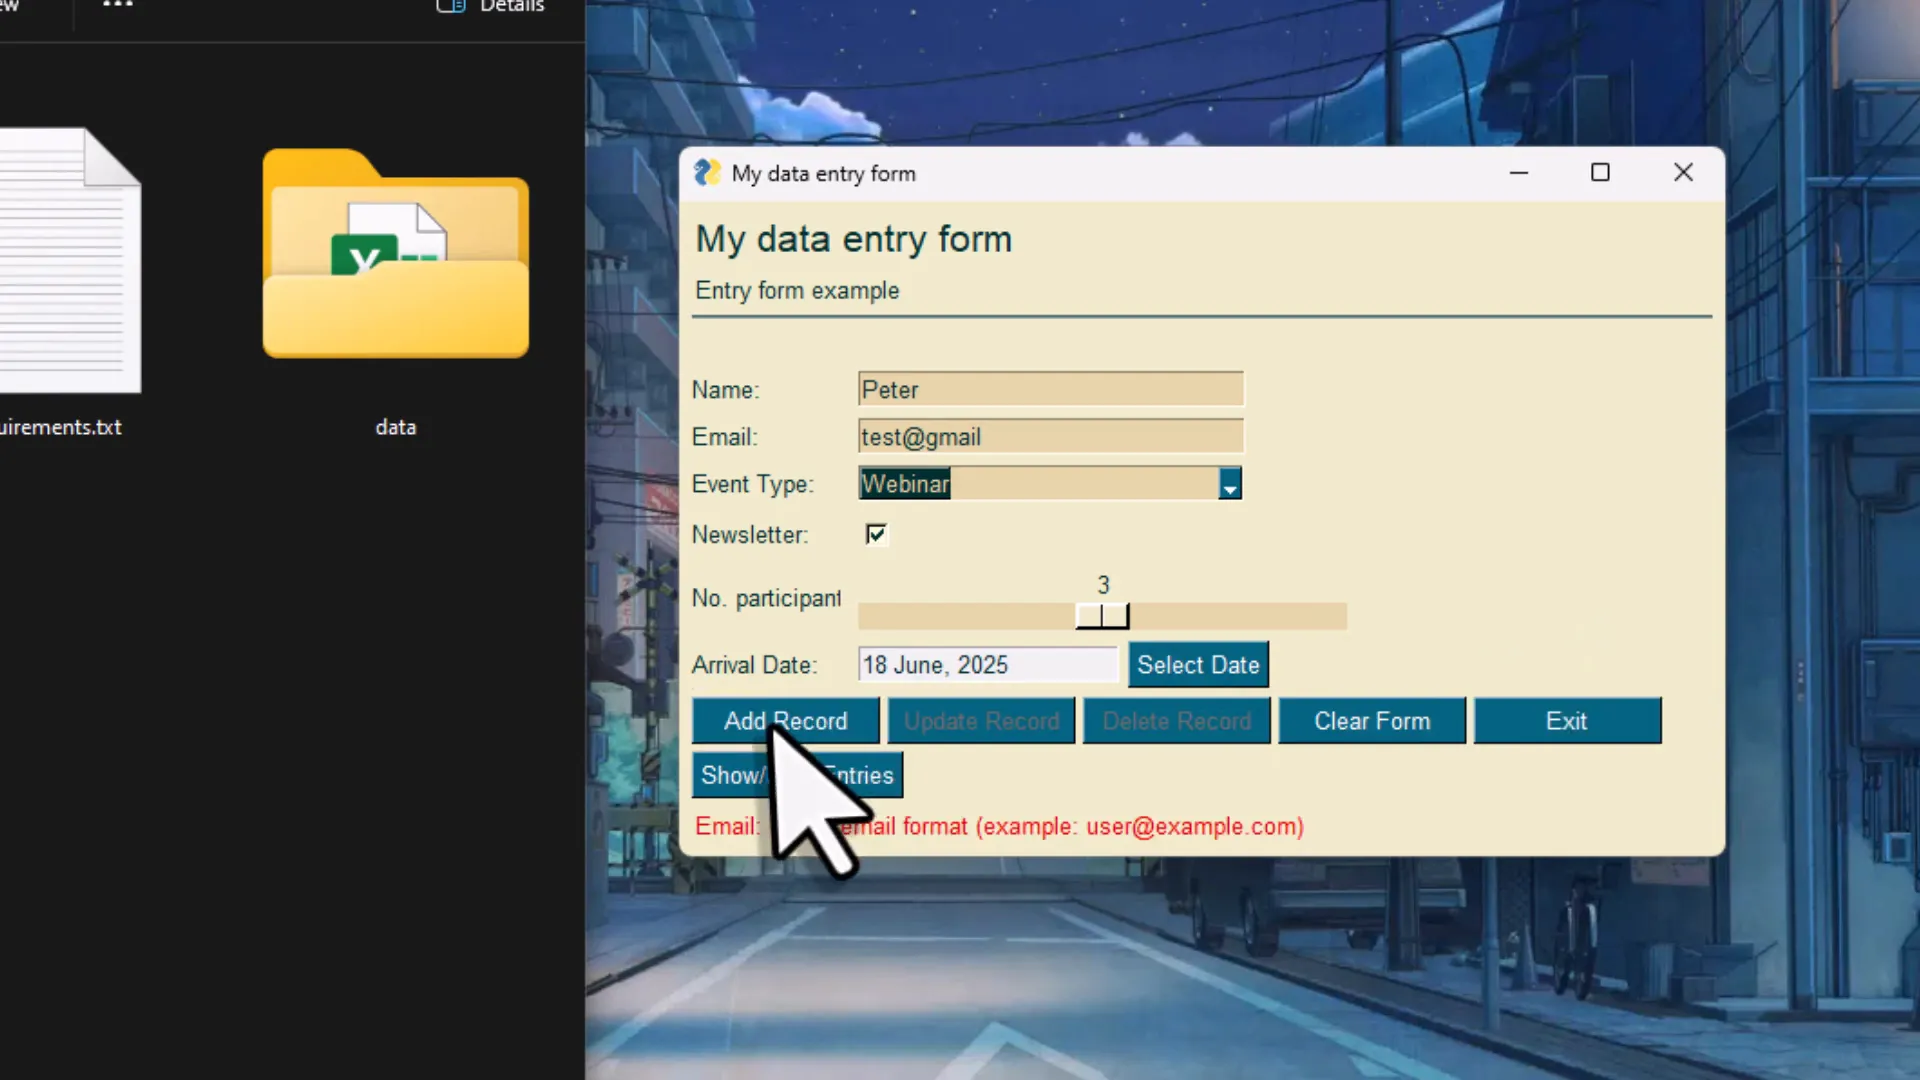
The form interface shows your custom title and description, along with all the fields you added. Filling out the form is straightforward:
- Input text fields like name or email (email has built-in validation)
- Choose options from dropdowns
- Check or uncheck boxes
- Use sliders for numeric input
- Select dates from a pop-up calendar
When you hit the “Add Record” button, the form validates your inputs (for example, it will catch an incorrectly formatted email) and then saves the record to the Excel sheet.
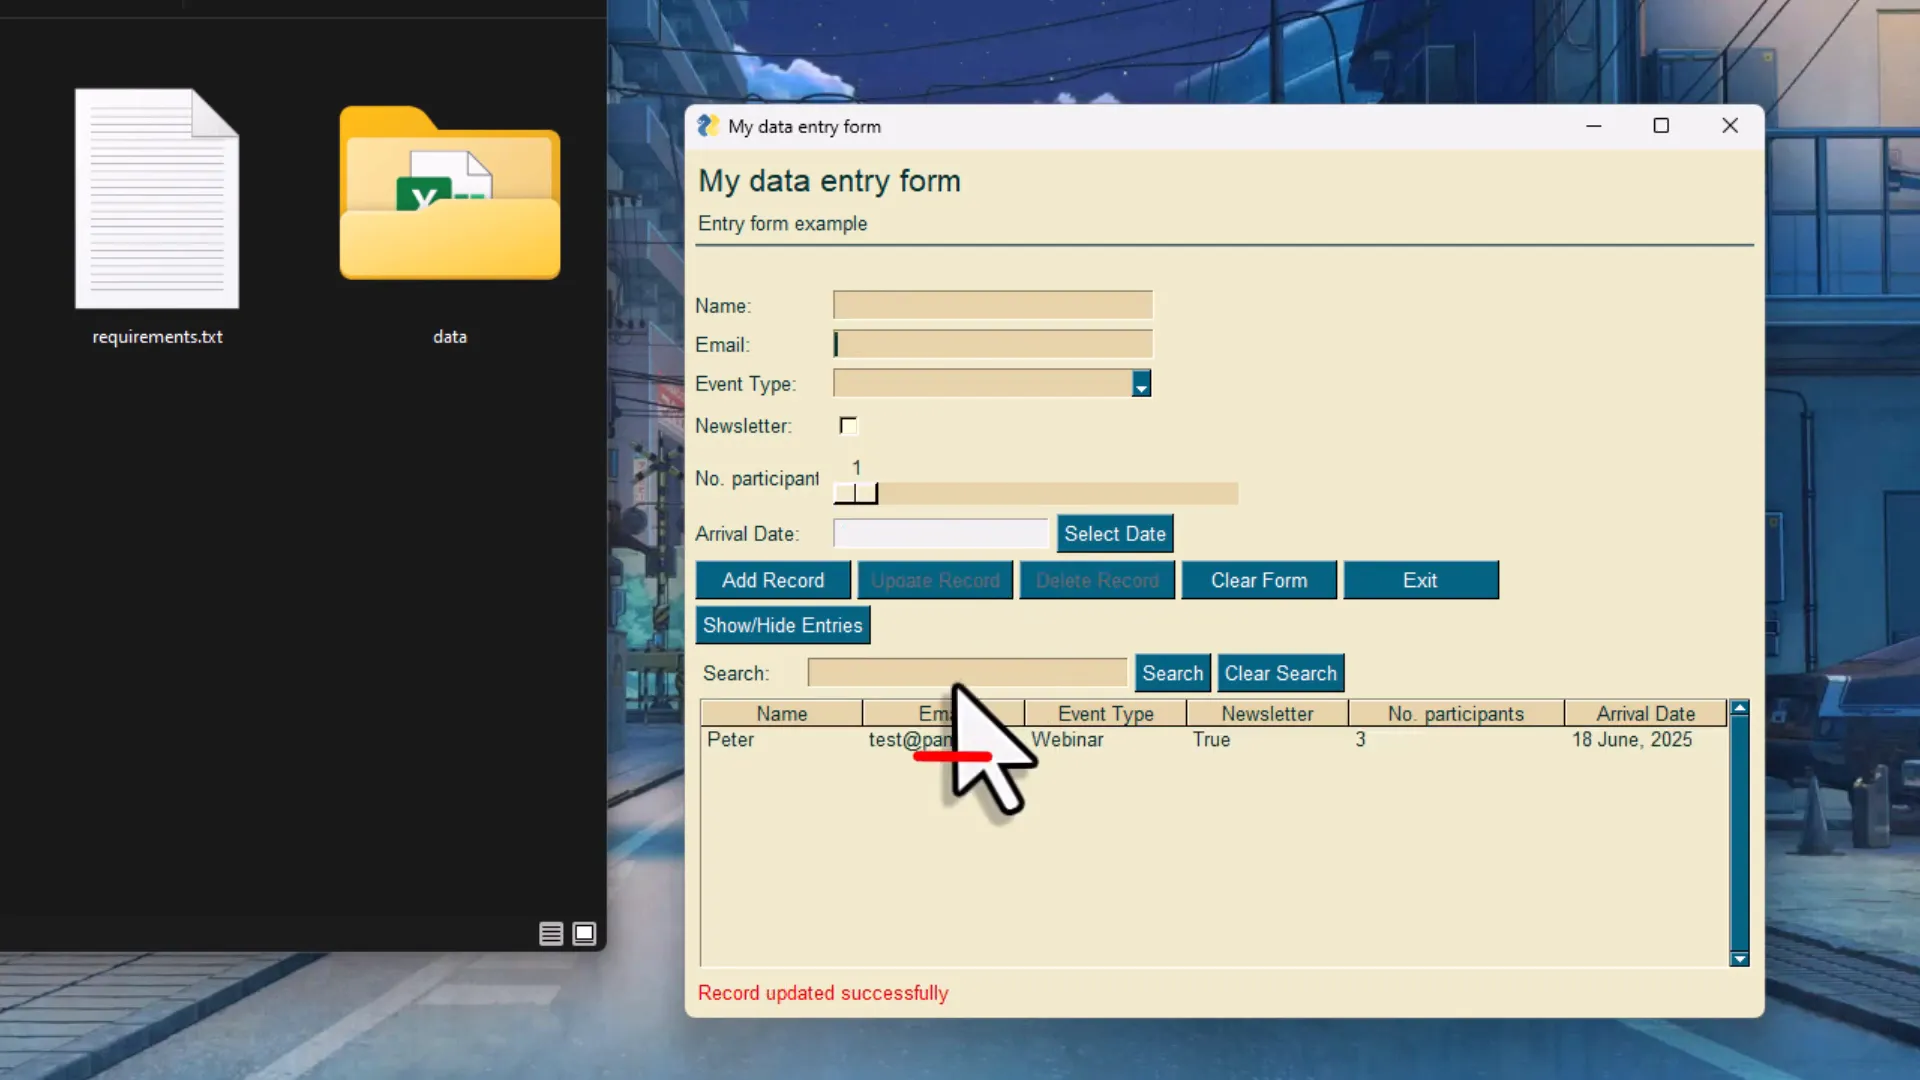
Once records are added, you can view them by clicking the “Show Entries” button. This displays a list of all records, and clicking any entry will populate the form fields with that record’s data—making it easy to update or delete entries.
To update, just make your changes in the form and hit the “Update Record” button. To delete, select the record and click “Delete Record.” The Excel file updates accordingly.
Searching is also built-in. If you have many entries, just type a keyword and hit “Search” to filter the records. Handy, right?
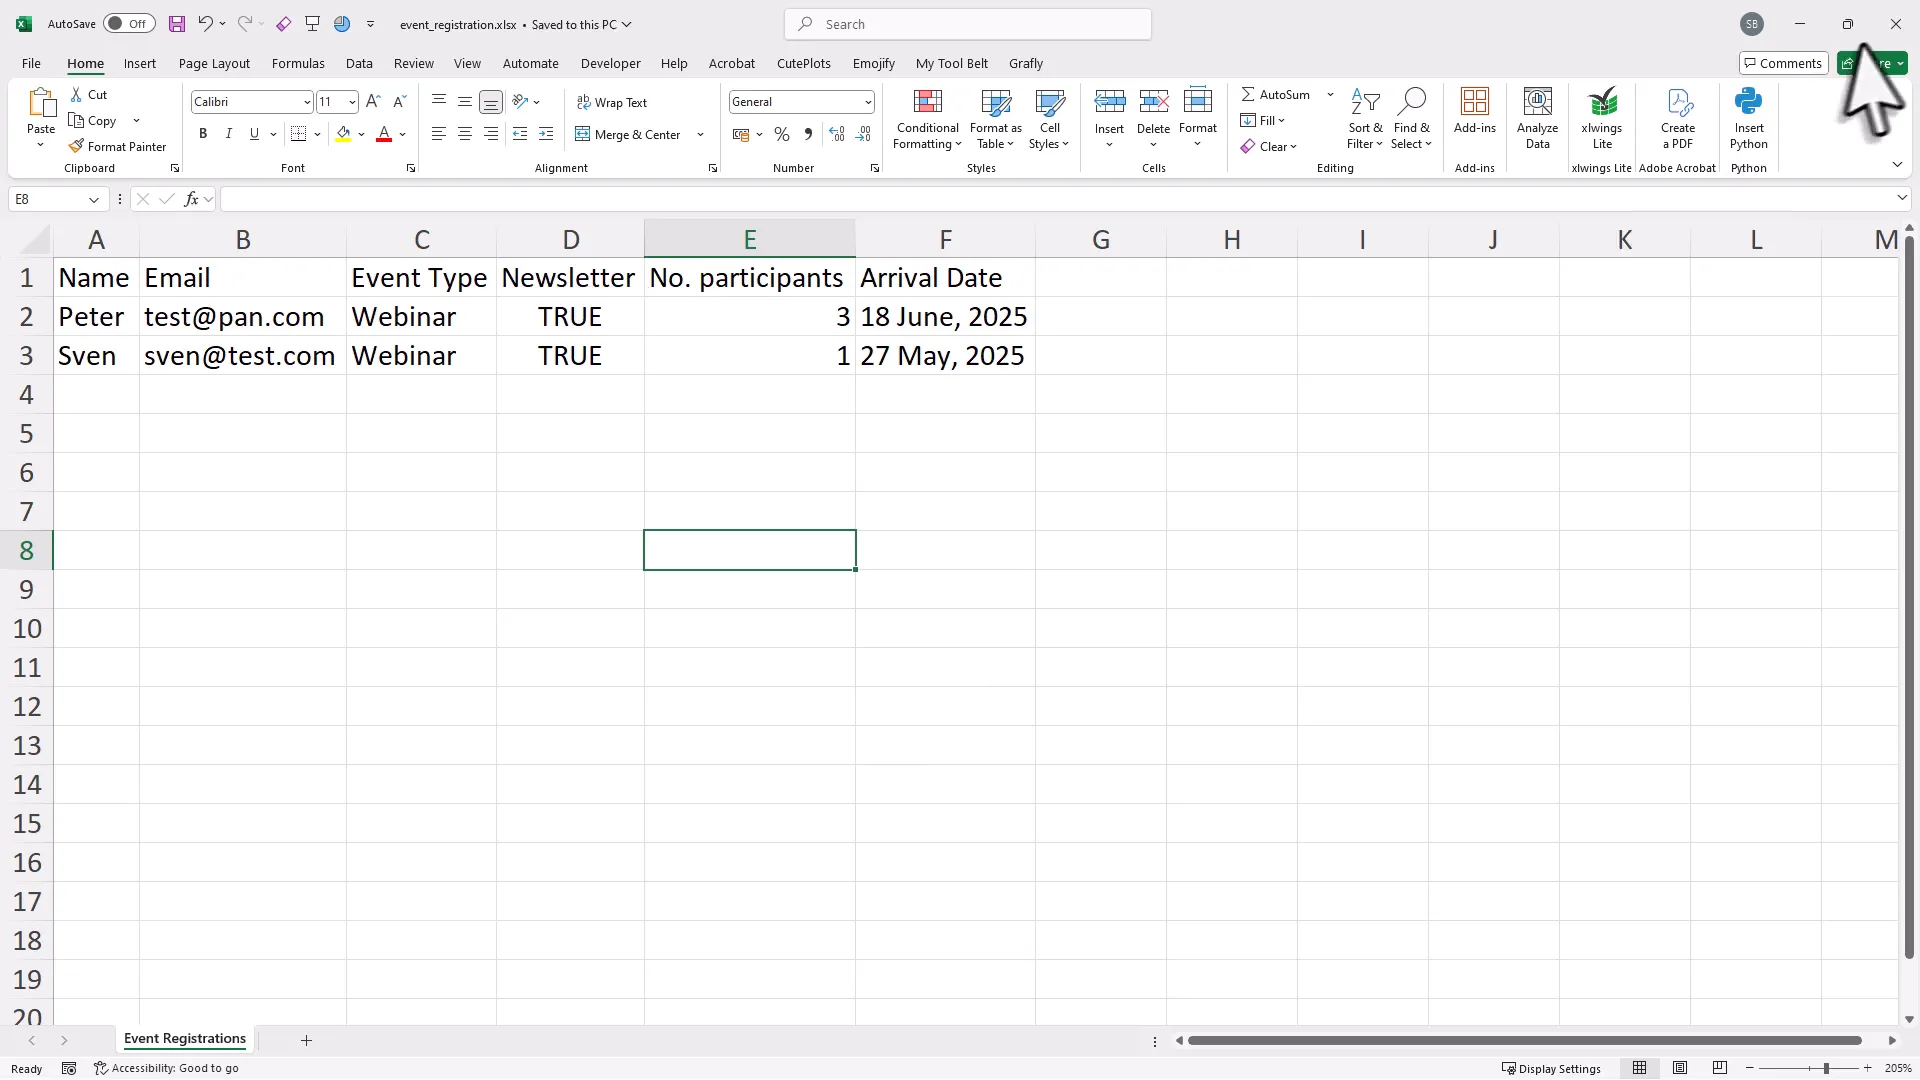
Peeking Inside the Excel Spreadsheet
All your data is stored in a neat Excel workbook inside the “data” folder. The spreadsheet uses your field names as headers, and each row corresponds to a record you’ve added.
The date fields respect the custom format you set during form design, and checkboxes appear as TRUE or FALSE values. You can even edit data directly in the Excel sheet if you want — just be sure to save and close the file before reopening the form app to avoid conflicts.
Customizing and Understanding the Code
Now, if you’re wondering, “What if I want to tweak the form or add features?” — good news! All the generated code is contained in a single Python file, roughly 500 lines long.
At the top of this script, you’ll find the settings block where you can change things like app title, Excel file names, worksheet name, and theme. This means you can make quick adjustments without having to design a new form from scratch.
If you want to dig deeper or customize the behavior, you can explore the code directly. And if you’re not a Python expert (yet), you can copy and paste the code into a large language model like ChatGPT or Plort — just ask for the changes you want!
For those who want to understand the inner workings, I have another video explaining the main concepts behind the app. One important note: the app uses freesamplegui, a fork and continuation of the popular PySimpleGUI library, which is being sunset soon. So you’re working with a modern and maintained GUI framework.
The Readme and Documentation
The package also includes a readme file with installation instructions and detailed descriptions of all the field types you can add to your form — from number-only inputs to multiline text boxes, option menus, and radio buttons.
This documentation is your friend when setting up or expanding your form’s capabilities.
Turning Your Python Form into a Standalone App
Okay, here’s a big plus: you don’t have to have Python installed on every machine where you want to run your form.
Using a tool called PyInstaller (and some optional packages), you can convert your Python script into a standalone executable. This means you can run your Excel Data Entry Form app on any Windows PC without worrying about dependencies or Python versions.
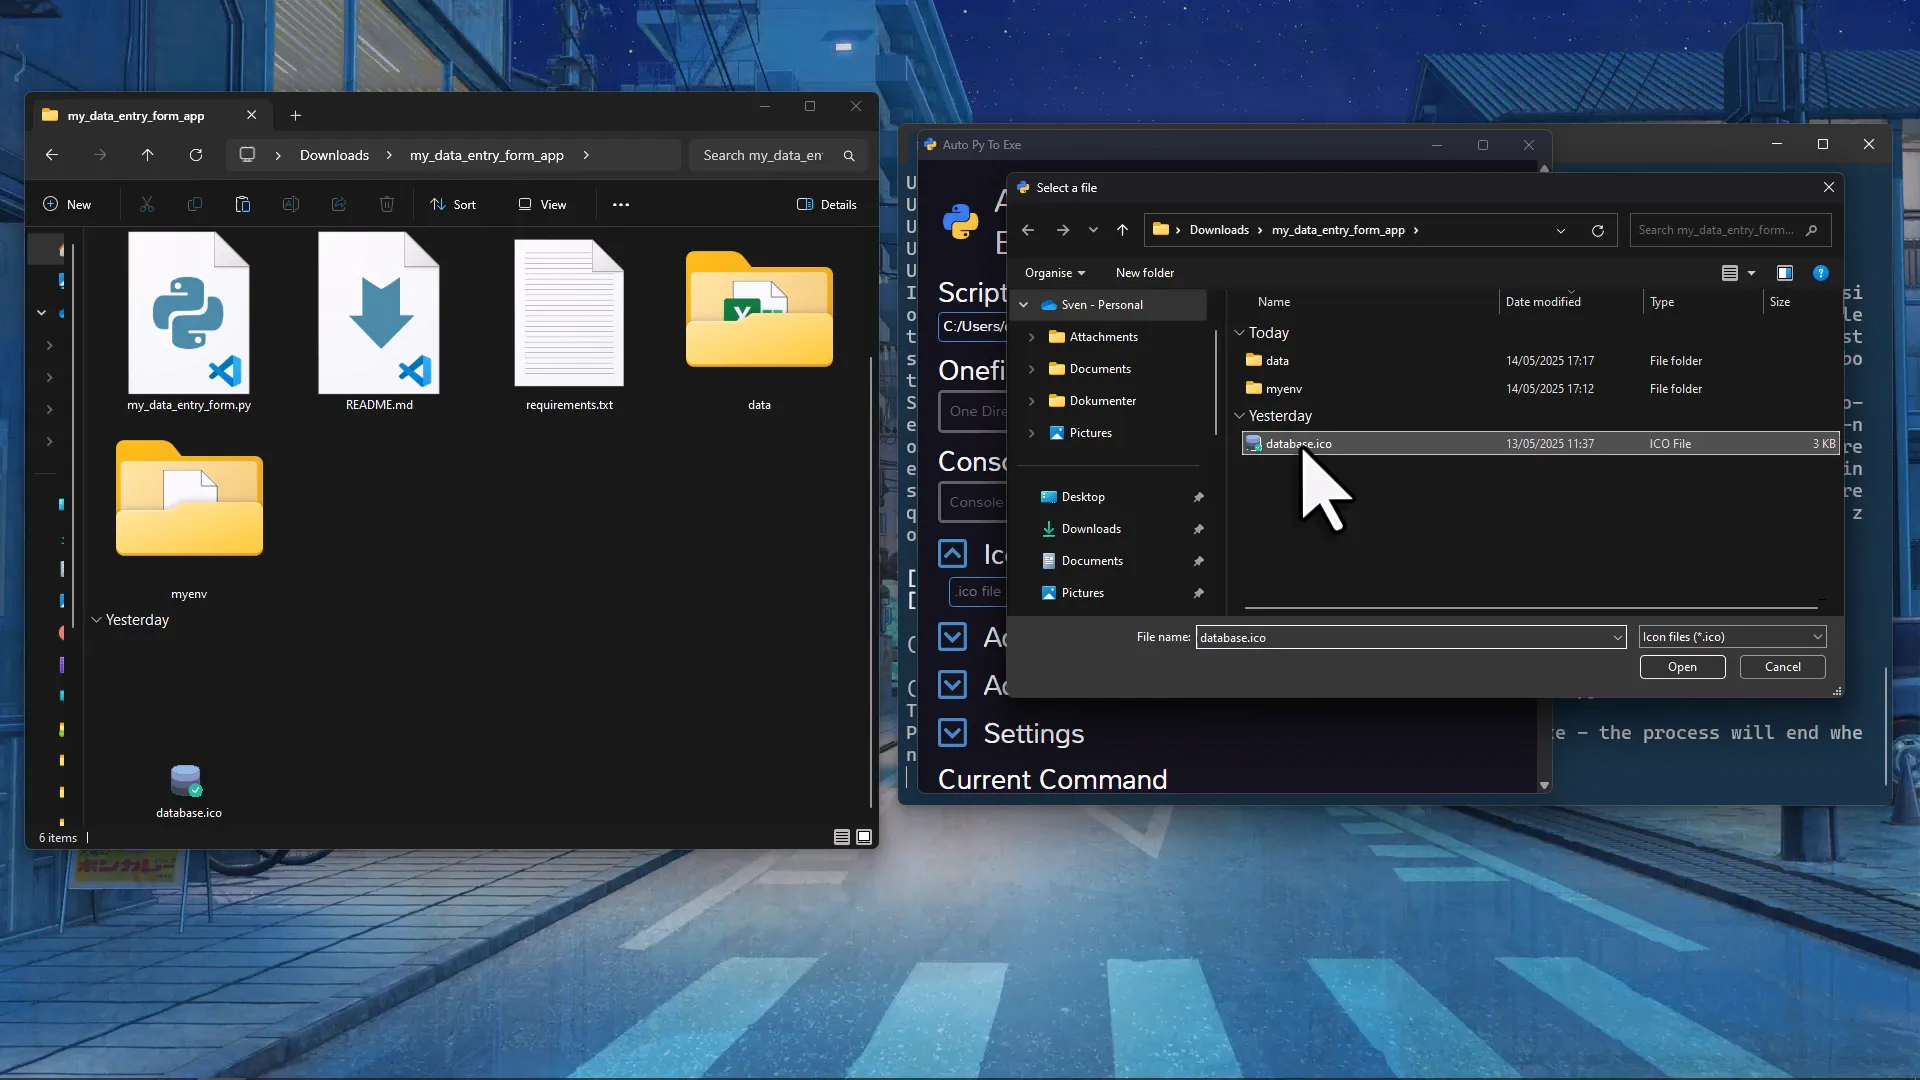
Here’s how it works:
- Make sure your virtual environment is activated.
- Run the command to launch the PyInstaller GUI converter.
- Select your Python form script.
- Choose the “one file” and “window-based” options for a clean executable.
- Optionally, add an icon to your app for a professional touch.
- Hit “Convert” and wait for the process to finish.
Once done, you’ll find the standalone executable in the output folder. Open it, and voila — your form app runs just like before, creating new Excel data files as you add entries.
This feature is perfect for sharing your form with colleagues or deploying it in environments where installing Python is not an option.
Extra Field Types and Features to Explore
Back on the website, you’ll find even more field types that I haven’t covered here, such as:
- Number-only input fields
- Multiline text boxes for longer notes or comments
- Option menus for single-choice selections
- Radio buttons for mutually exclusive options
Feel free to experiment with these to tailor your Excel Data Entry Form exactly to your needs.
Wrapping It Up: Your New Excel Data Entry Companion
So there you have it: a fast, flexible, and user-friendly way to build Excel data entry forms using Python — no heavy coding required. Whether you’re managing event registrations, tracking inventory, or collecting survey responses, this tool helps you create a polished front-end without the usual hassle.
And the best part? You can run it anywhere, customize it easily, and even share a standalone app with friends or coworkers who don’t have Python installed. It’s like having a Swiss Army knife for Excel data entry.
Think of it as upgrading from a rusty old bike to a shiny new electric scooter — same destination, much smoother ride.
Ready to try it out? Head over to the Excel Data Entry Form Builder and start designing your form today. Happy data collecting!