Find & Replace Values in Multiple Excel Files using Python (fast & easy)

Introduction
Imagine working as a business analyst for a retail company that sells vacuum cleaners. One day, you receive a call from the Marketing department announcing a product name change. Instead of “The Dirtinator”, the new name will be “The Dustinator”. As the business analyst, you have hundreds of Excel files that still contain the old product name. Manually finding and replacing all instances could be tedious. Luckily, there’s a way to efficiently find and replace multiple values in multiple Excel files using Python.
Getting Started
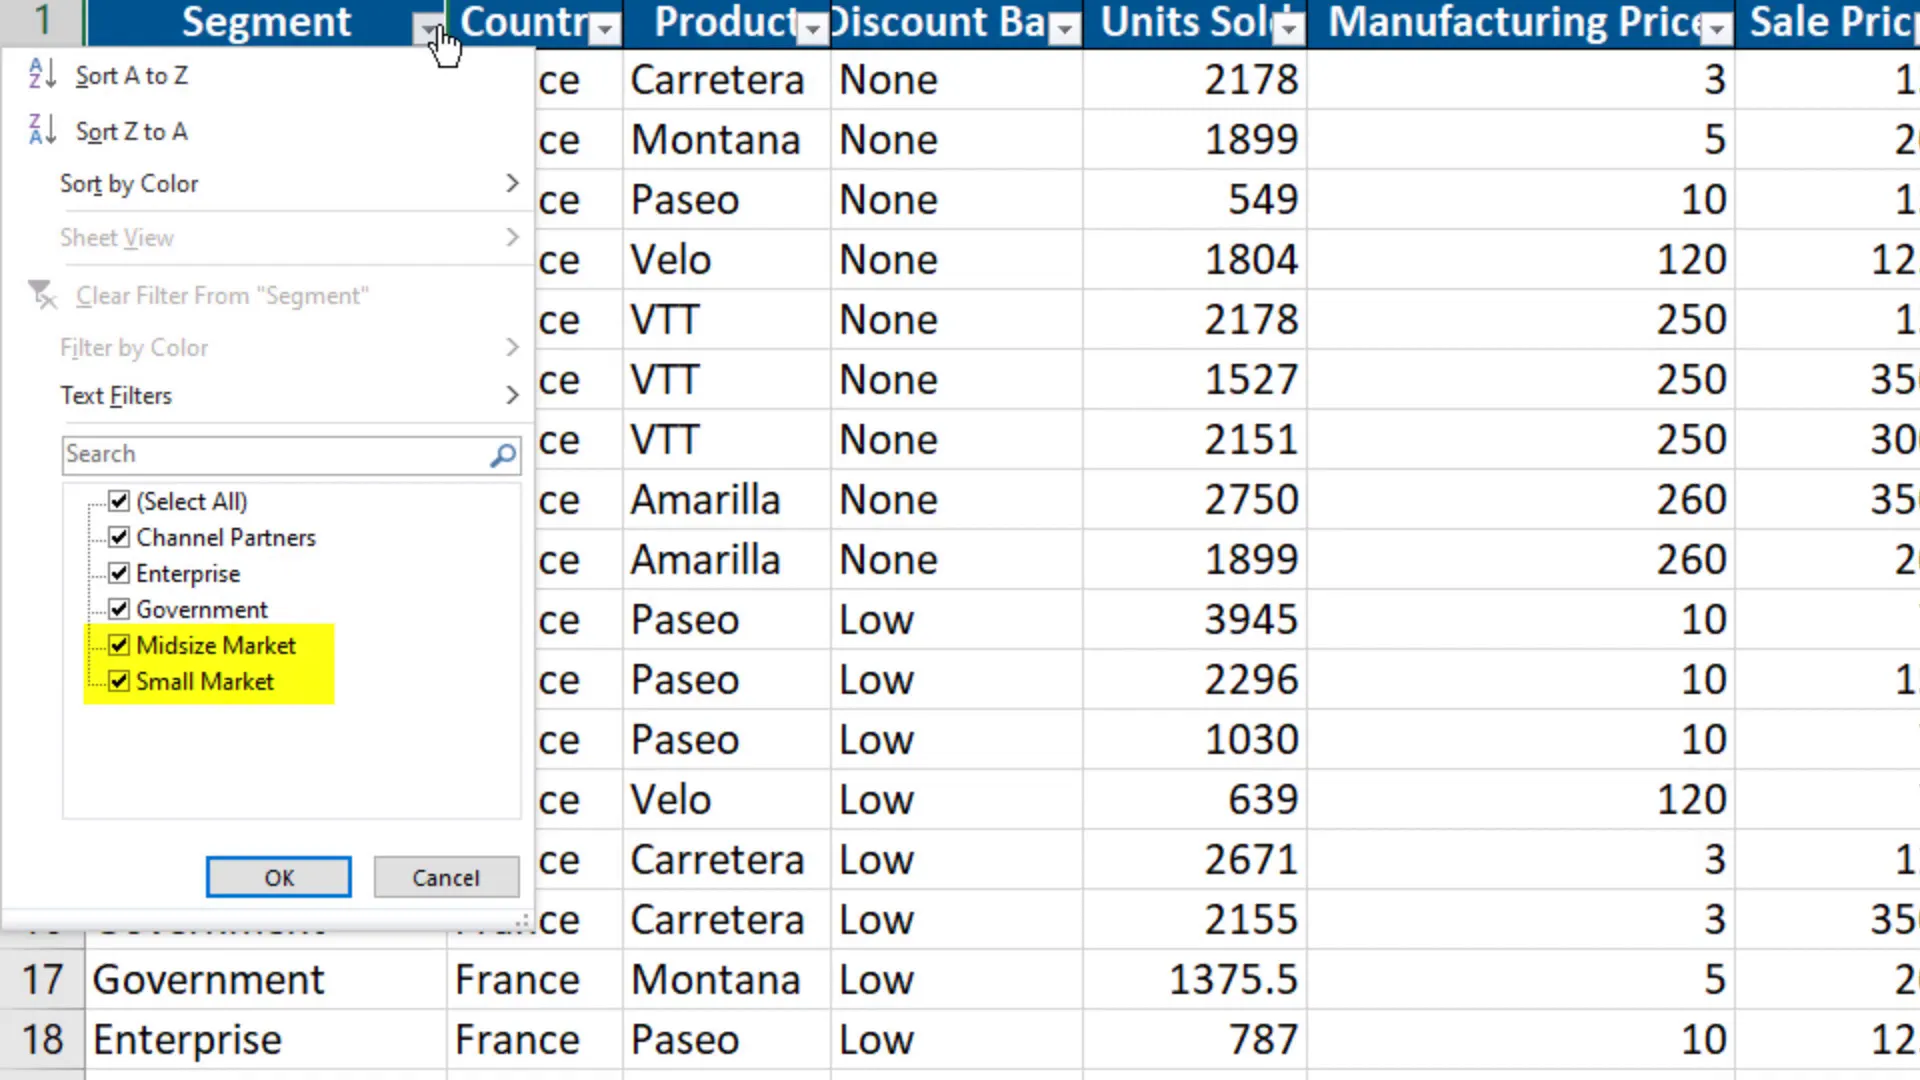
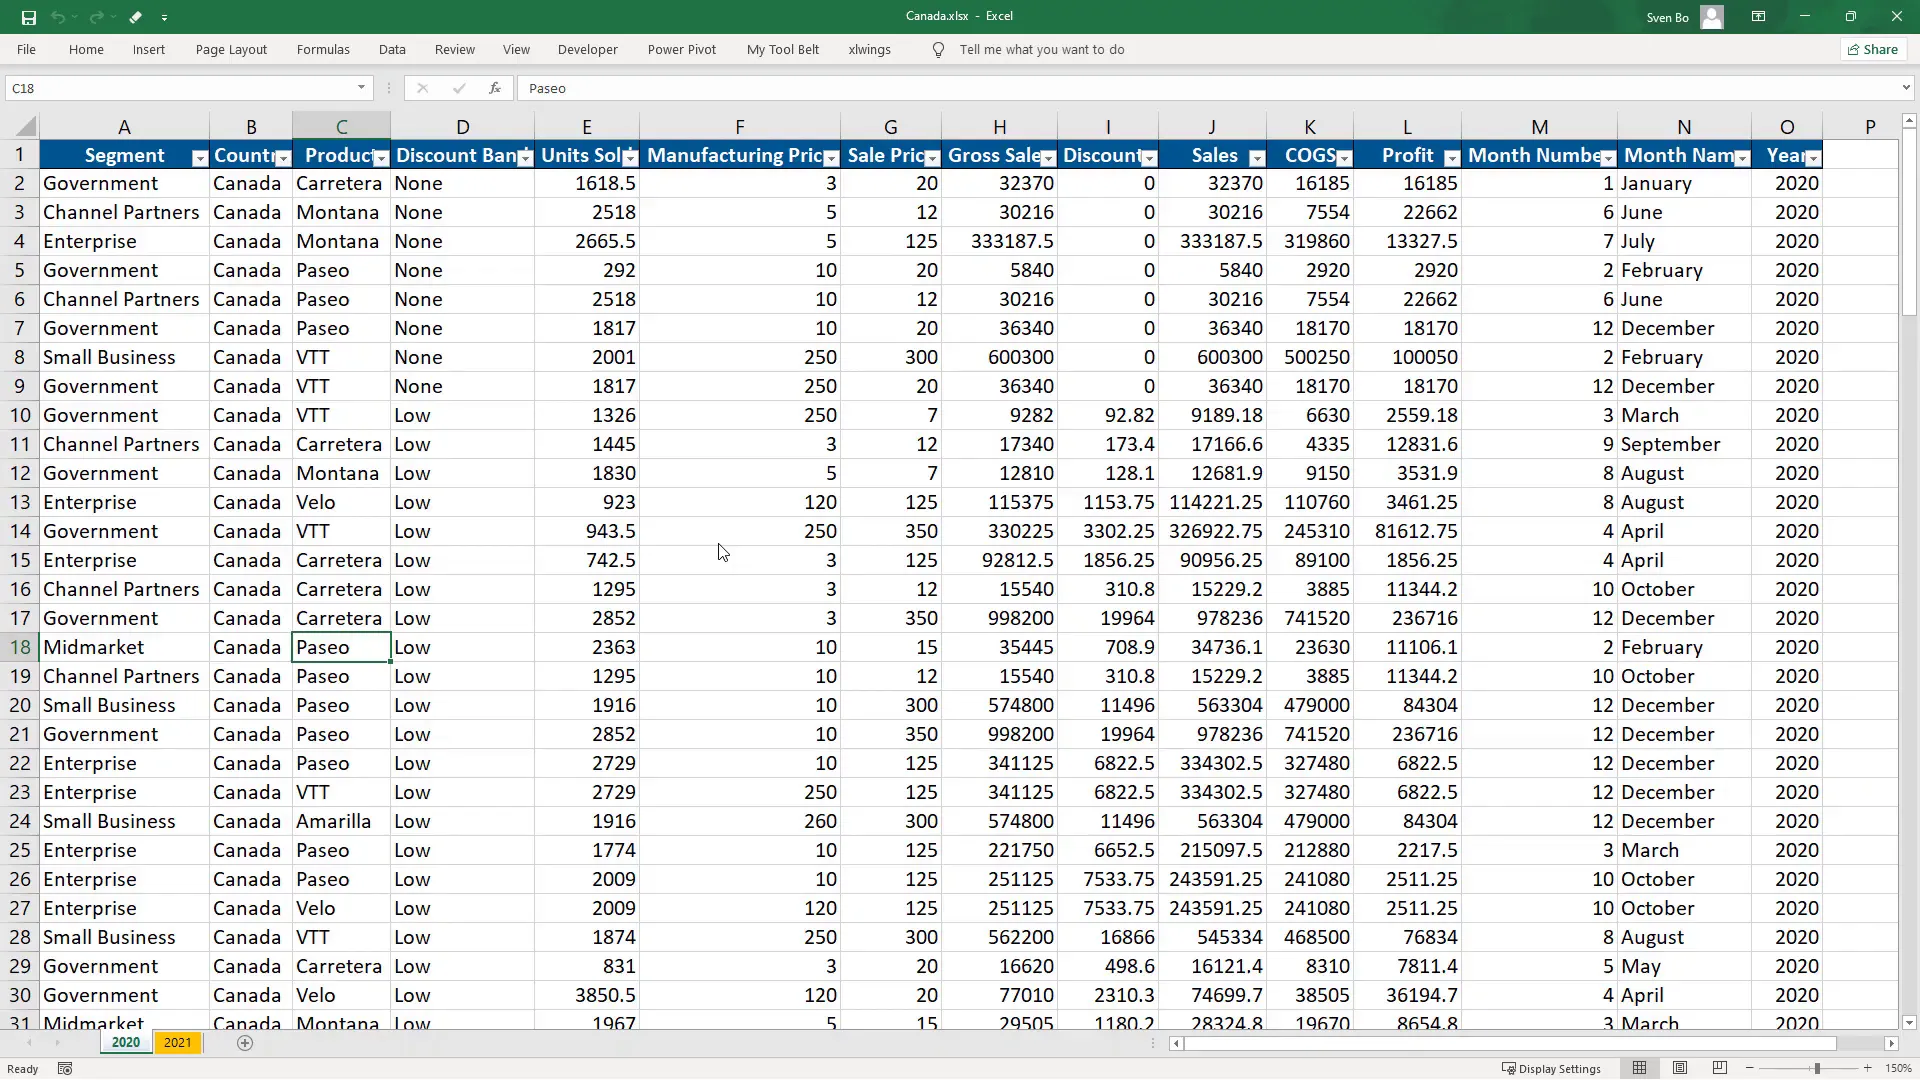
To kick things off, let’s begin with a simple example. In my workbook, I have financial data. In column A, there are different segments of the business. I intend to replace “Midmarket” with “Midsize Market” and “Small Business” with “Small Market” across the entire workbook, including the second worksheet.
Using the openpyxl Library
To accomplish this in Python, I will be using the openpyxl library. First, install the module by opening your command prompt or terminal and typing:
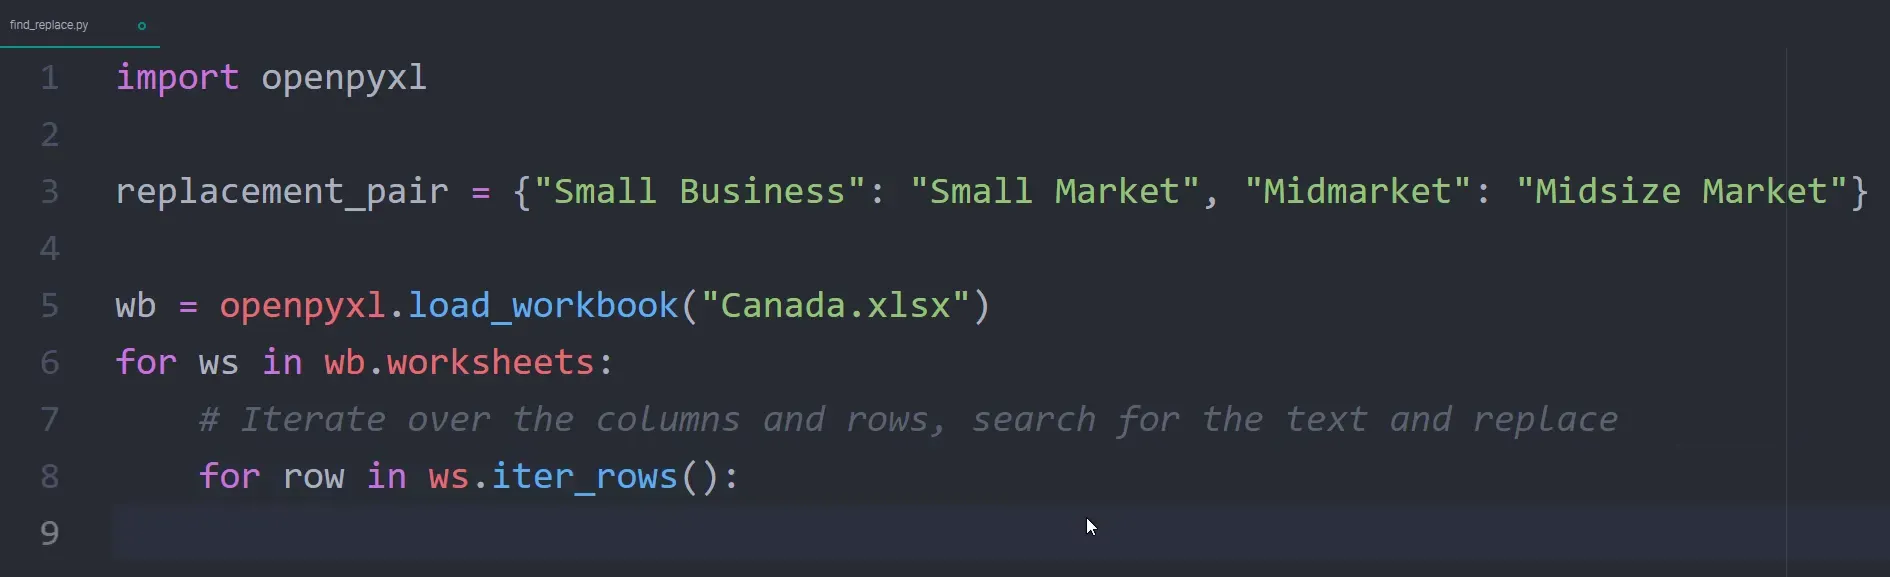
pip install openpyxlOnce installed, I’ll create a Python file and start by importing the openpyxl library. Next, I will create a Python dictionary where the key is the text I want to find in my Excel file, and the respective value is the text I want to replace it with. For example, I will find “Small Business” and replace it with “Small Market”.

Loading the Workbook
With the dictionary in place, I will load the workbook using:
openpyxl.load_workbook('your_excel_file.xlsx')As my Python file is in the same directory as the Excel file, I only need to type the file name. Later, I will show a better solution for working with file paths.
Iterating Over Worksheets
Now, I will loop over each worksheet in the workbook. Within each sheet, I’ll iterate over the rows and columns to search for the text and replace it. I’ll use iter_rows to iterate over all cells. If the cell value matches any of the keys in my dictionary, I will replace it with the corresponding value.
Saving the New Workbook
After making the replacements, I will save this as a new workbook. Upon executing the script and opening the new workbook, I can see the values have been successfully replaced in both worksheets.

Expanding the Script
Now that we have a working script, let’s take it a step further. I’ll copy the script and modify it to find and replace values in all Excel files within a specified folder. This script will even work with additional subfolders containing more Excel files.
Setting Up File Paths
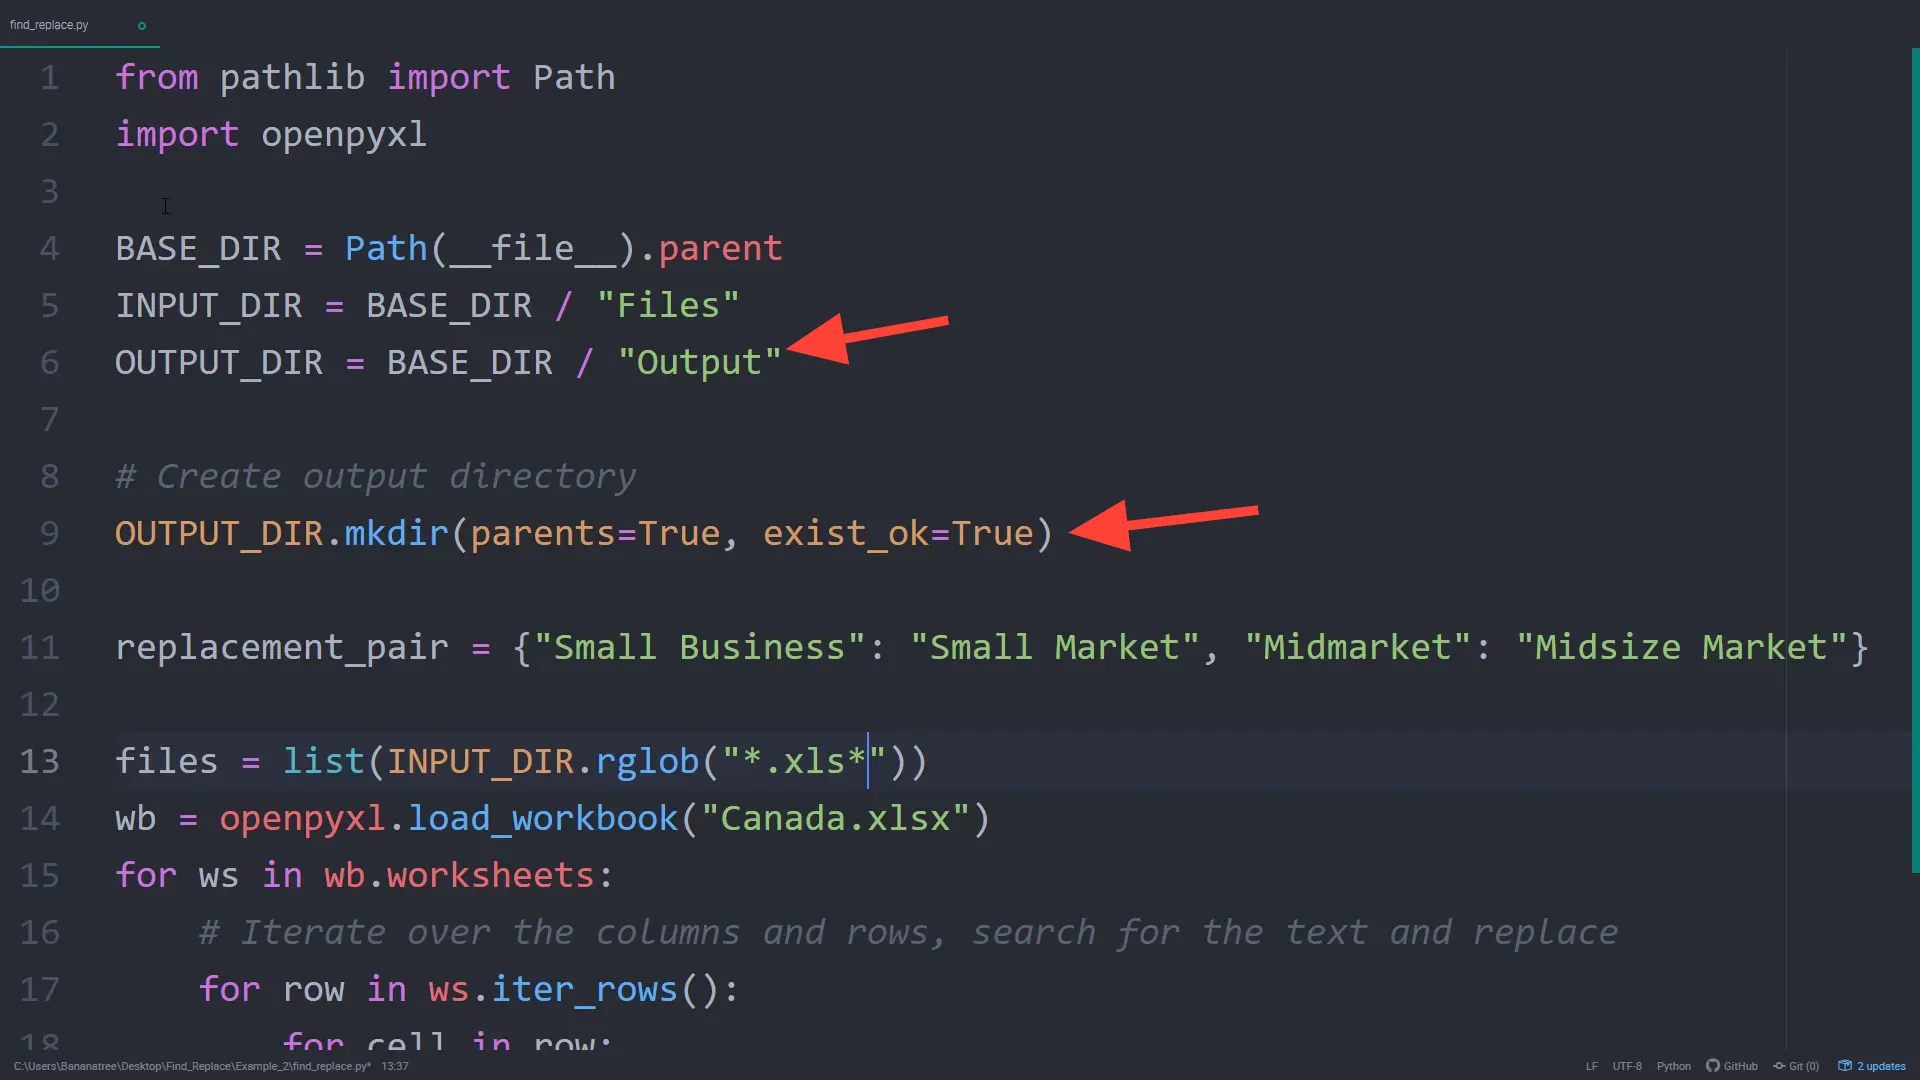
To manage different file paths, I will import Path from pathlib. Pathlib is included in Python 3.4 and above, so no additional installation is required. I will specify the base directory, the input directory containing the Excel files, and set up an output directory to save the new Excel files.
Creating the Output Directory
Using pathlib, I can easily create the output directory if it doesn’t exist. By setting parents to True, pathlib will create any missing parent directory. If the directory already exists, I’ll set exist_ok to True to ignore the error.
Finding Excel Files
To store all Excel file paths in the folder, I will create a list called “files” using rglob to return the file paths. I’ll filter to only include files that end with ‘xls’. For files without subfolders, I could use glob instead of rglob.

Executing the Script
Once I have the list of all Excel file paths, I can iterate over them. The last step is to replace “Canada” with “file” and save it to the output directory. I will use the original file name with the suffix “_New”. Executing this script takes less than 2 seconds. I’ll validate that it worked by opening one spreadsheet and checking the replaced values.

Conclusion
That’s all for this tutorial! Now you know how to efficiently find and replace multiple values in multiple Excel files using Python and the openpyxl library. If you have any questions, feel free to leave them in the comments. Thanks for reading!