How to create a Streamlit Multi-Page Web App

Introduction
In this post, I’m excited to walk you through the process of creating a multipage app using Streamlit, a powerful tool for building web applications. This feature was introduced in Streamlit version 1.10, and it allows developers to create more organized and user-friendly applications. Let’s dive right in!
Create a basic streamlit app
First things first, ensure you have the latest version of Streamlit installed. Open your terminal or command prompt and type:
pip install streamlit --upgrade.
Next, create a blank Python file named Homepage.py. Start by importing Streamlit:
import streamlit as st
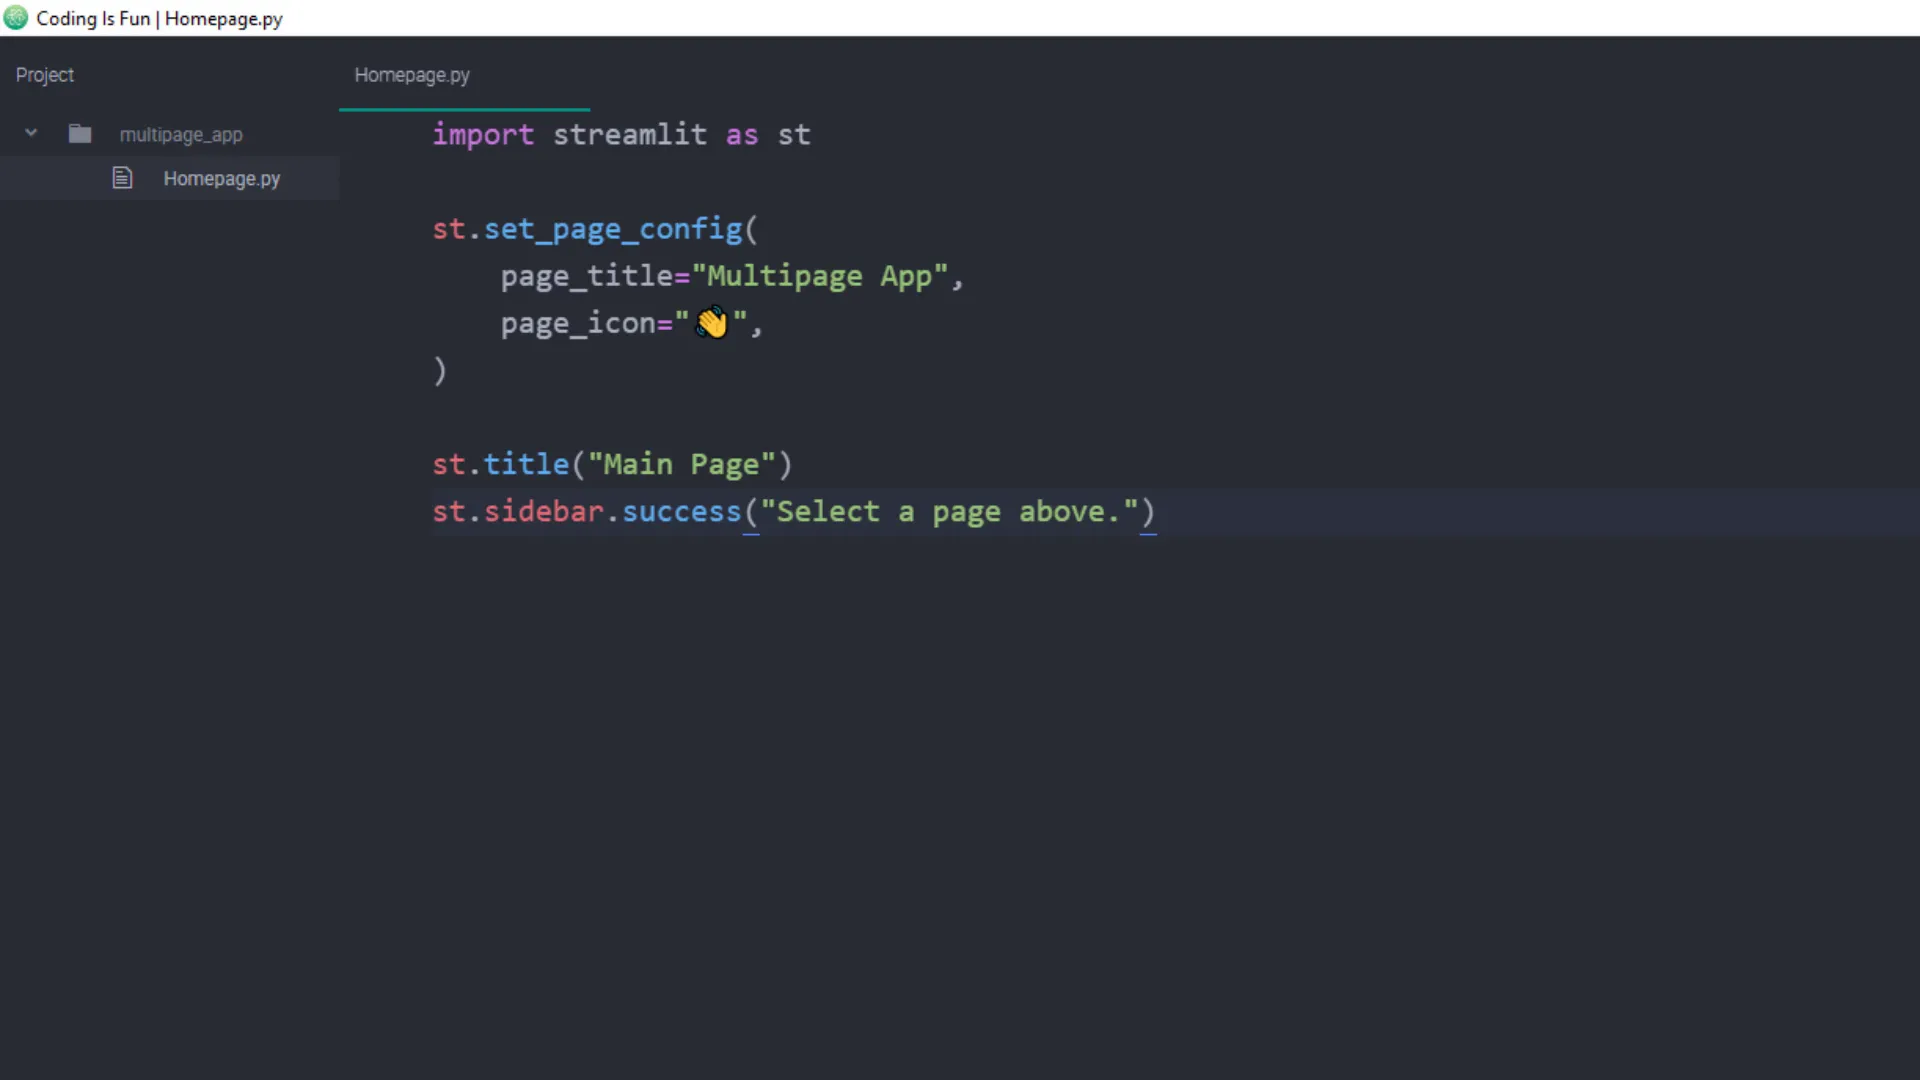 Set up some basic configurations like the page title and icon, and insert a title and a success message in the sidebar. To see your app in action, run:
streamlit run Homepage.py
Now, you should see your basic app up and running!
Add multiple pages
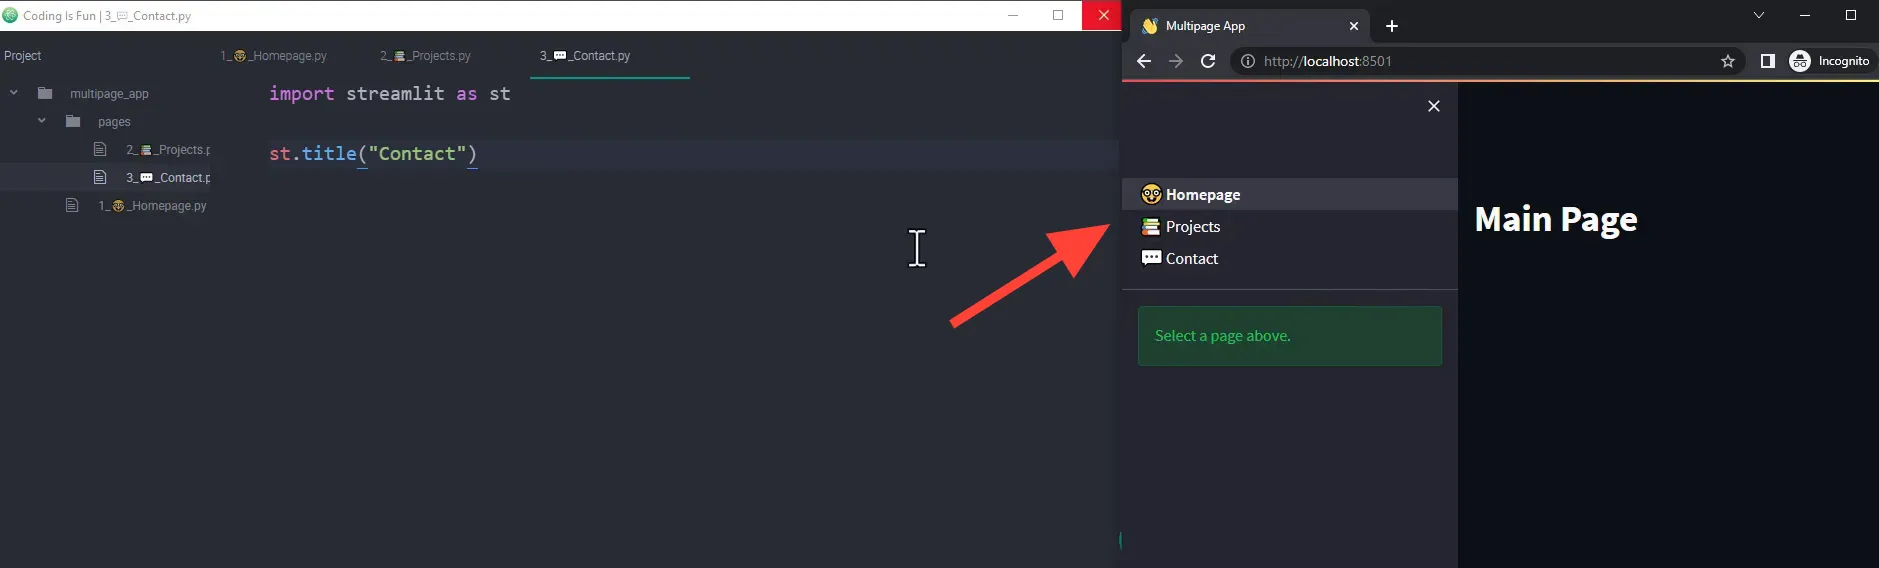
To add more pages to your app, create a new folder in the app directory called pages. Within this folder, you can create additional Python files. For example, create a file named Projects.py. When you save this file, you will notice that the sidebar now shows two pages.
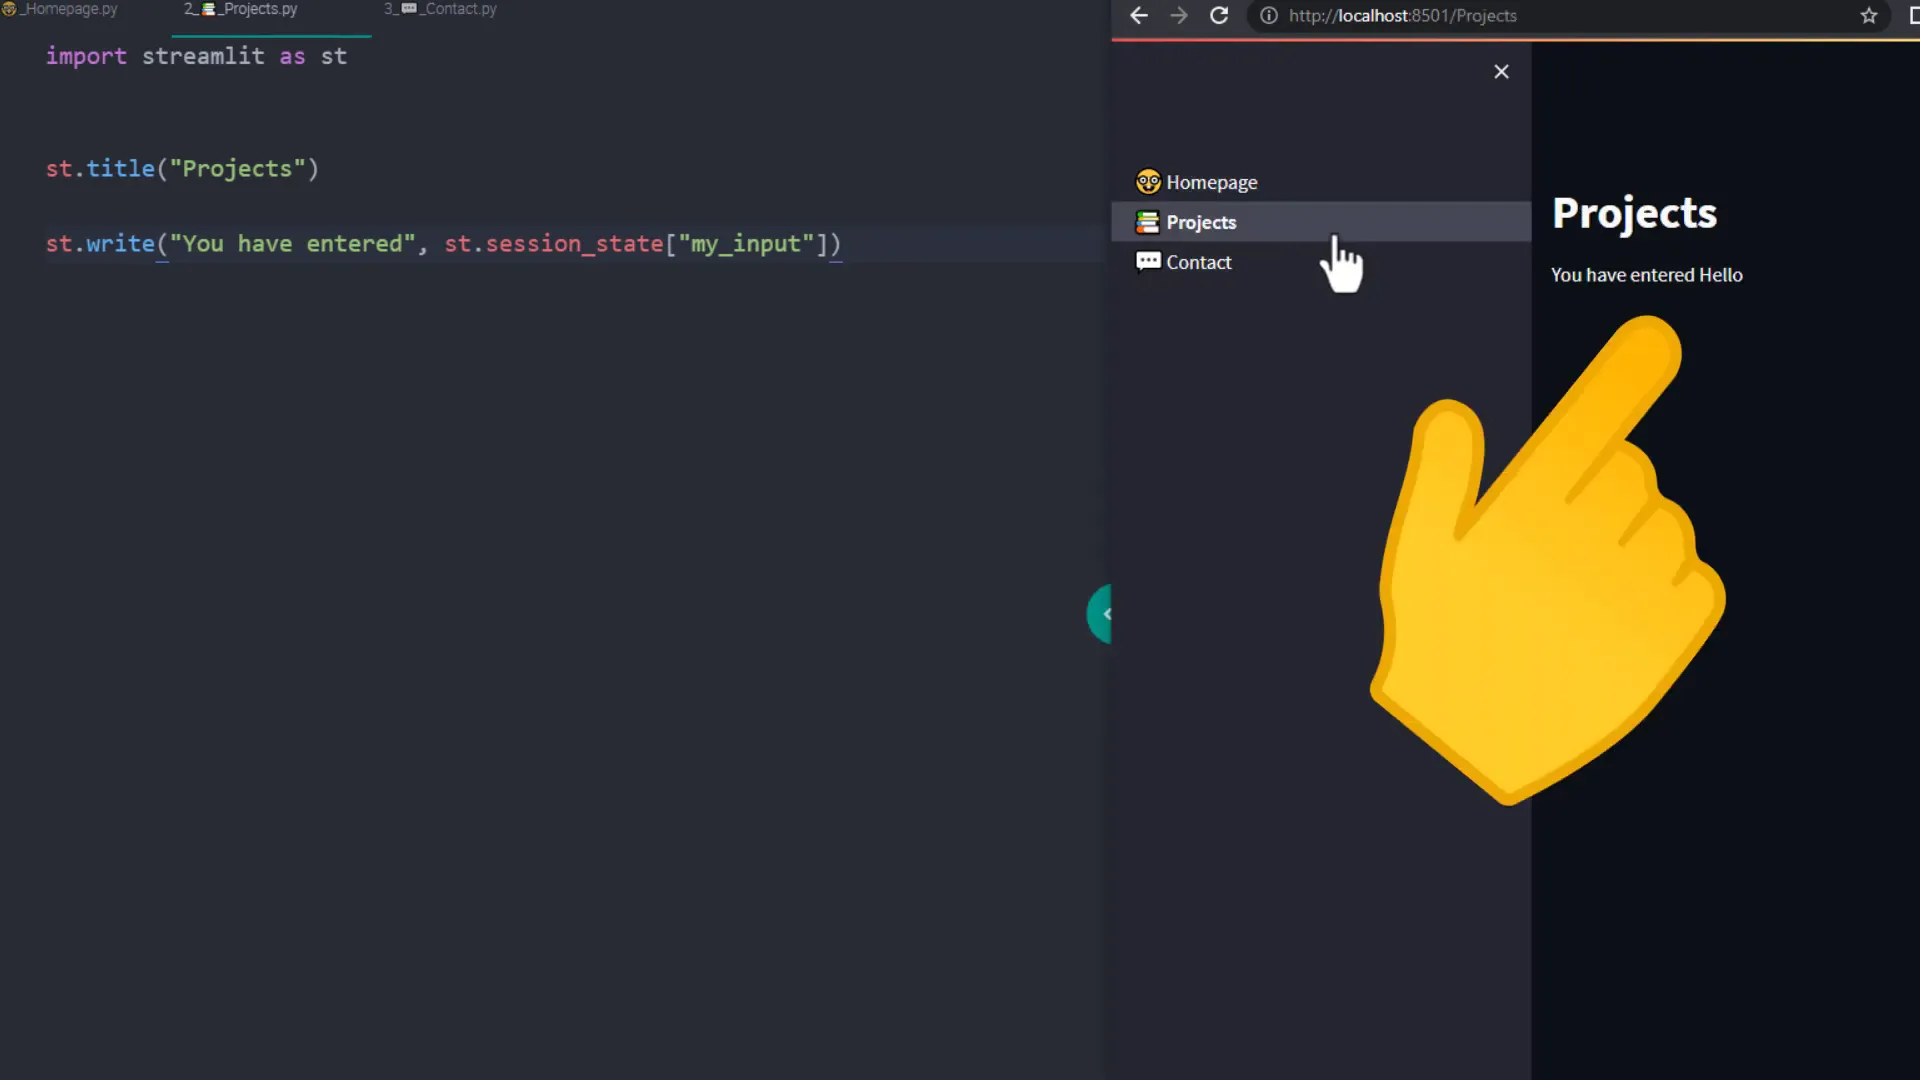
In Projects.py, import Streamlit again and insert a title:
import streamlit as st
st.title("Projects")
Save the script and navigate to the Projects page to see your title displayed. However, keep in mind that the initial page title and icon are only valid for the respective page and won’t be shared across pages.
Order pages
Streamlit sorts the pages alphabetically by default. If you want to control the order, rename your Python files by adding a number followed by an underscore. For instance, rename Projects.py to 02_Projects.py and Contact.py to 03_Contact.py. This way, the order will reflect your desired arrangement.
Add emojis before the page name
Another fun customization is adding emojis to your page names. To do this, rename the files to include an emoji after the index number. For example:
01_🎈_Homepage.py
02_📁_Projects.py
03_💬_Contact.py
After renaming, rerun your app to see the emojis appear next to the page names in the sidebar.
Share session state variables
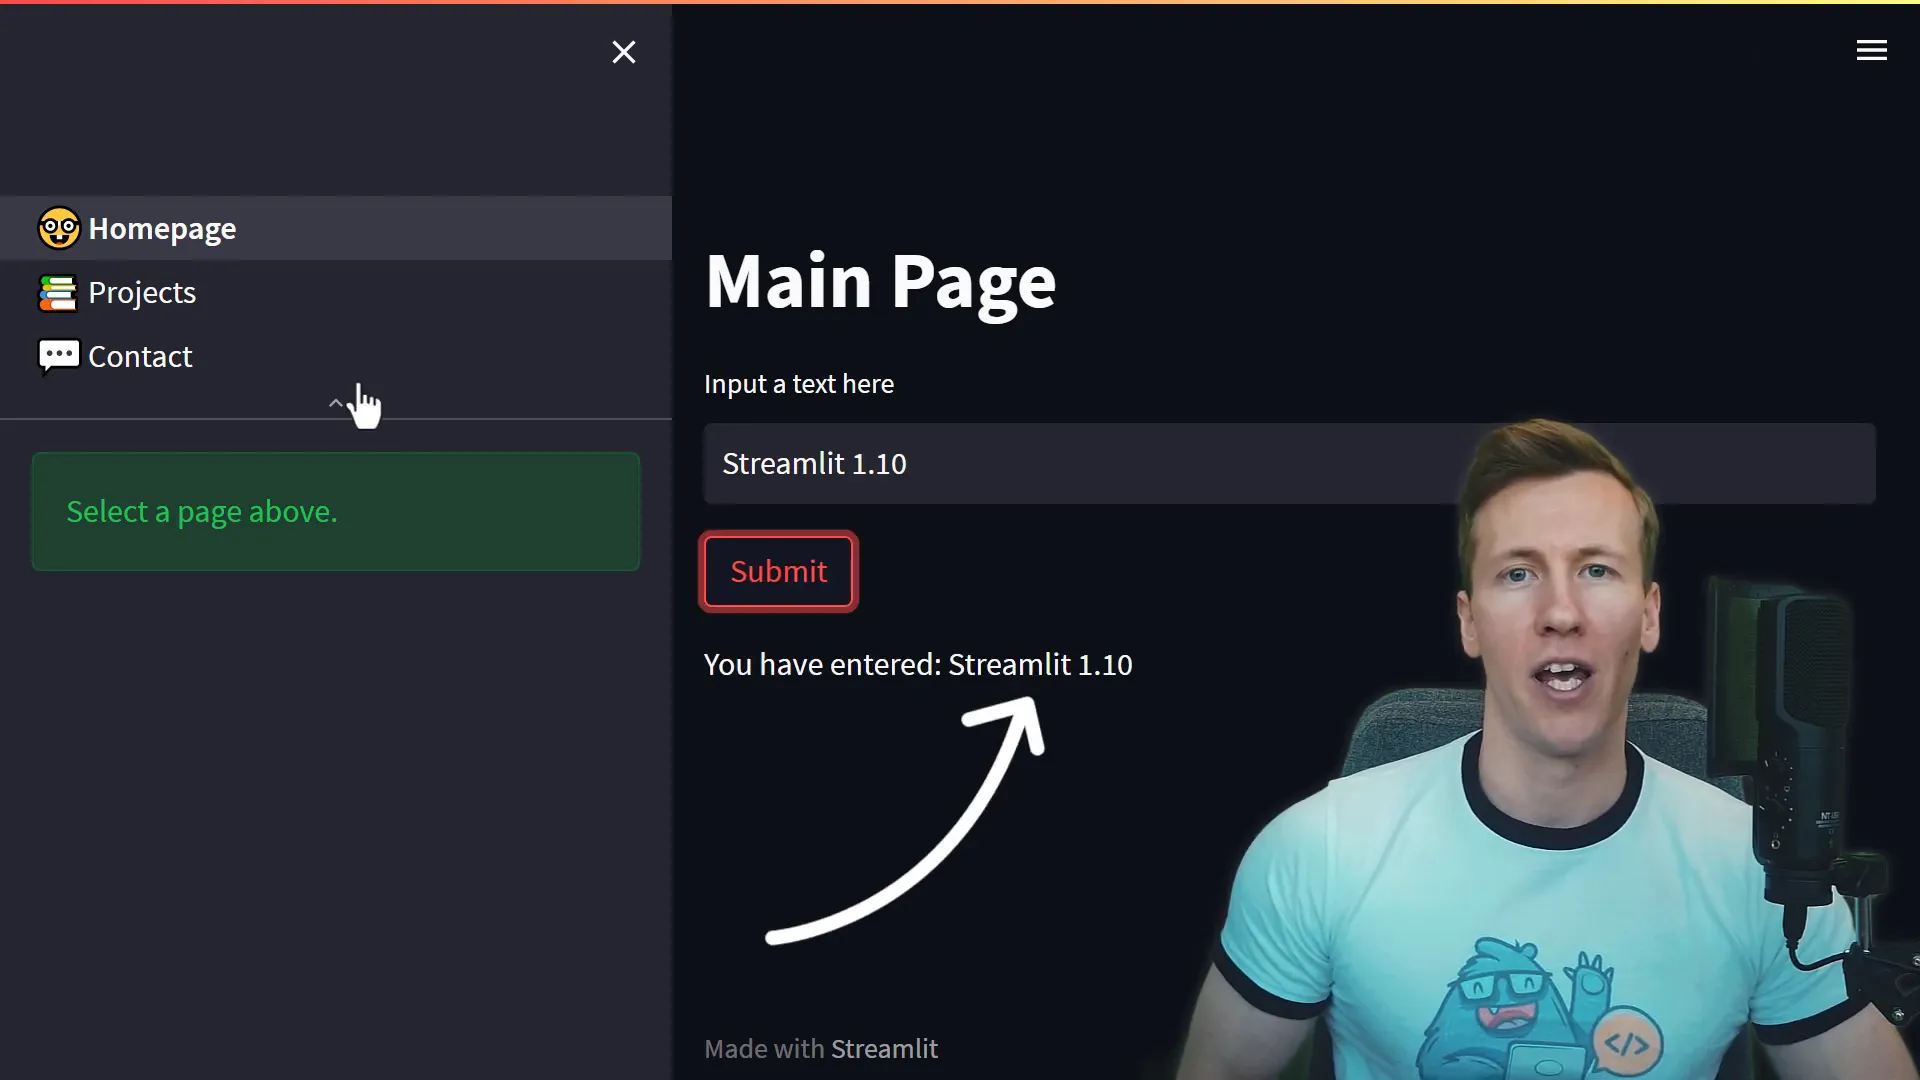
One of the powerful features of Streamlit is its ability to share session state variables across different pages. For example, you can create a text input in your Homepage.py file and store its value in the session state:
if "my_input" not in st.session_state:
    st.session_state.my_input = ""

st.session_state.my_input = st.text_input("Enter something:")
if st.button("Submit"):
    st.session_state.my_input = st.session_state.my_input
When you navigate to the Projects page, you can display the value stored in the session state:
st.write("You entered:", st.session_state.my_input)This way, the input value persists across page navigations, enhancing user experience.
Final words
While the native support for multipage apps in Streamlit is fantastic, there are still some limitations. Currently, customization options are somewhat limited, and many users may wonder about features like nested pages or alternative navigation options. However, community packages like streamlit-option-menu can help enhance navigation in your app.
Outro
This tutorial covered the essentials of building a multipage app in Streamlit, including creating a basic app, adding multiple pages, reordering them, adding emojis, and sharing session state variables. I hope this inspires you to explore more possibilities with Streamlit!