How to Send Push Notifications to Your Phone Using Excel & VBA
Introduction
Today, I’m excited to share how you can send push notifications to your smartphone directly from Excel using VBA. For this, I will be using the free Pushbullet API. Let’s dive right in!
Getting Started with Pushbullet
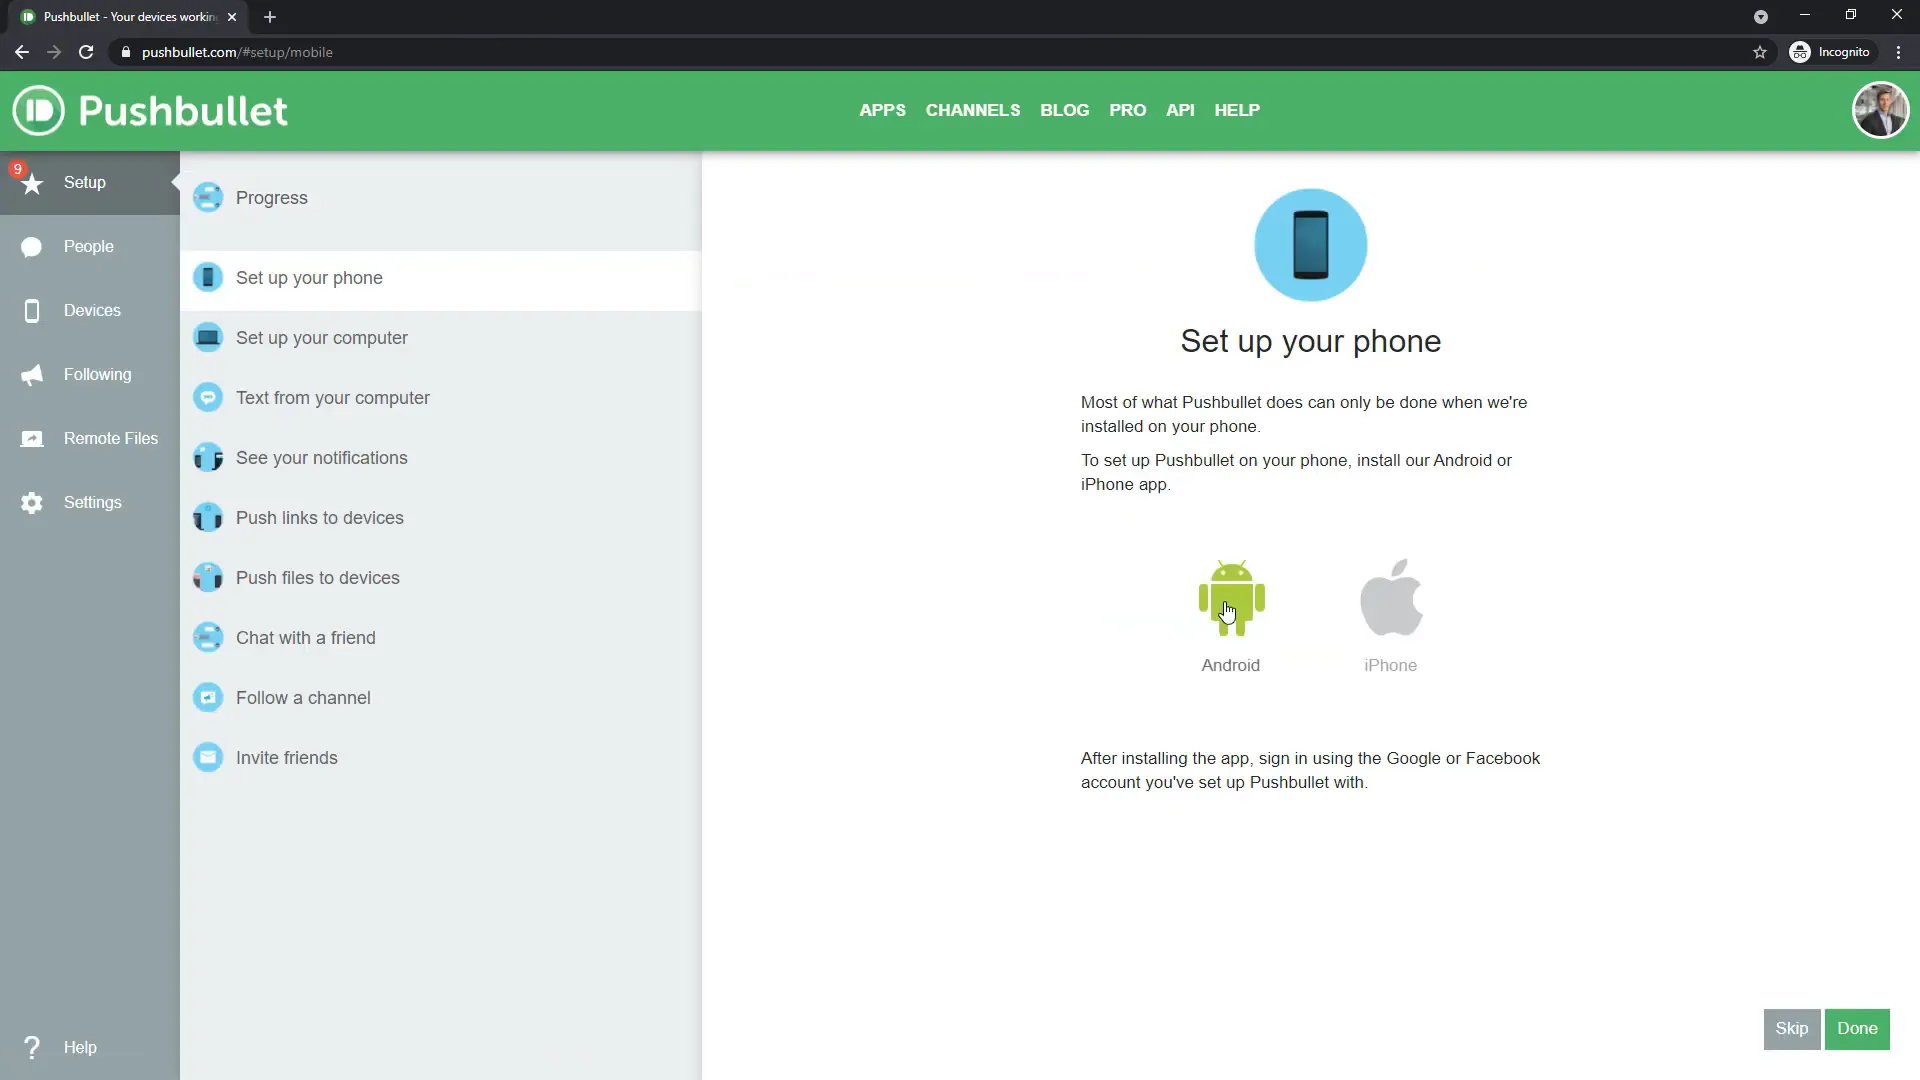
First things first, head over to Pushbullet.com and sign up using your Google or Facebook account. After logging in, you’ll need to install the Pushbullet app on your smartphone, available on both the Google Play and Apple App Store.
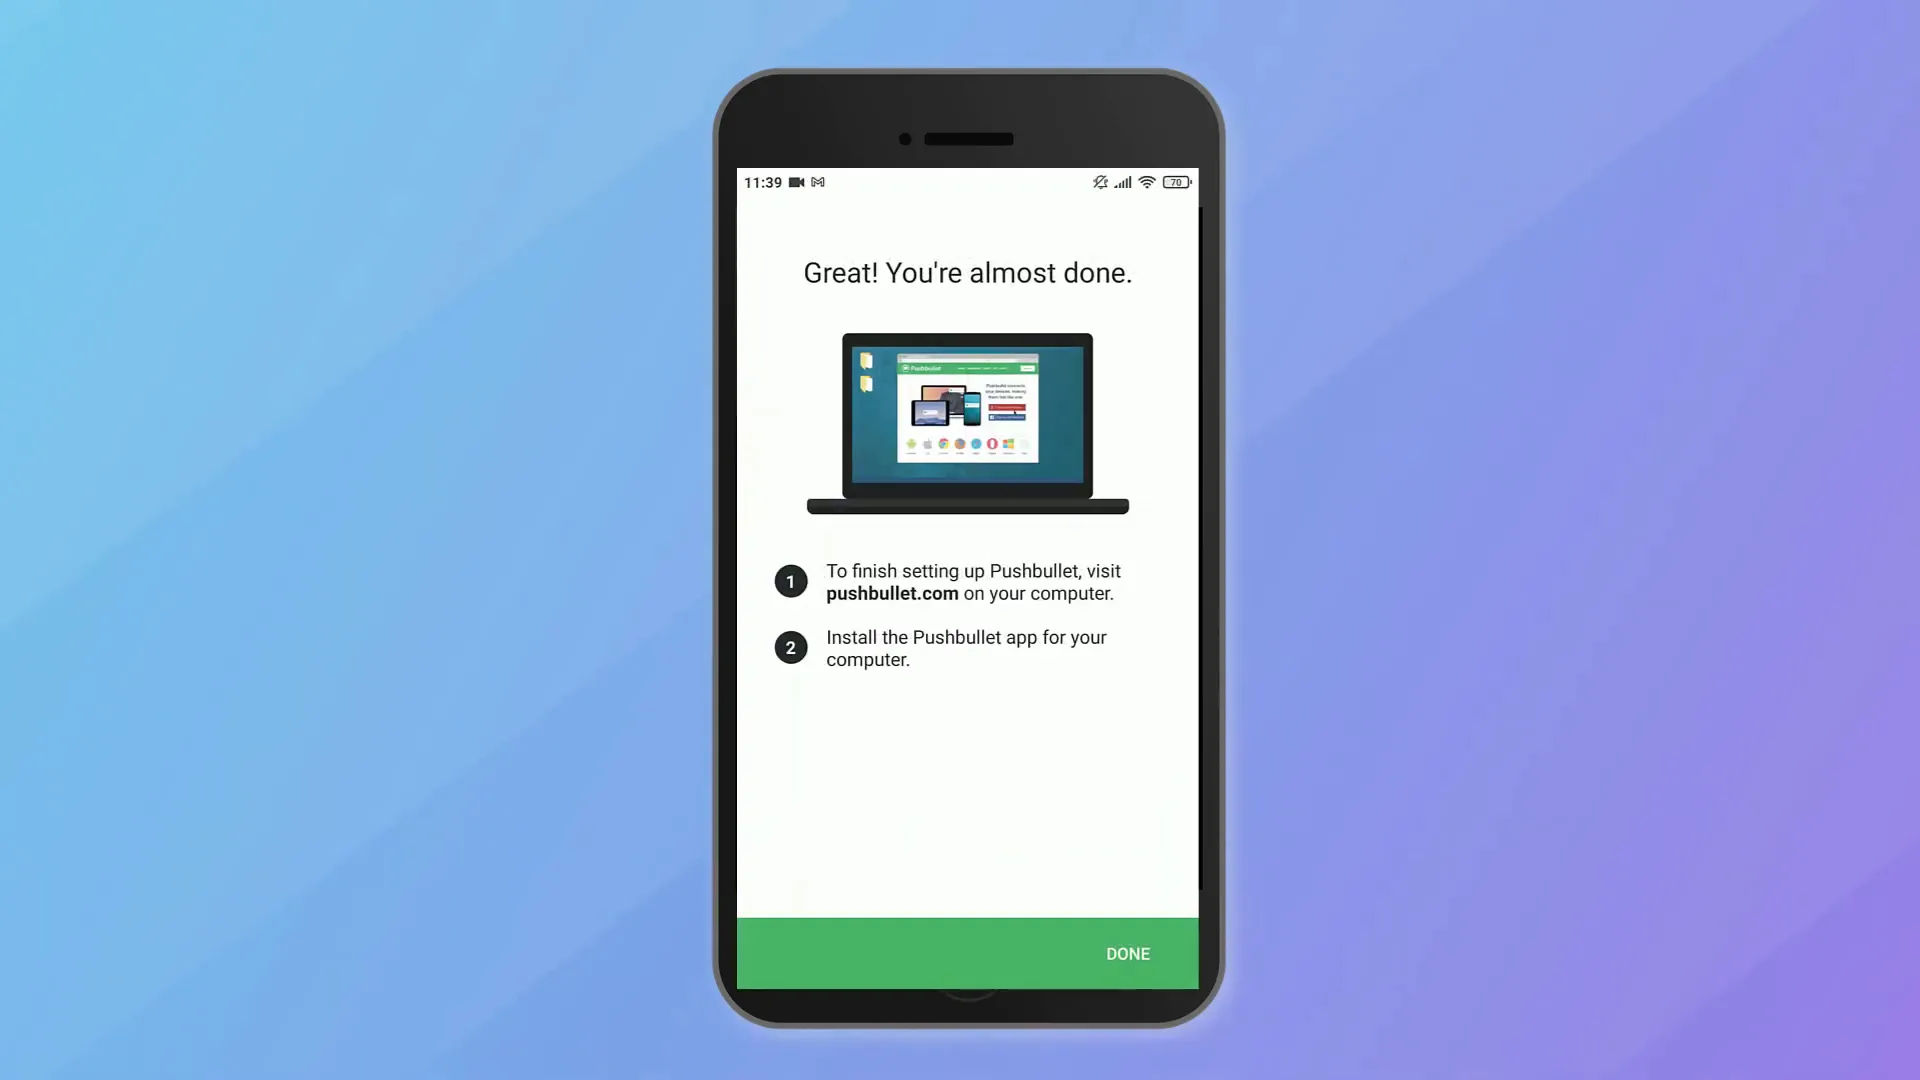
Once the app is installed, sign in with your account. The next crucial step is to grant Pushbullet access to your phone’s notifications. After enabling notifications, return to the Pushbullet website. Under the “Devices” section, you should now see your smartphone listed.
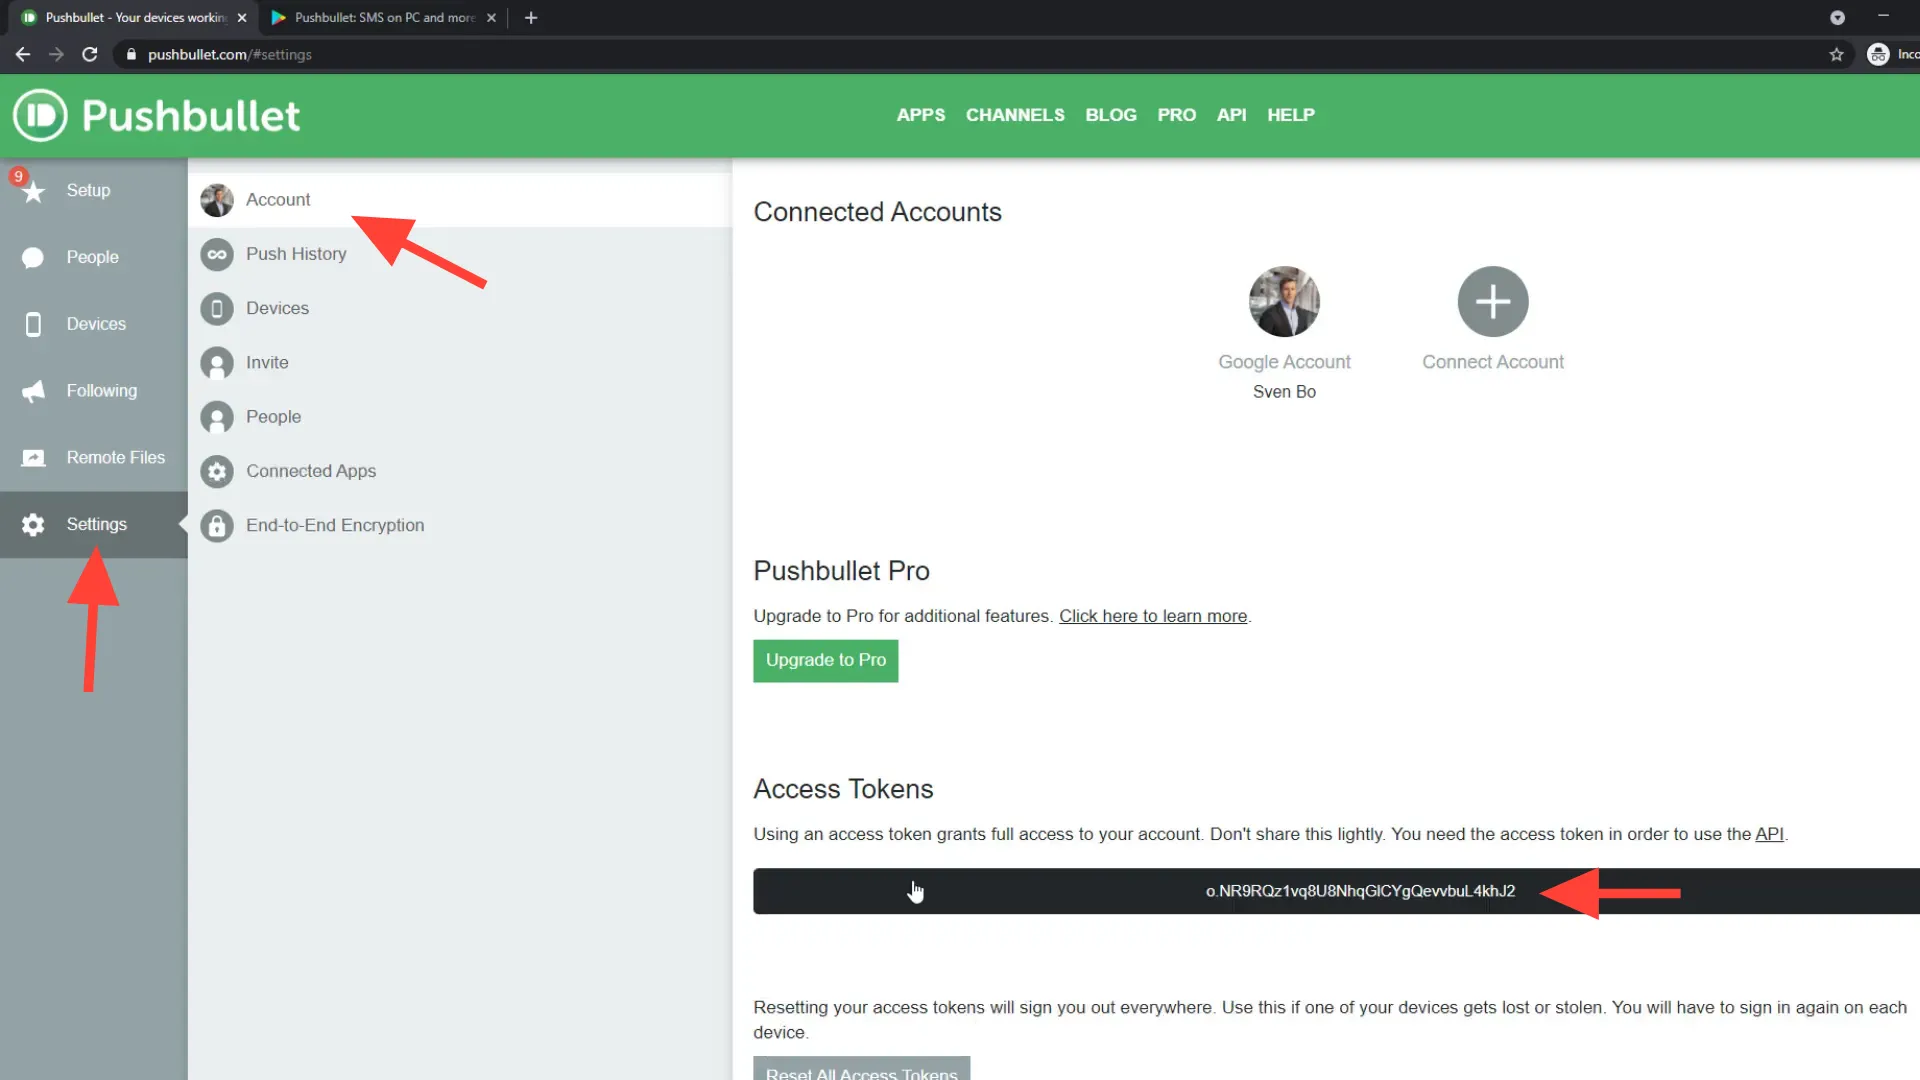
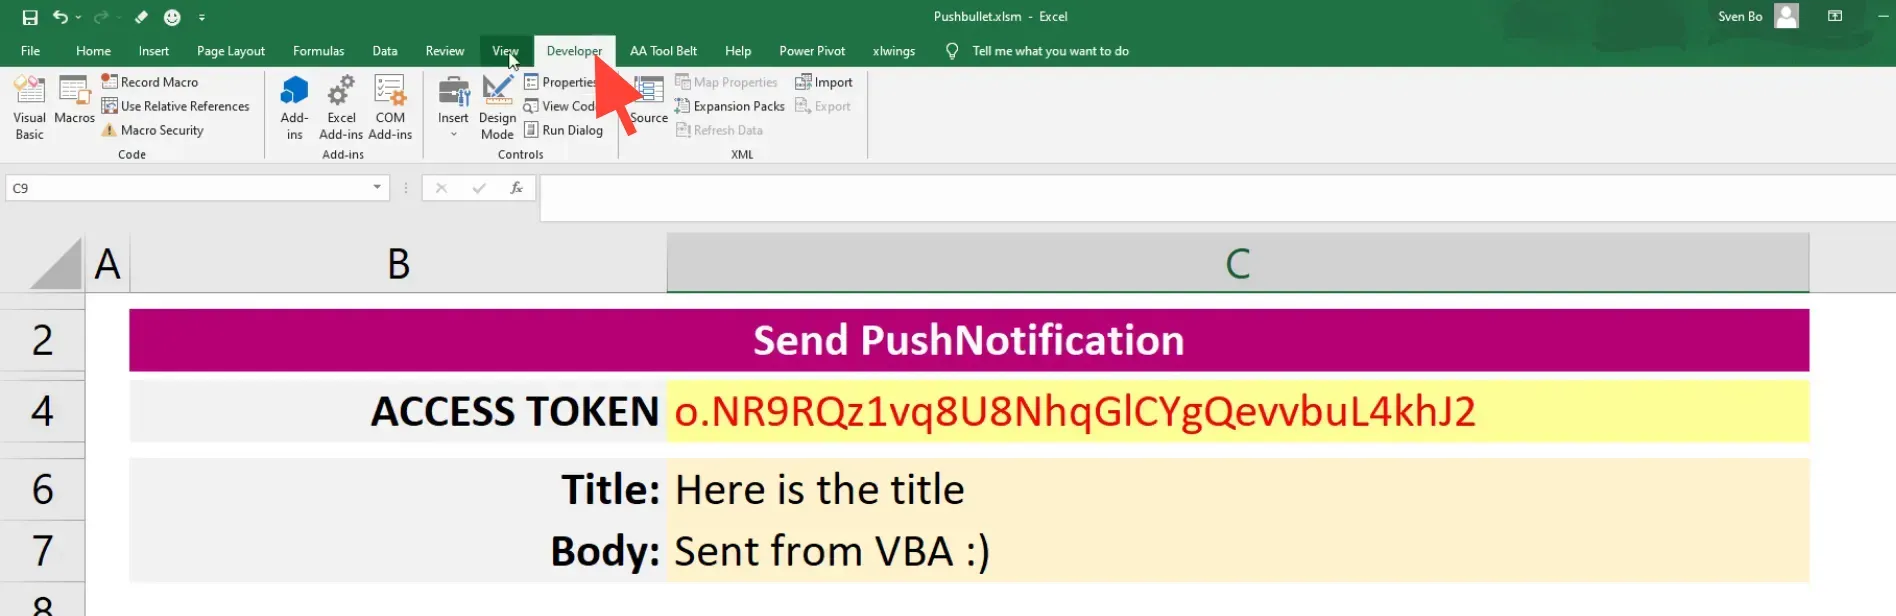
Next, navigate to “Settings” and click on “Create Access Token.” This token is essential for sending notifications, so copy it and paste it into your Excel worksheet. Remember, it’s important to use your Access Token, as I will revoke mine before uploading this guide.
Setting Up Excel and VBA
Now, let’s switch gears and head over to the VBA editor in Excel. Click on the Developer tab. If you don’t see this tab, you can enable it by right-clicking on the ribbon and selecting “Customize the Ribbon.” Make sure to tick the box next to Developer and press OK.
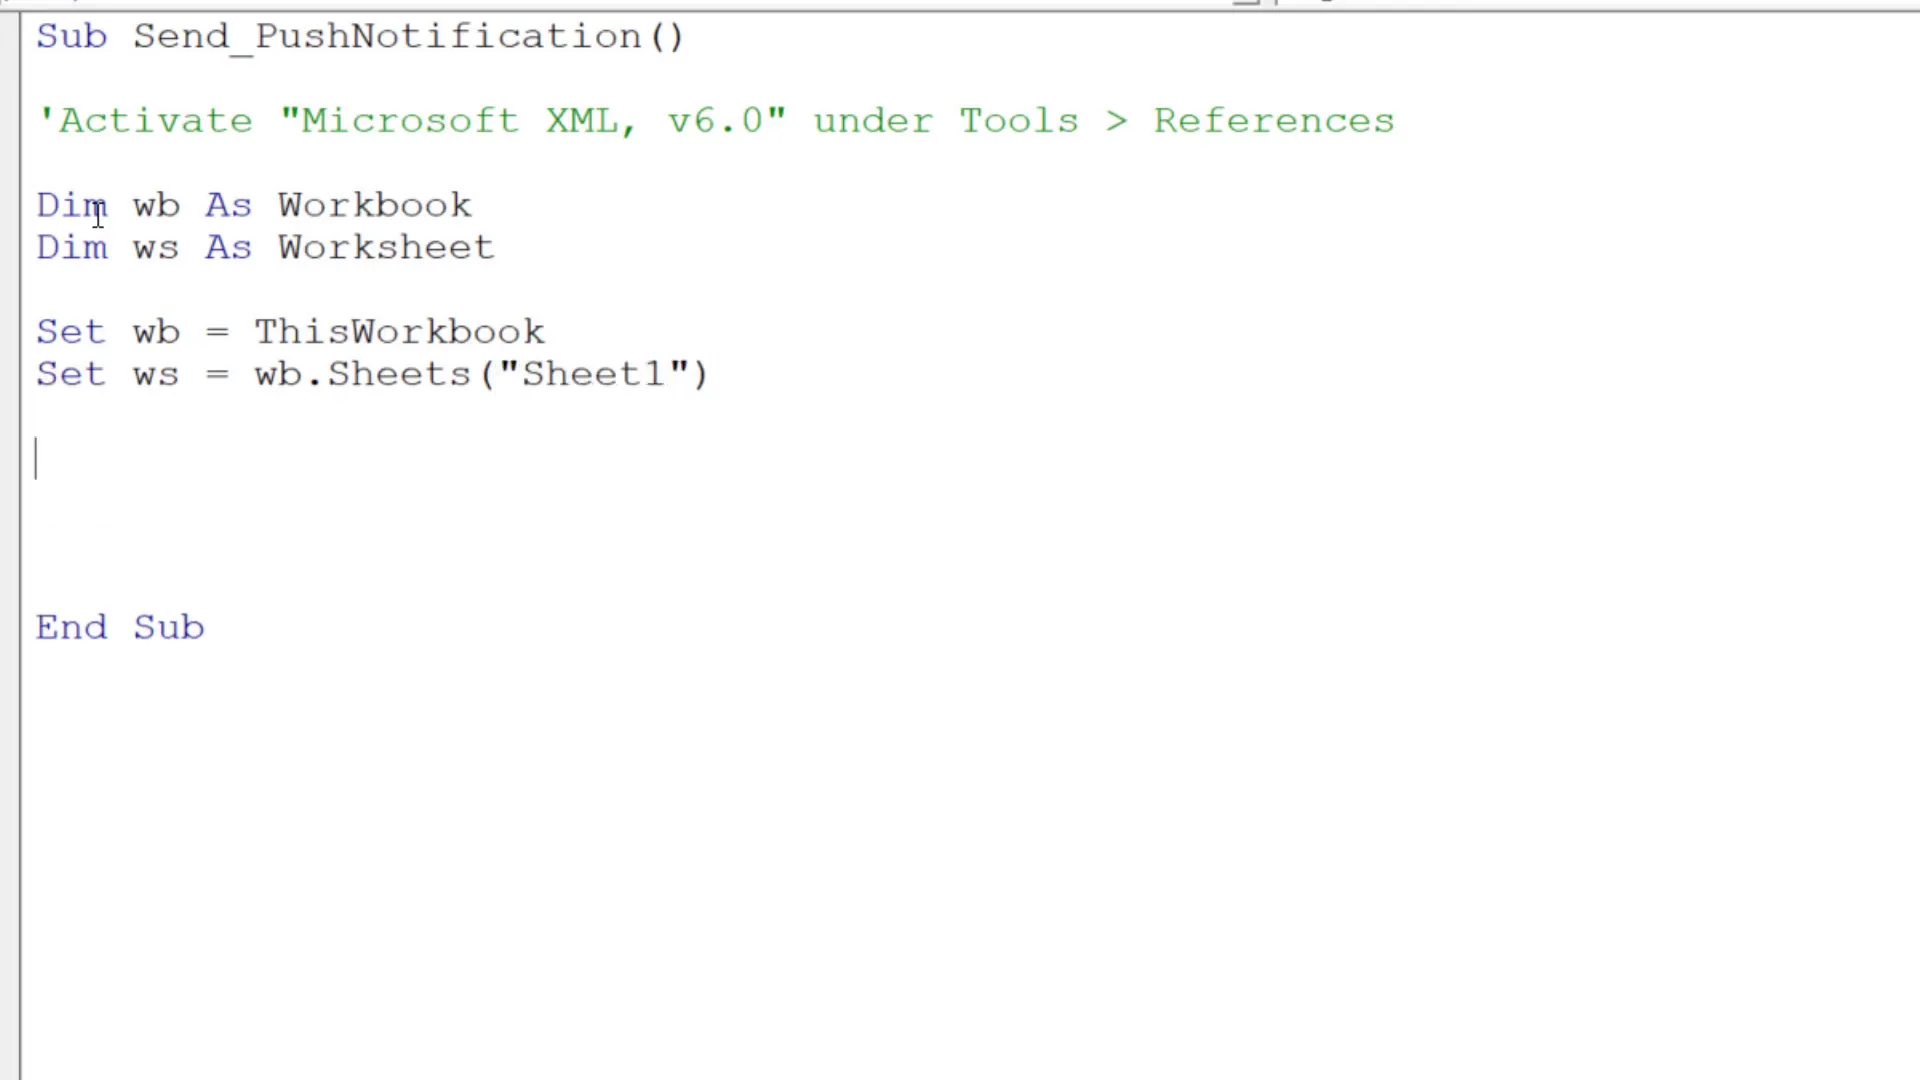
Once you have the Developer tab visible, open the Visual Basic Editor. The first step here is to insert a new module and name the subprocedure ‘Send Push Notification’.

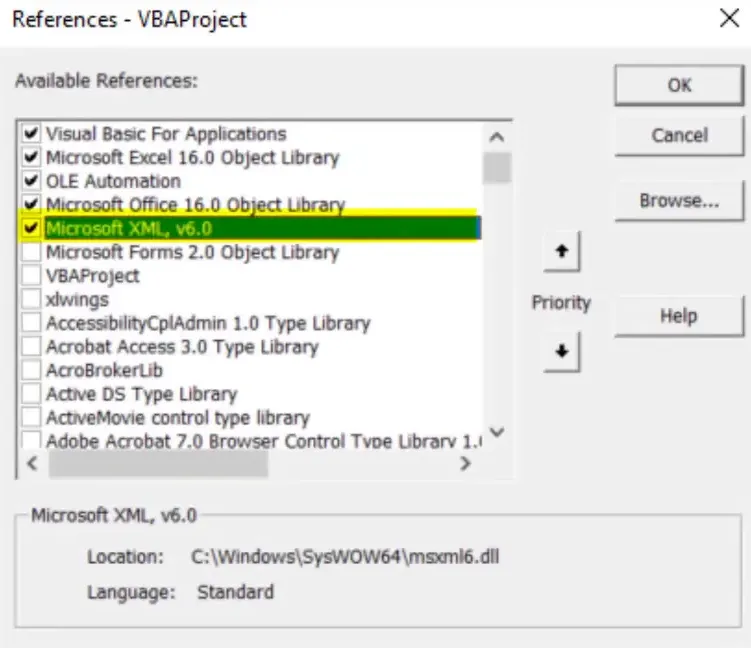
Since we will be sending a POST request, we need to reference the object library called “Microsoft XML v.6.” You can do this by going to Tools, then References, and searching for that library. Once found, tick the box next to it and click OK.
Writing the VBA Code
Now that we have everything set up, let’s begin writing our code. First, declare a variable for the workbook and the worksheet, setting the workbook to “ThisWorkbook” and the worksheet to “Sheet1”.
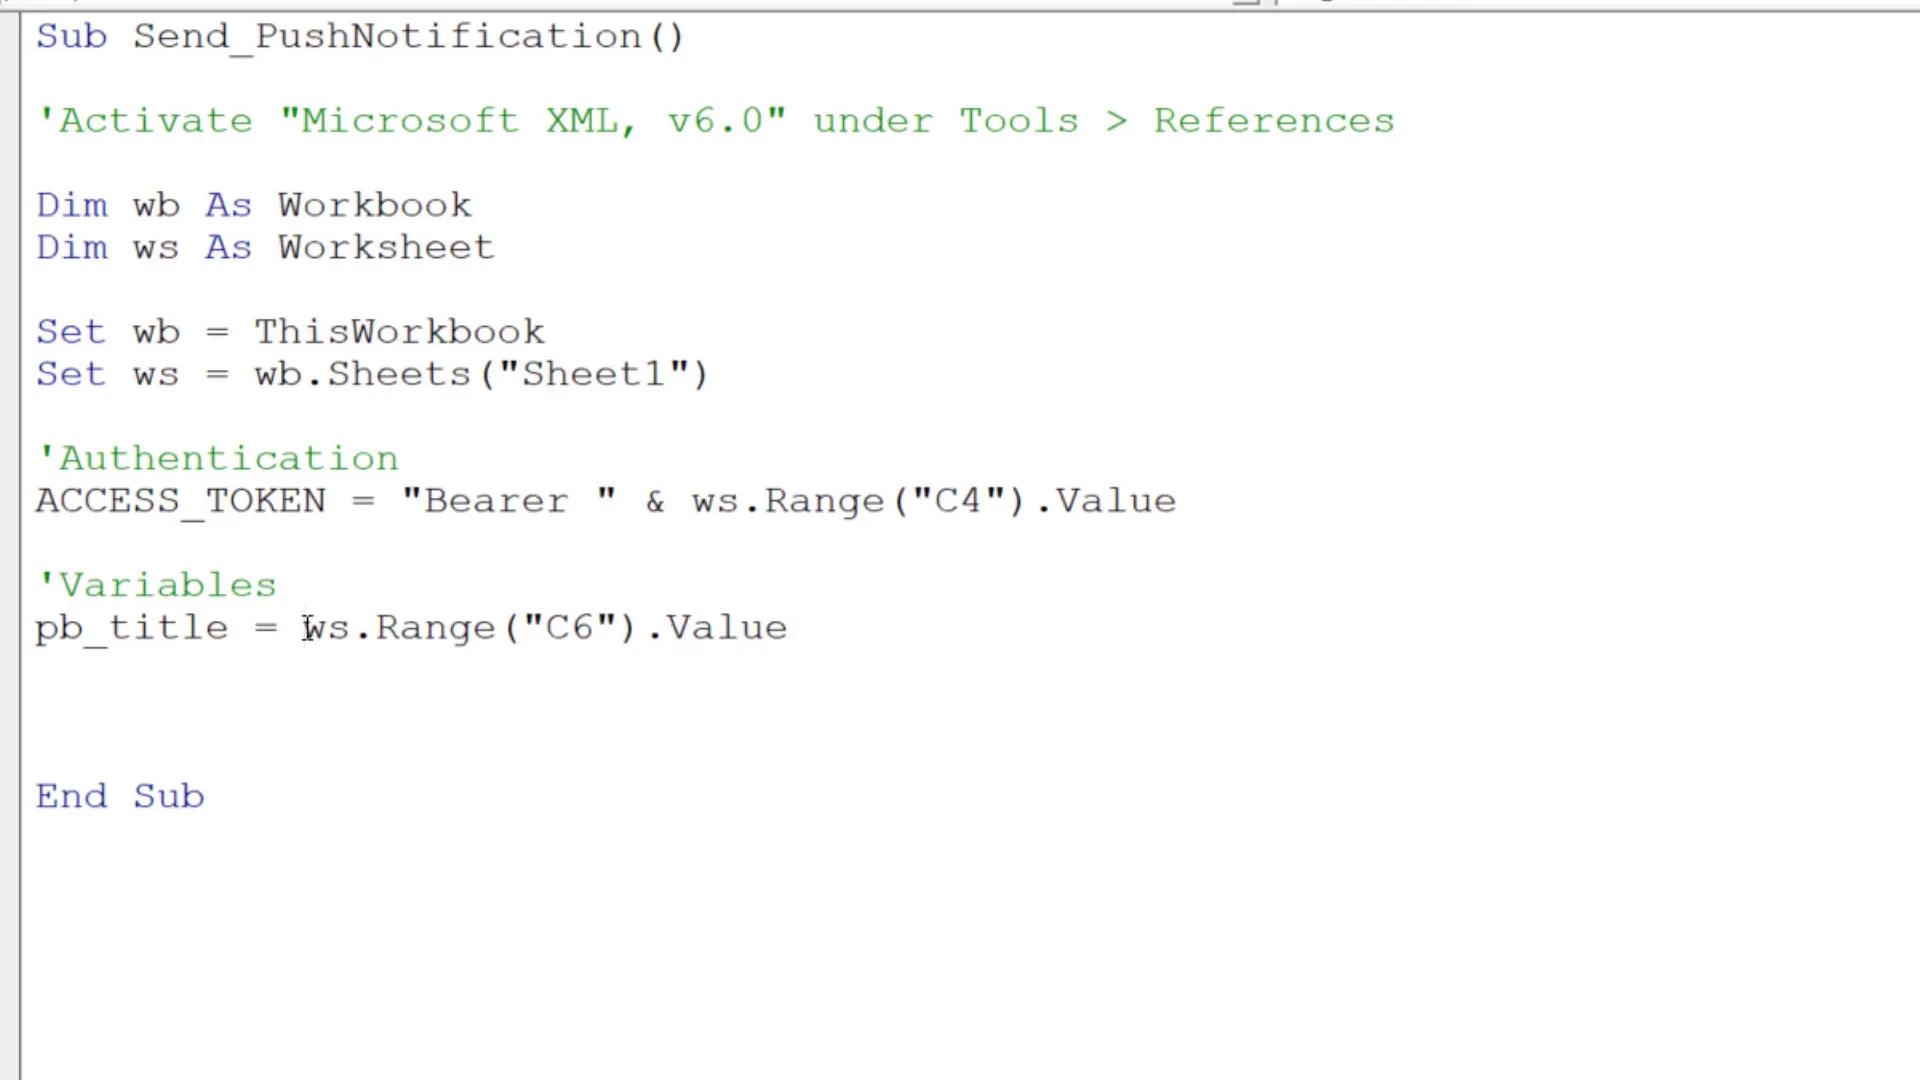
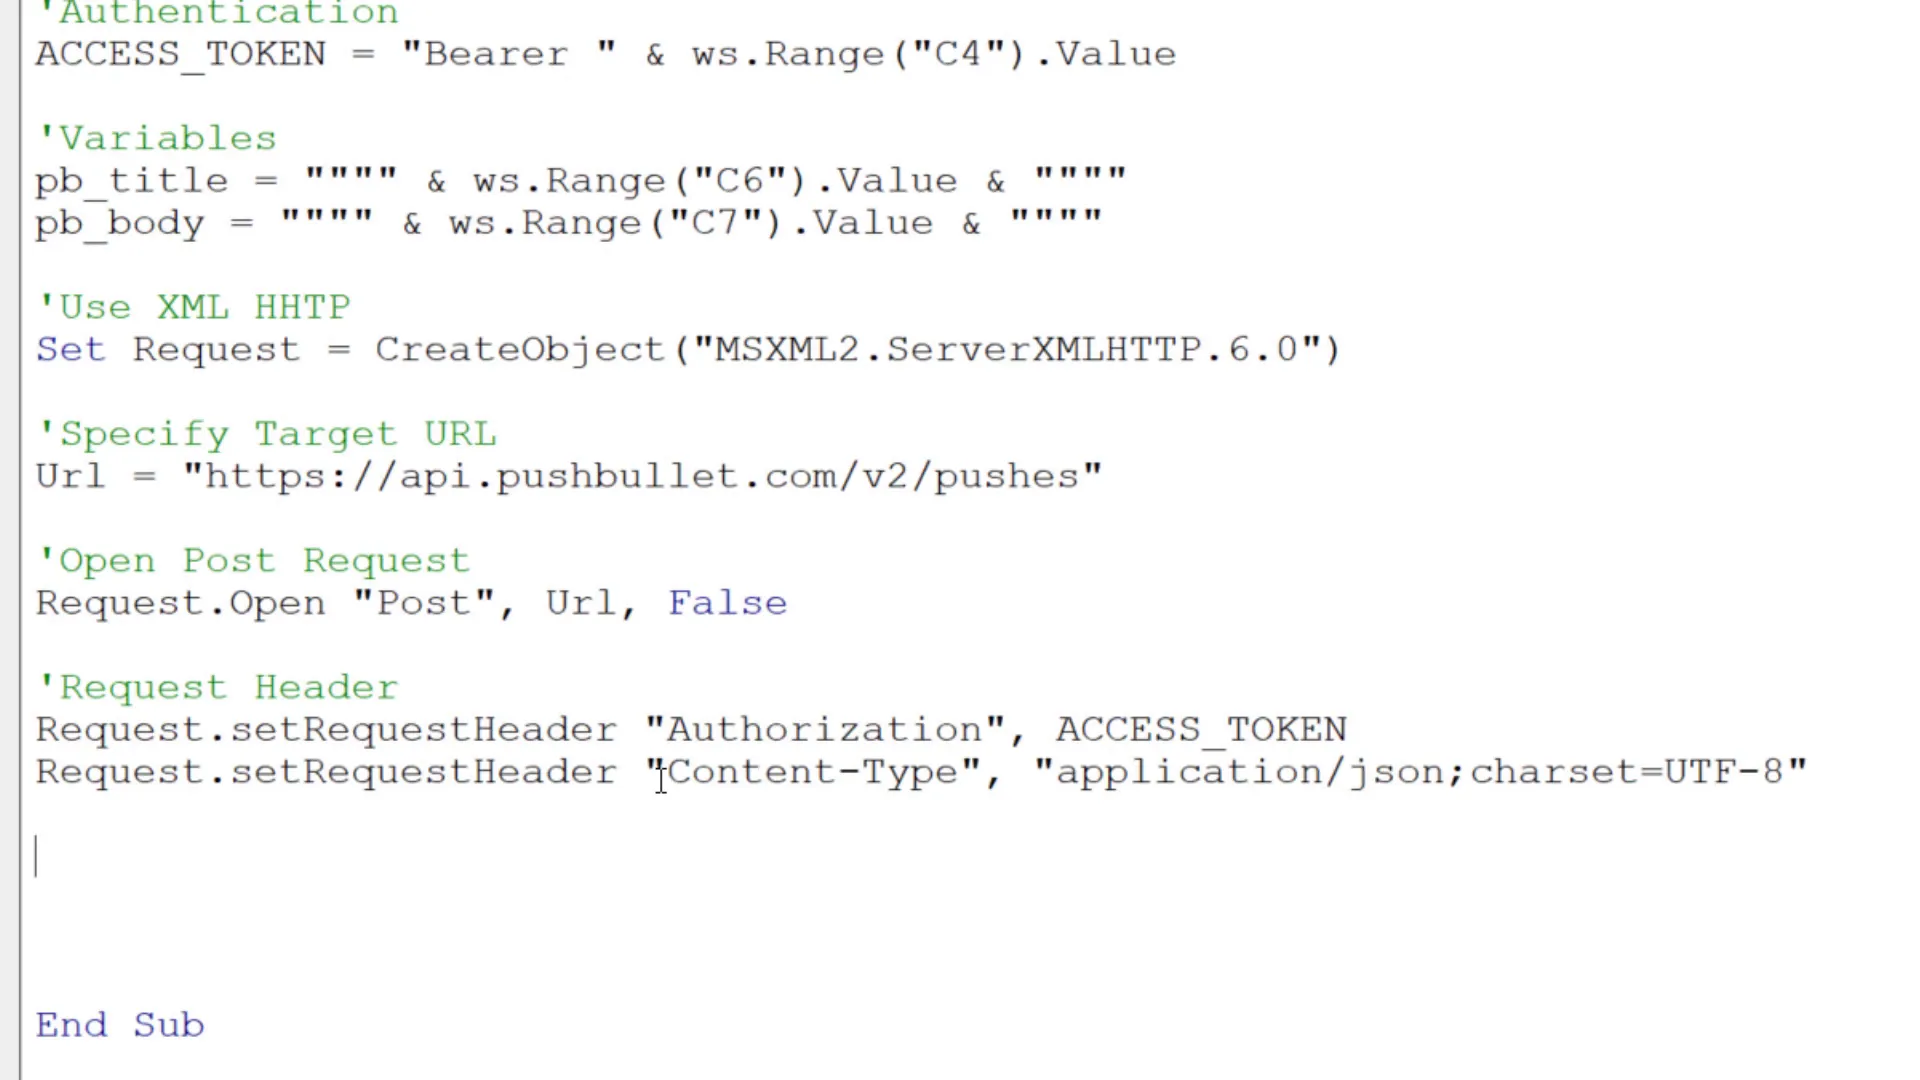
Next, retrieve the Access Token for authentication from cell C4. According to the Pushbullet API documentation, concatenate the Access Token with the string “Bearer”. After that, get the title for your push notification from cell C6.
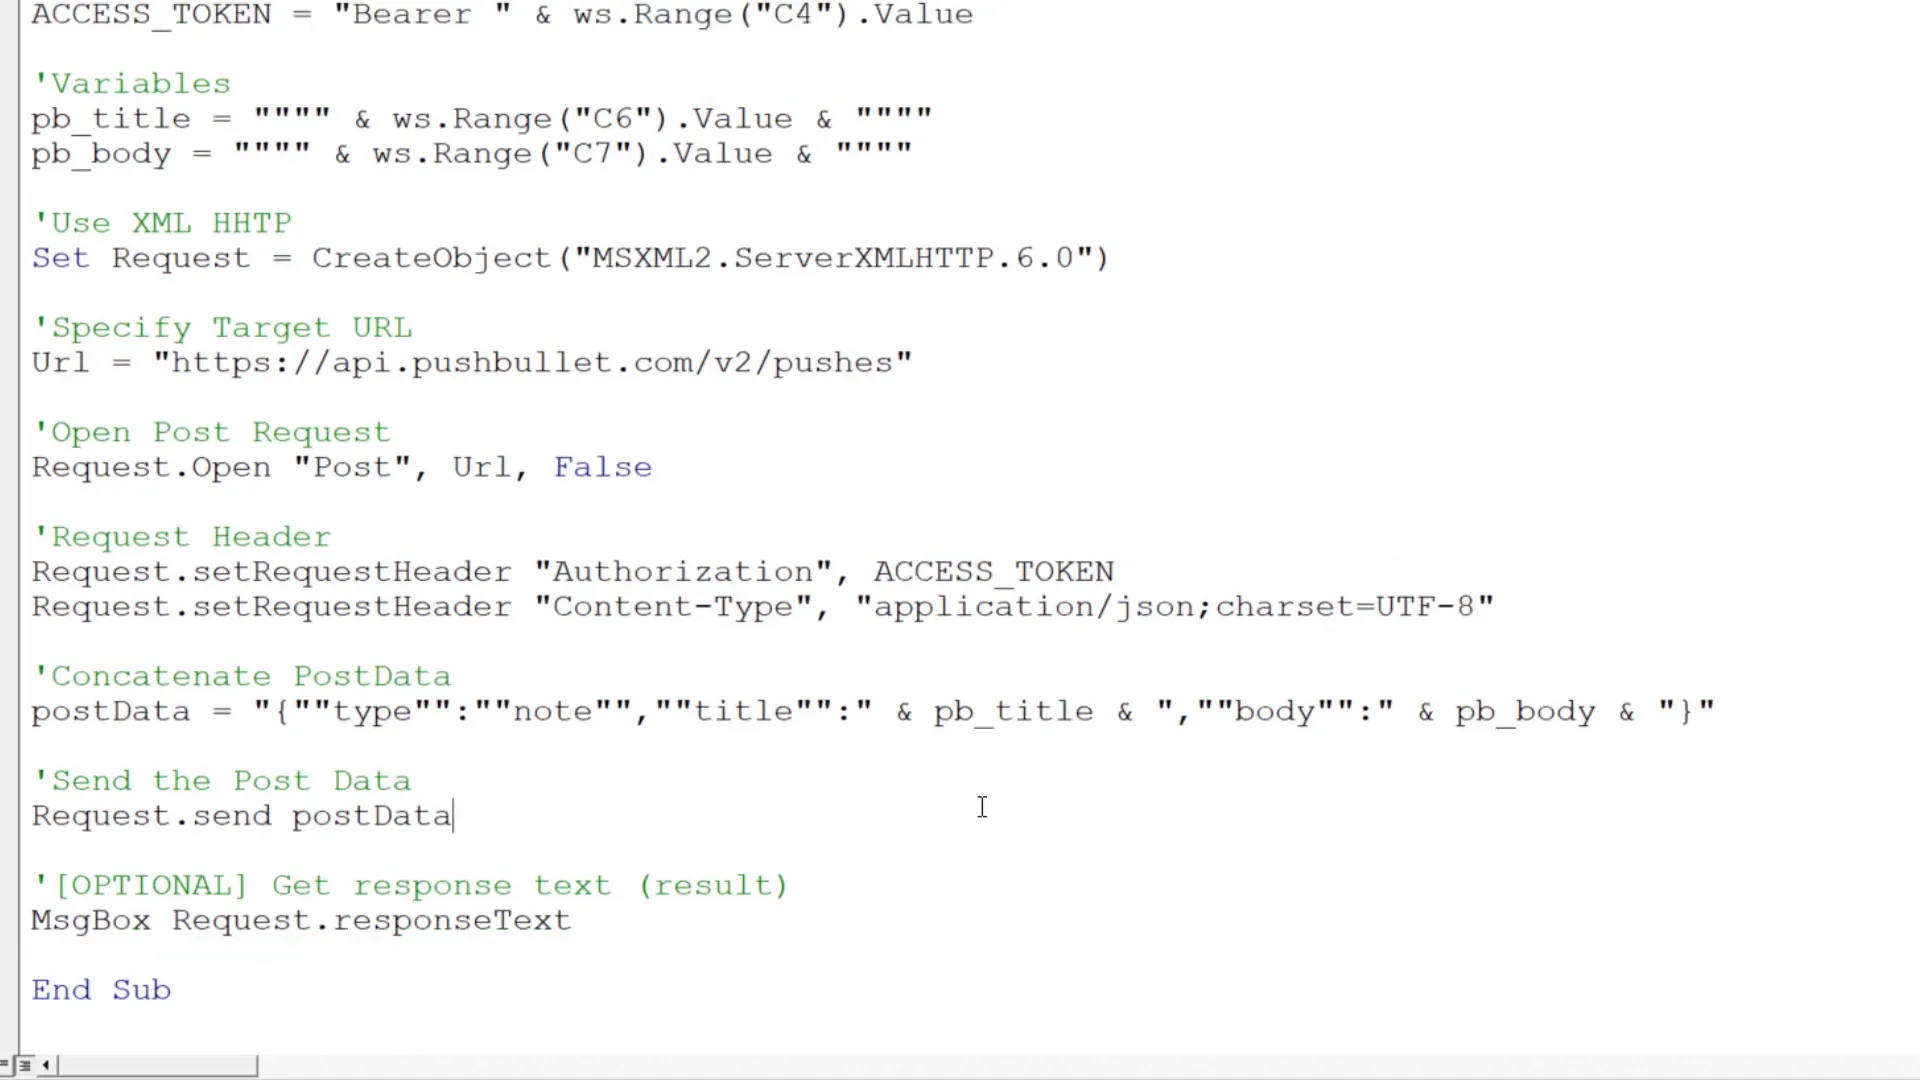
Later, we will send the POST request in JSON format. This means we need to enclose the title and body text in quotation marks. The following lines of code will create a request using the Microsoft XML v.6 object library, specifying the Pushbullet API URL. Now, we can open our POST request with the URL from above. Set up the request header for authorization using our Access Token, and specify the content type as JSON.
Finally, we can send our JSON formatted data. Optionally, we can retrieve the response text from Pushbullet, which is helpful for debugging. In my case, I will display the response text in a message box.
Running the Macro
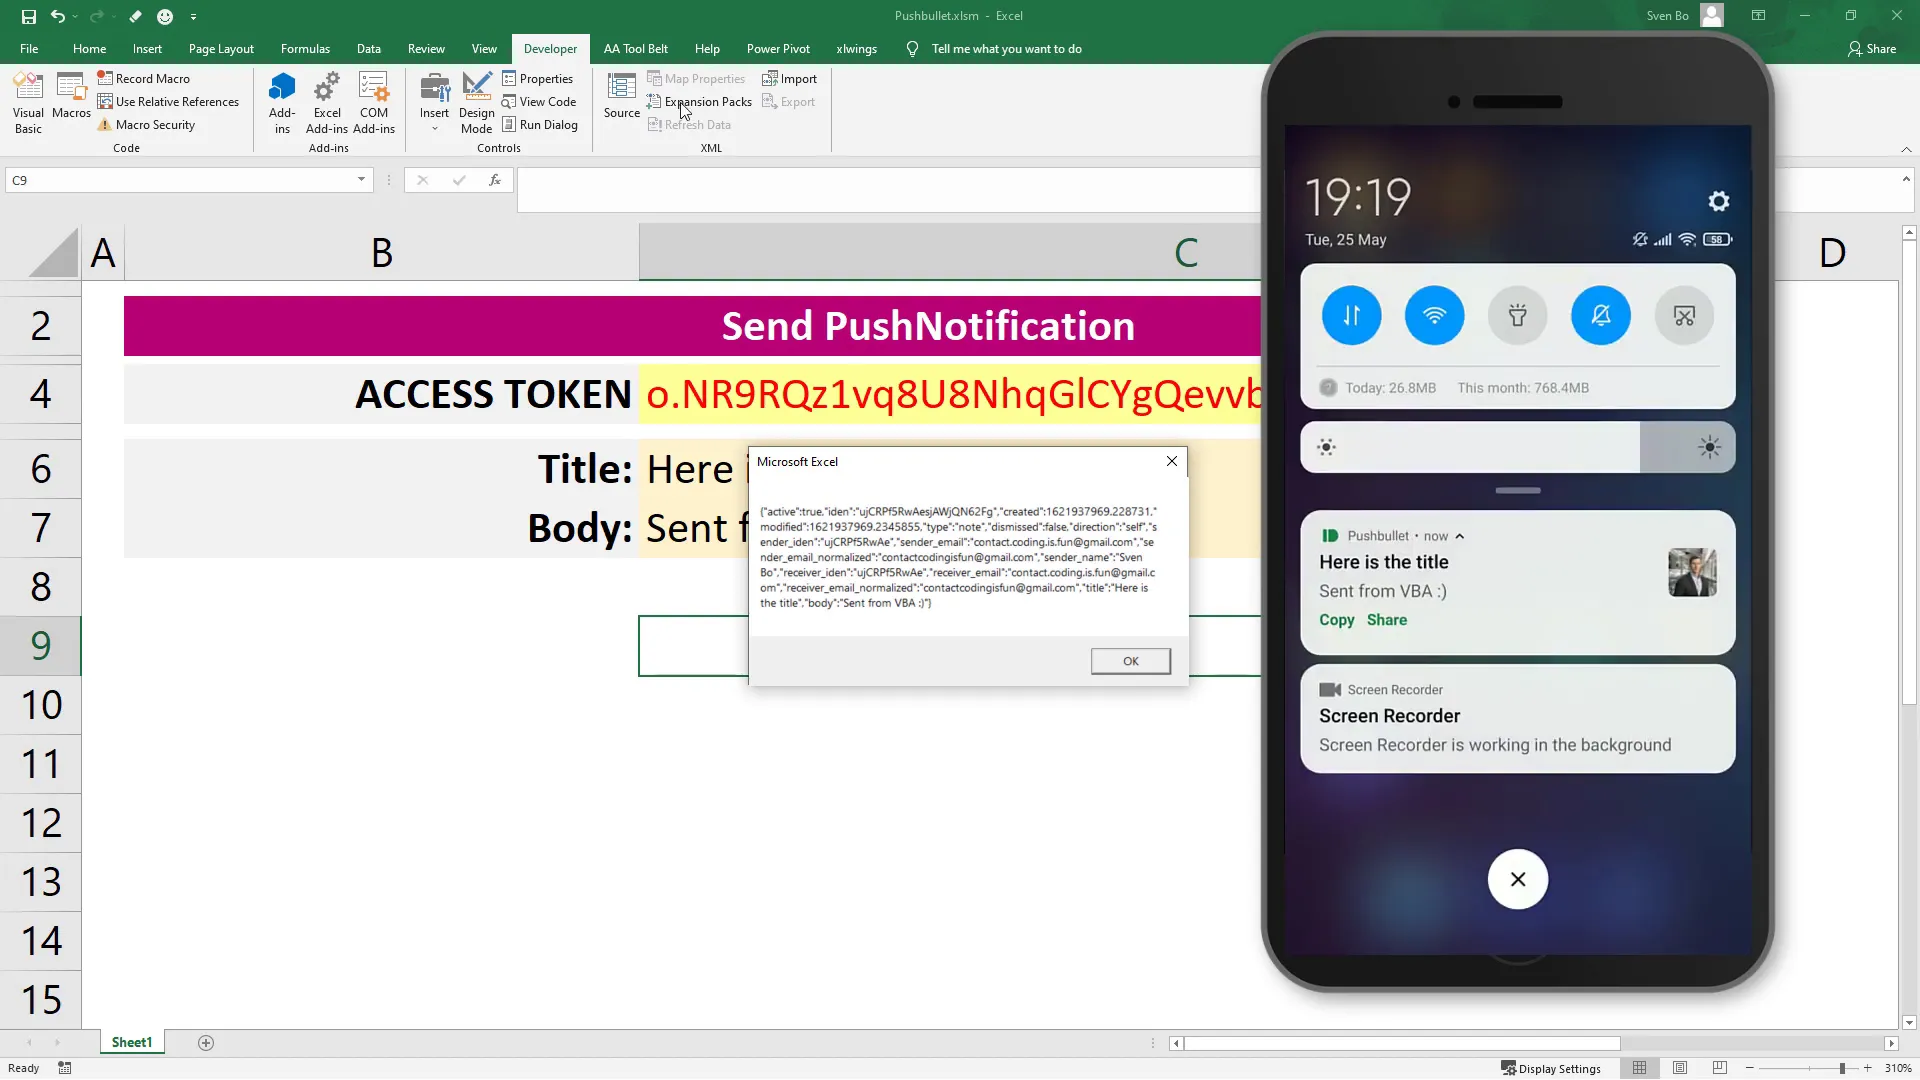
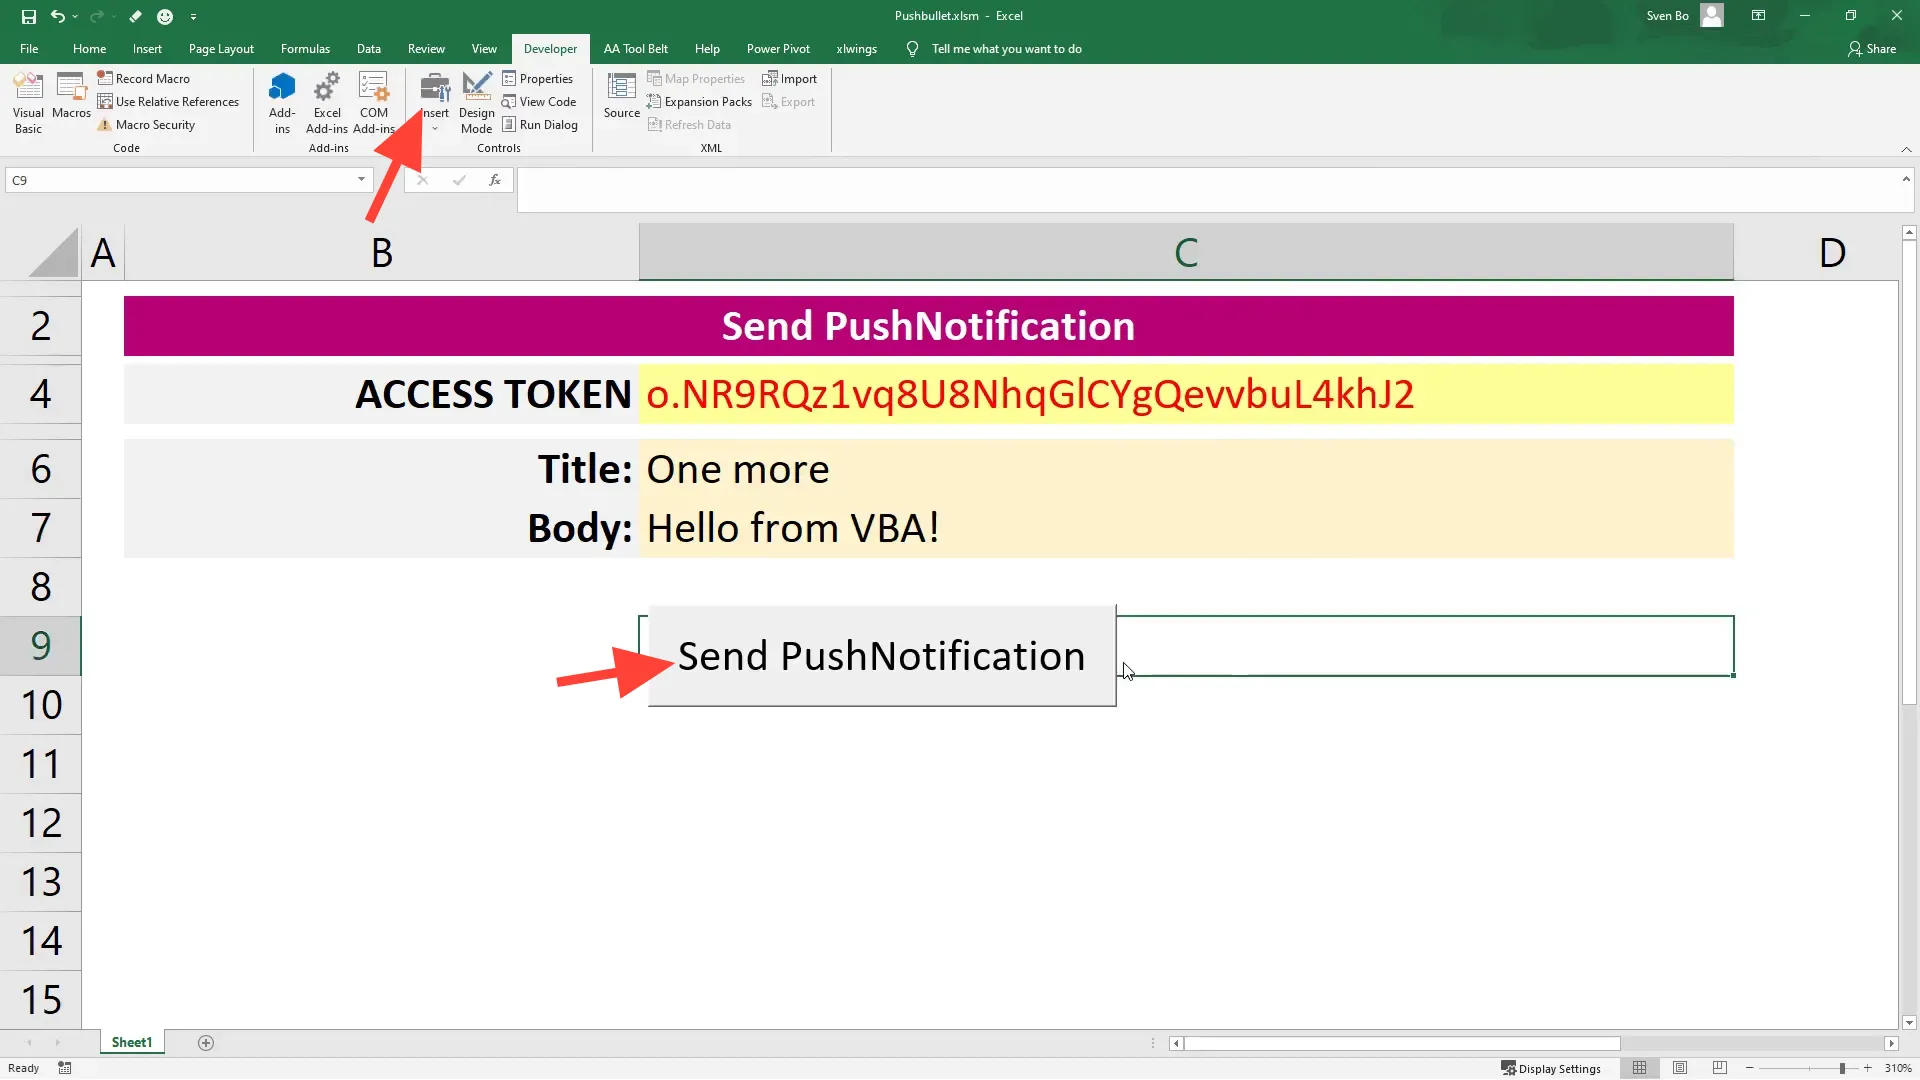
To run the macro, simply press F5 on your keyboard or click the button you’ve assigned it to. Once done, you should see the response text in a message box, and more importantly, you’ll receive the push notification on your smartphone!
Now that we know everything is working, you can also assign this macro to a button in Excel for easier access. Instead of getting the Access Token, title, and body text from the worksheet, you could directly insert them into your VBA code as well.
Conclusion
And that’s it! You’ve successfully set up your Excel to send push notifications to your smartphone using VBA. If you have any questions or run into any issues, feel free to leave a comment. Thanks for following along!