How to Send Bulk Emails from Excel with Gmail (Signatures, Attachments, Placeholders, Excel Ranges)
Introduction
You know that feeling when you need to send a bunch of personalized emails—maybe to your team, your customers, or clients—and the whole process feels like trying to herd cats? You want each message to feel personal, maybe with a little flair, but sending them one by one? That’s a total time sink. What if I told you there’s a way to send hundreds of customized emails right from Excel, using your free Gmail account, without breaking a sweat?
Well, buckle up, because I’m about to introduce you to a nifty Excel-based tool I created that turns your spreadsheet into a powerful email-sending machine. It’s called the Gmail Blaster, and it’s perfect for anyone who wants to send personalized bulk emails quickly, with the ability to add attachments, inline images, Excel tables, and even HTML signatures.
Why Use Excel to Send Bulk Emails?
If you’ve ever tried to send personalized emails to a large group, you know the pain of juggling email clients, copy-pasting, and hoping you don’t miss anyone or make embarrassing mistakes. Excel is already where you keep your contact lists, data, and notes—it makes sense to harness that power directly.
The Gmail Blaster tool bridges the gap between your data and your email inbox, enabling you to:
- Send hundreds of personalized emails in one go.
- Use placeholders to dynamically insert names, dates, and other info.
- Randomize subject lines with spin text, so your emails don’t feel robotic.
- Attach files and include inline images or even Excel tables inside the email body.
- Customize fonts, delays between emails, and add HTML signatures.
All from within Excel, powered by your free Gmail account. No extra software required (except Excel on Windows, but we’ll get to that).
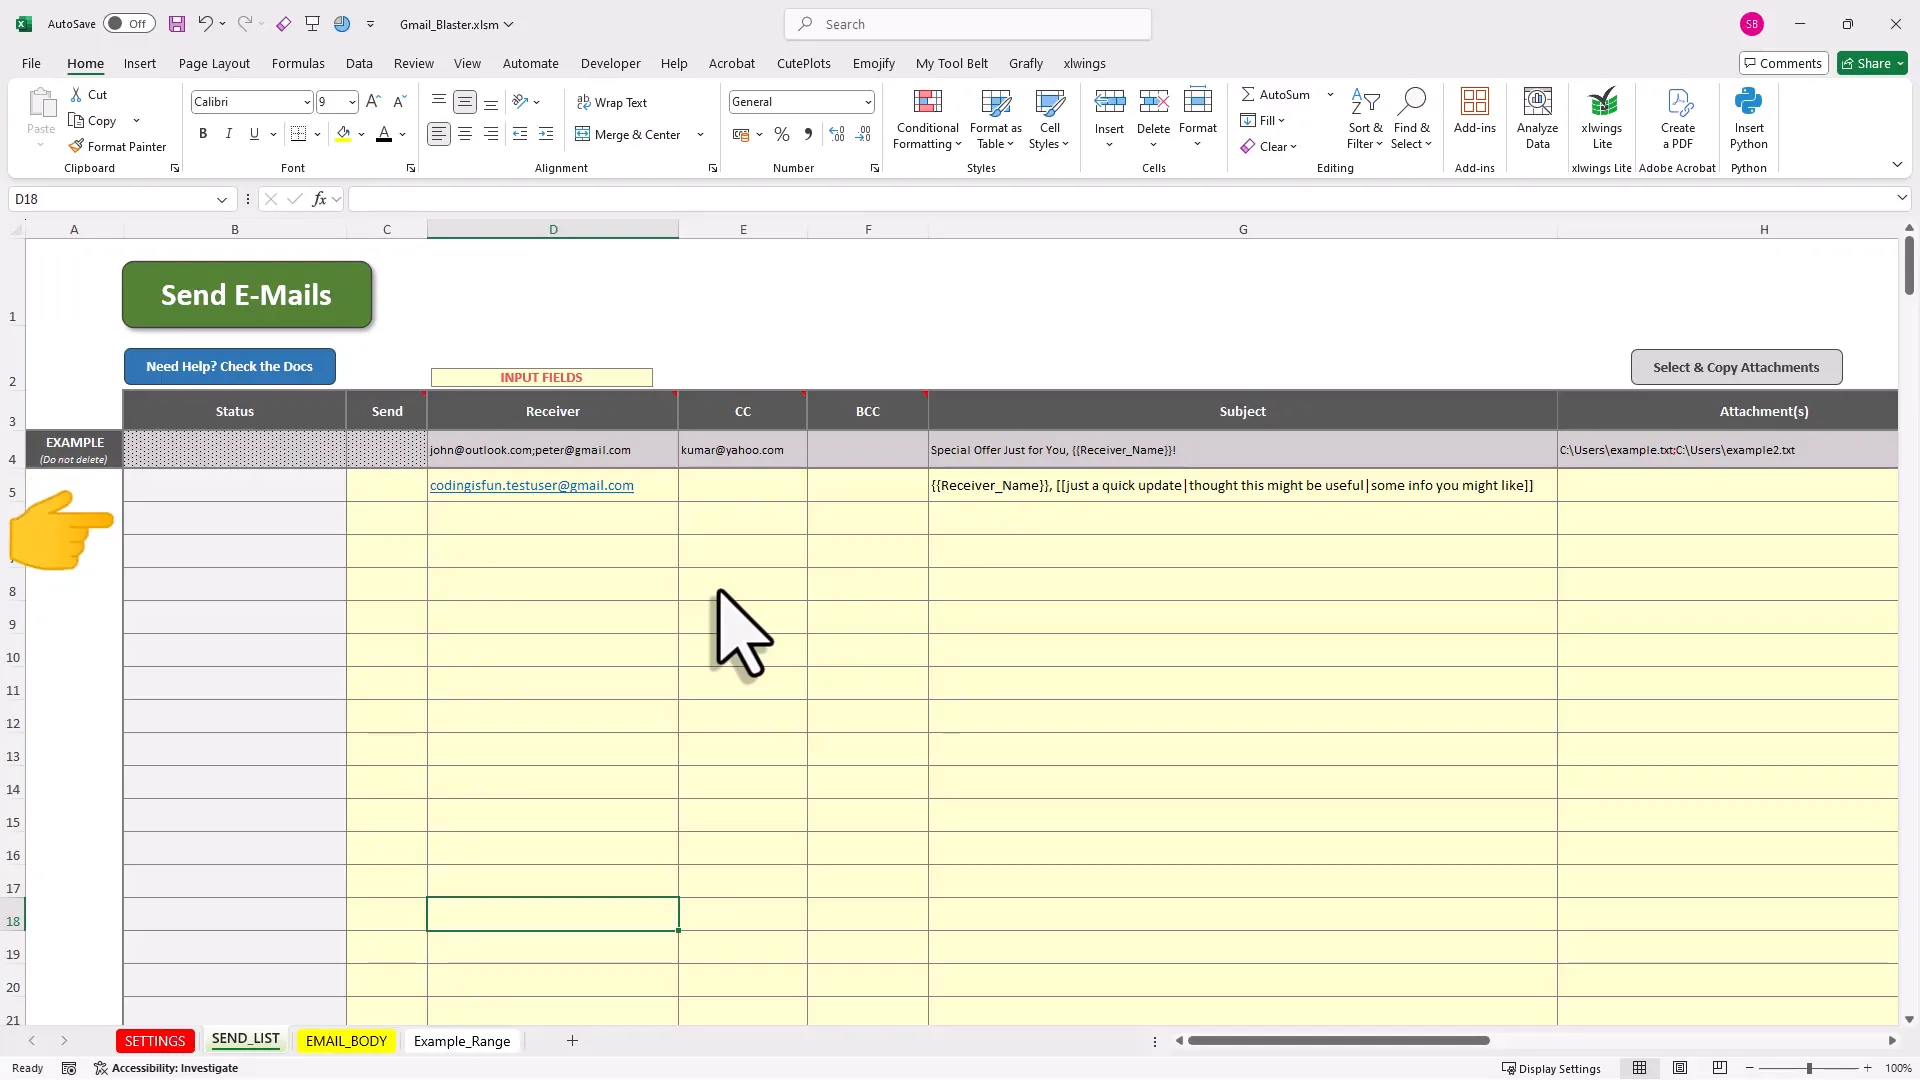
Getting Started: Setting Up Your Emails in Excel
Imagine your Excel spreadsheet as a mailing list on steroids. Each row represents one email. Here’s how it works:
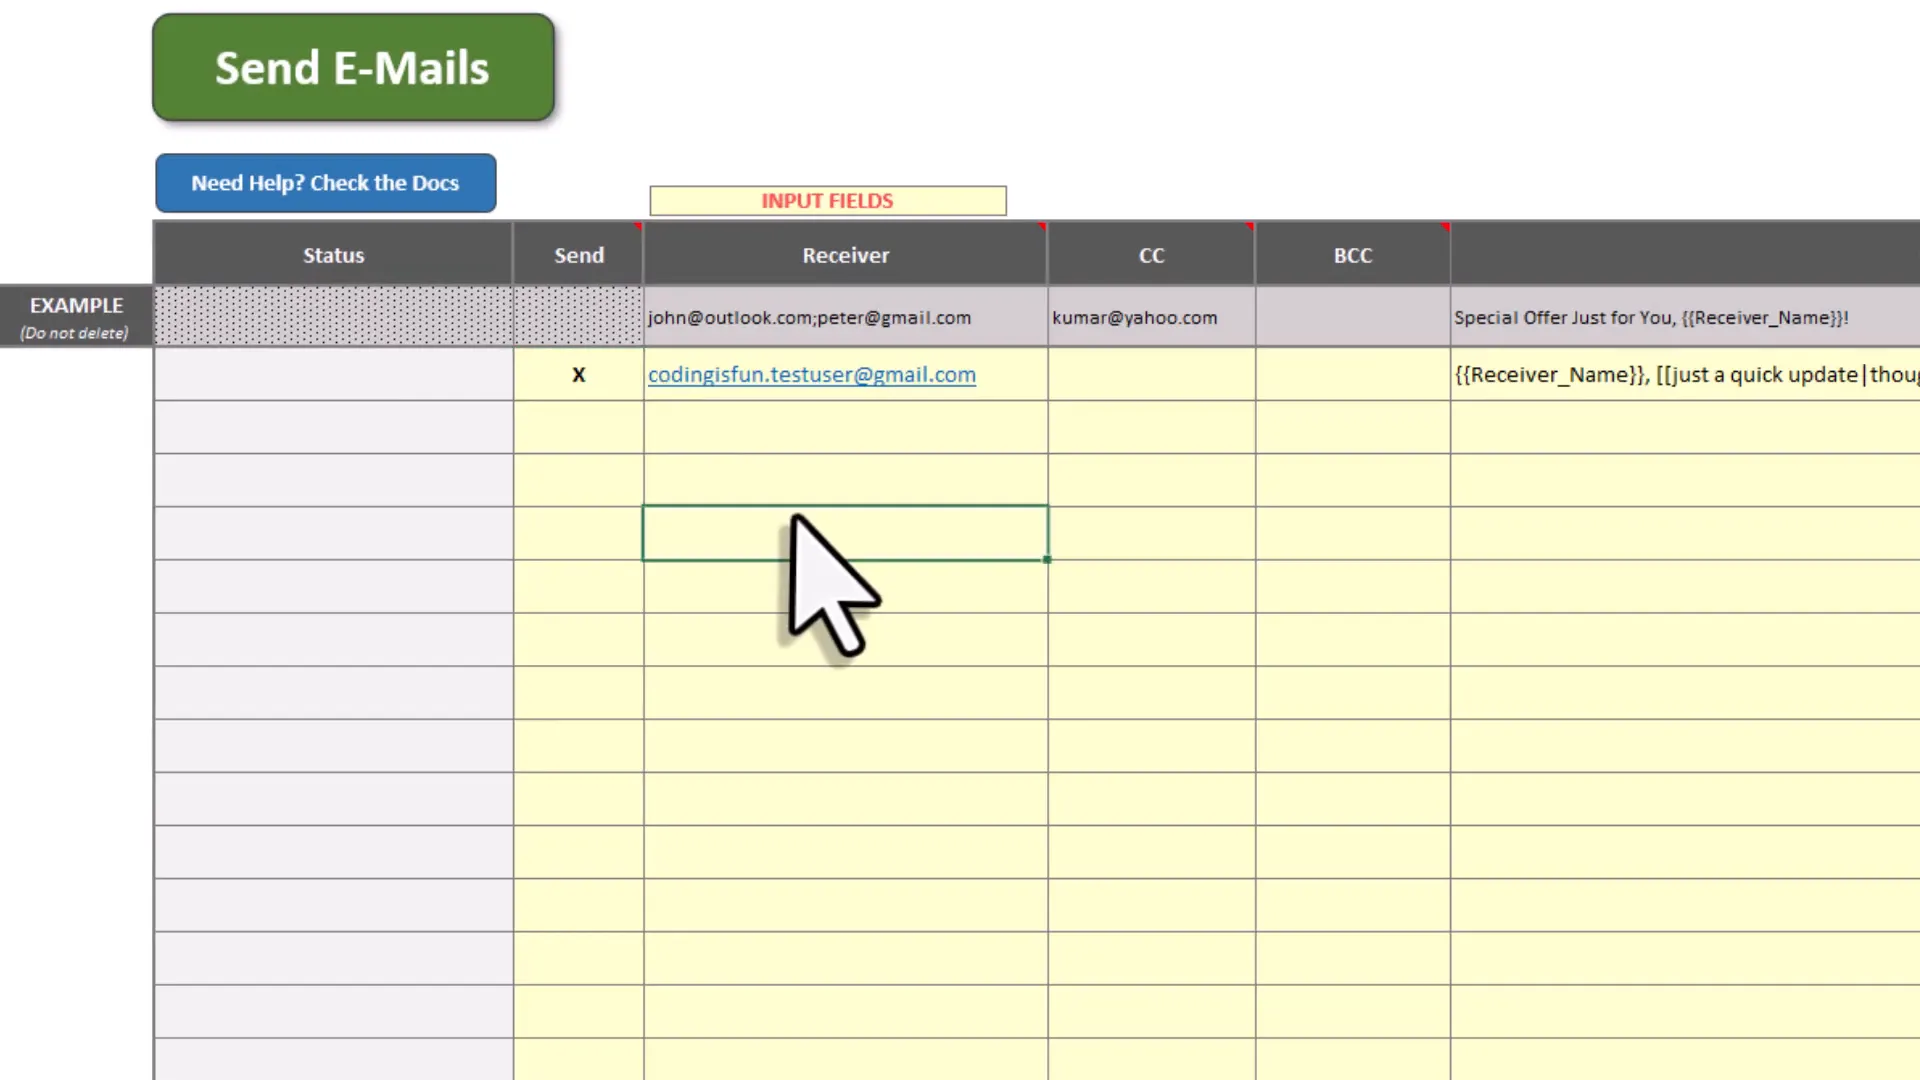
- Mark the row with an “X” to indicate you want to send that email. Easy, right? Just a simple flag.
- Add the receiver’s email address. It doesn’t have to be Gmail—any valid email address works. Want to send to multiple people? Separate addresses with semicolons.
- Optionally, add CC or BCC addresses. You can keep these blank if you don’t need them.
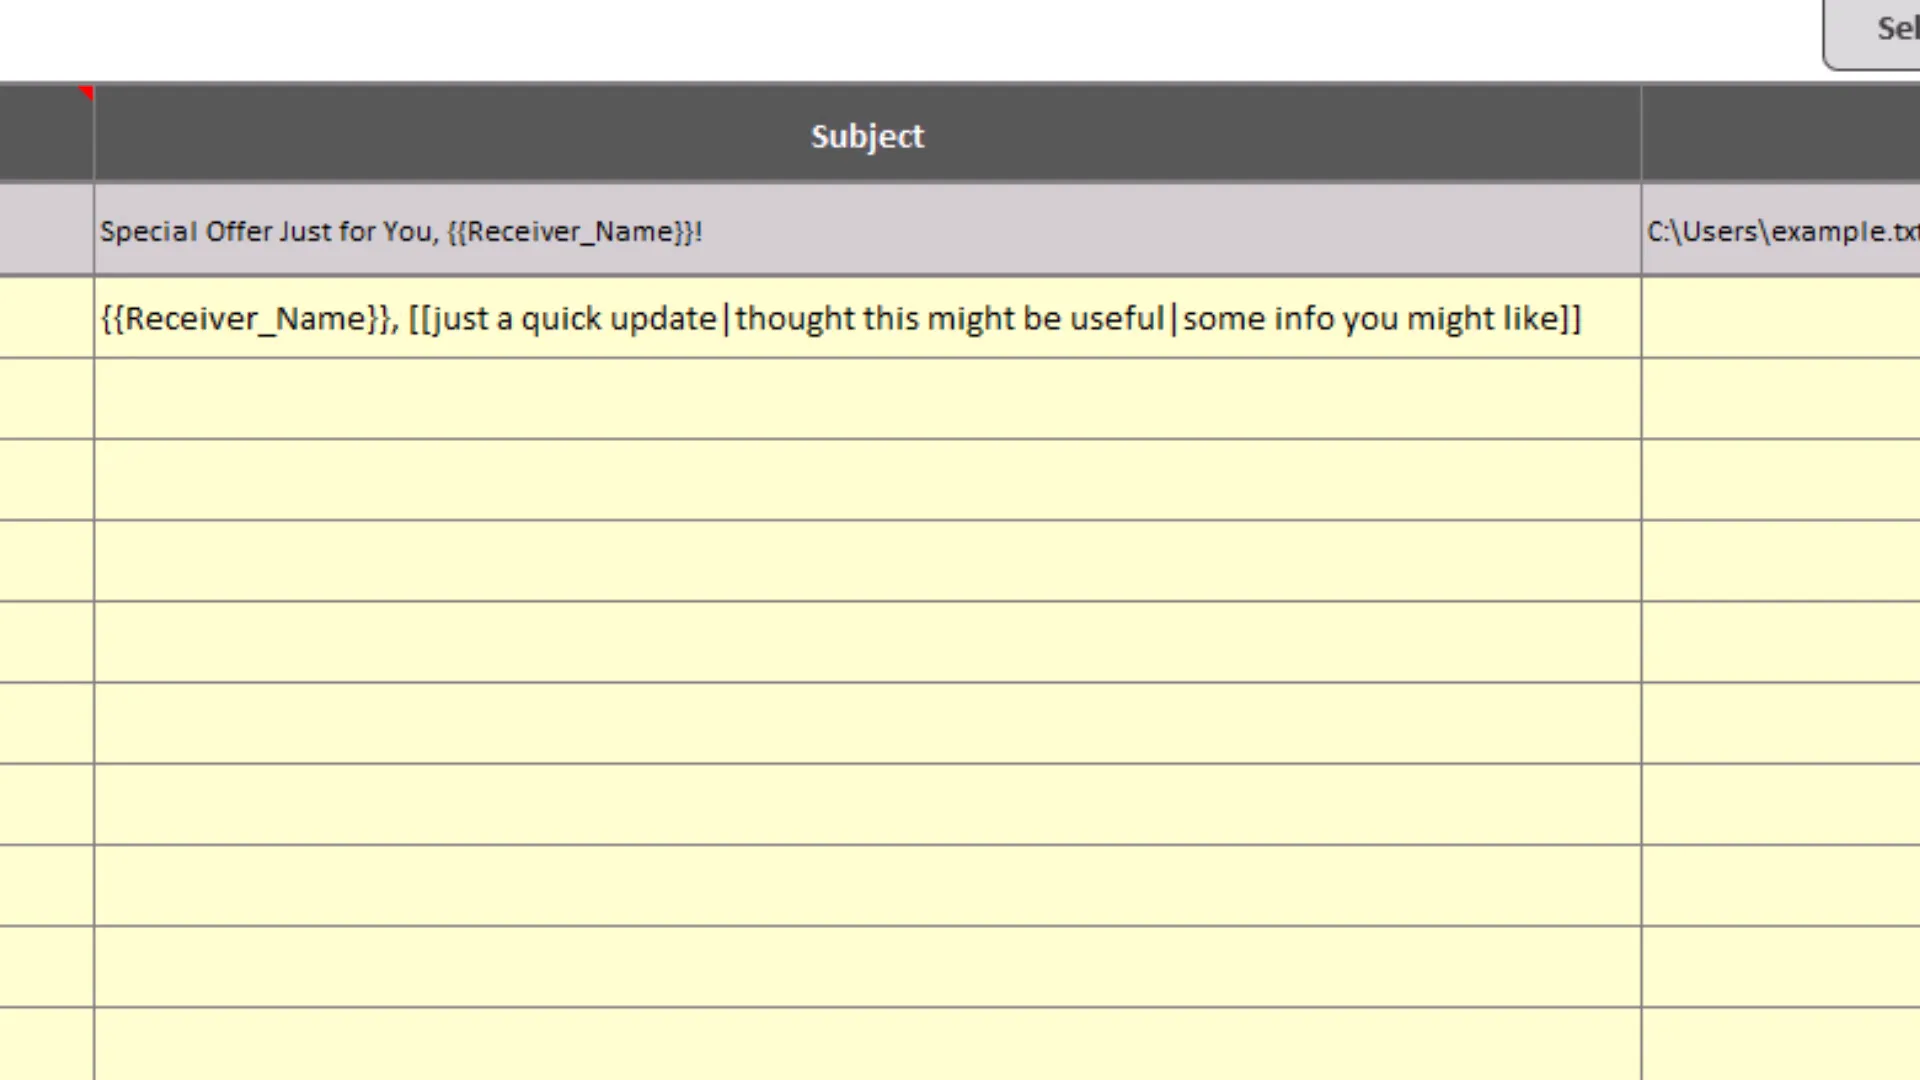
- Enter your subject line. This can be plain text or you can spice it up with placeholders and spin text (more on that soon).
For example, if I’m sending the same email to ten people, I just fill out one row, then drag it down to copy it to other rows, updating the recipient emails as needed.
Personalizing with Placeholders and Spin Text
Here’s where things get fun. Instead of sending the same boring message to everyone, you can personalize each email dynamically:
- Placeholders: Wrap tags in double curly braces, like
{{receiver_name}}. The tool will replace this tag with the actual name or value you specify for each email. - Spin Text: Use double square brackets with options separated by pipes, like
[[Hi|Hello|Hey]]. The tool randomly picks one option per email, making each message feel fresh and less robotic.
This combo helps your emails feel like they were crafted by a thoughtful human, not a machine (even though, well, a machine is doing most of the work).
Adding Attachments Without the Hassle
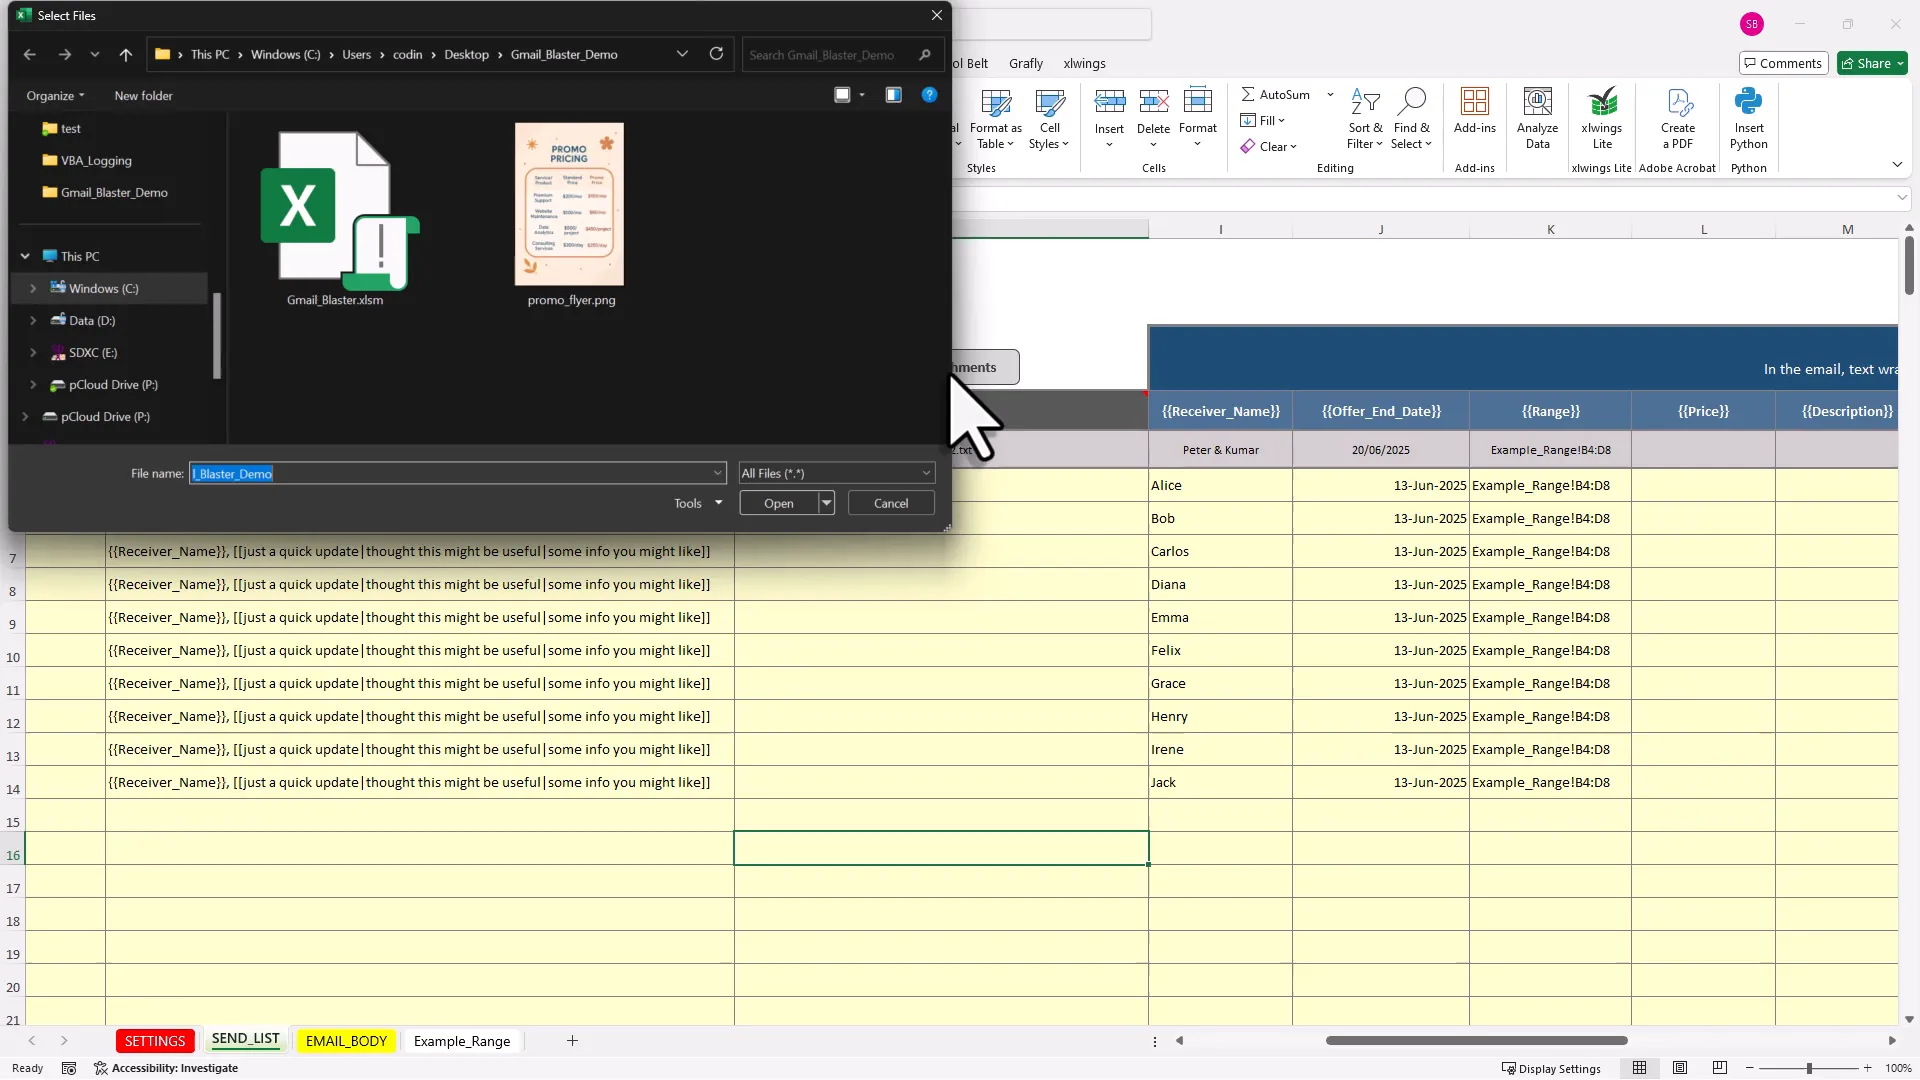
Need to send attachments? No problem. Just place the file path of the attachment into the designated column in your Excel sheet. To make this even simpler, you can click a button in the tool that opens a file picker dialog. Select your files, and the tool copies the file paths to your clipboard—then just paste them into the cells.
Want to attach the same file to multiple emails? Just drag the file path down to other rows. Whether it’s an image, a PDF, or any other file, the tool handles it smoothly.
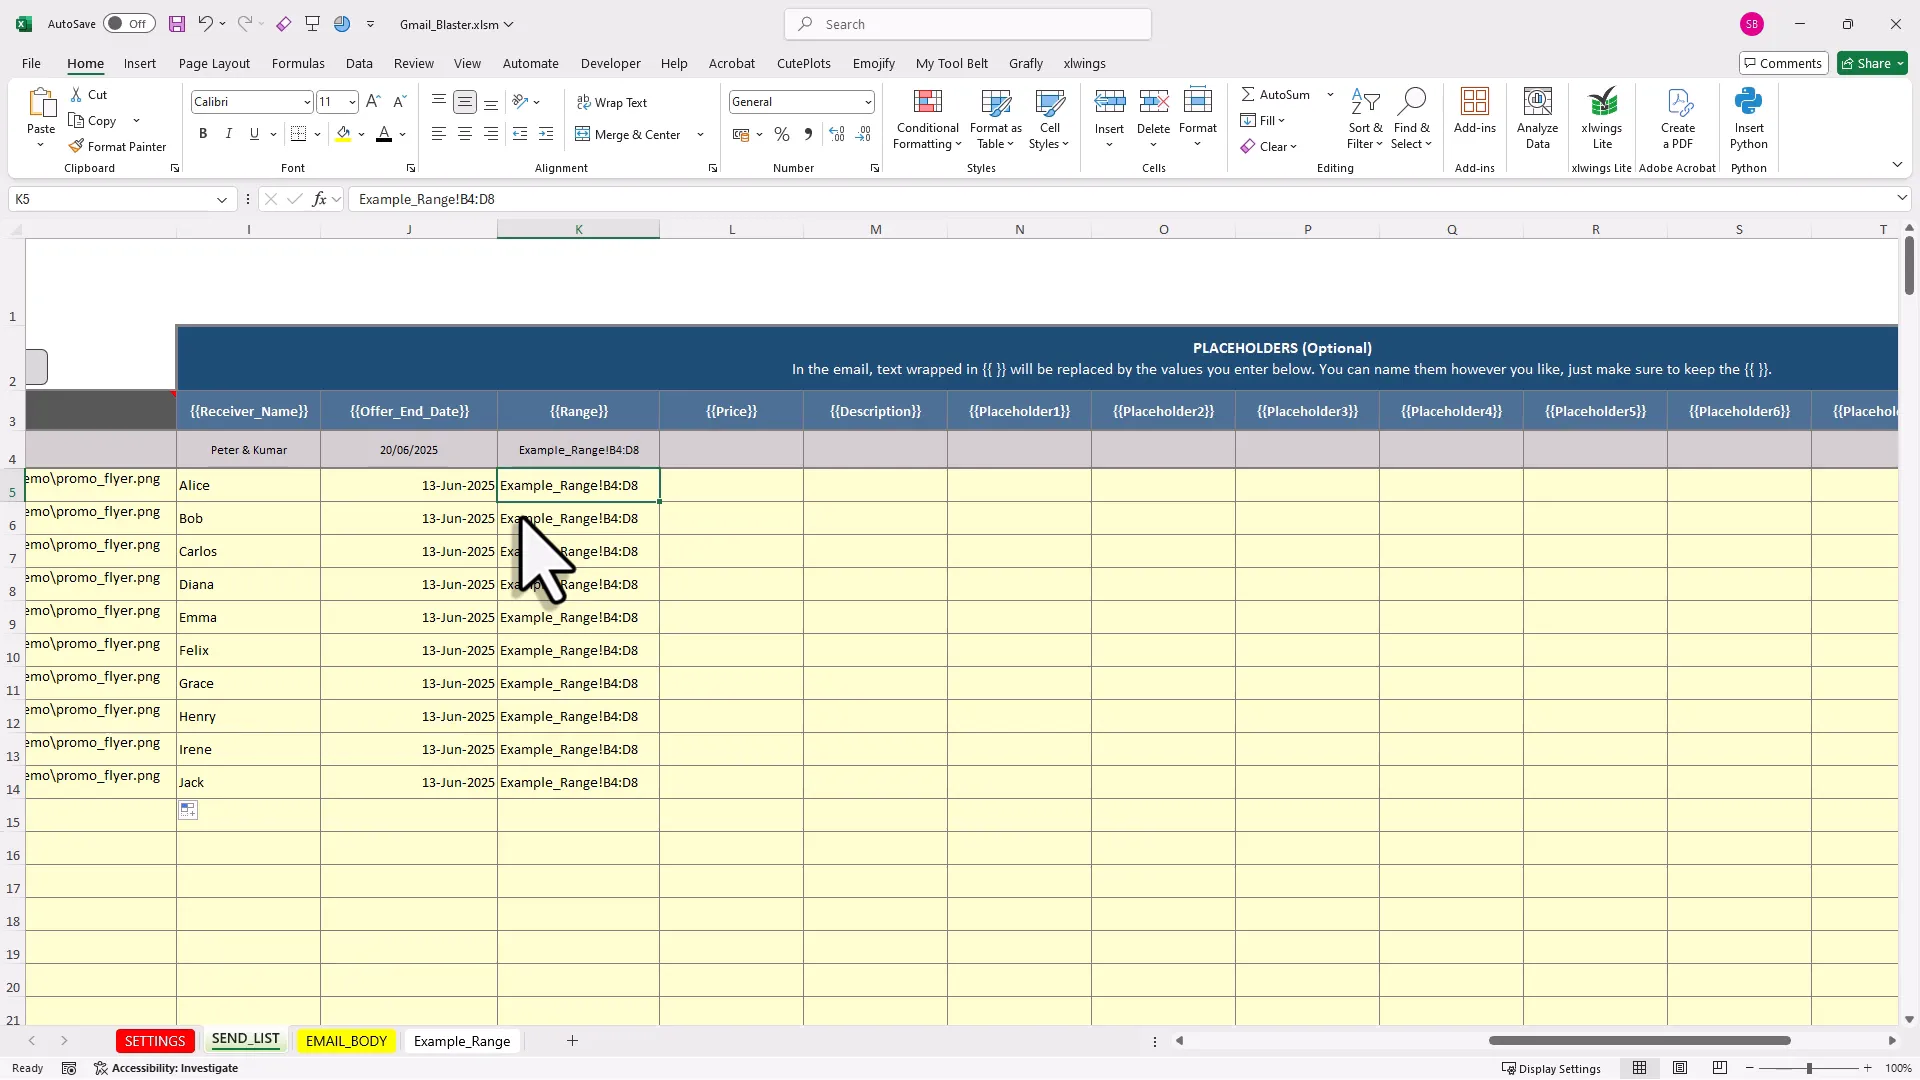
Mastering Placeholders: Text, Dates, and Excel Ranges
Let’s zoom in on placeholders a bit more because they’re the true secret sauce of this tool.
- Text Placeholders: Replace tags with personalized text, like a recipient’s name or a custom greeting.
- Date Placeholders: Insert dynamic dates using Excel formulas. For example, you can use
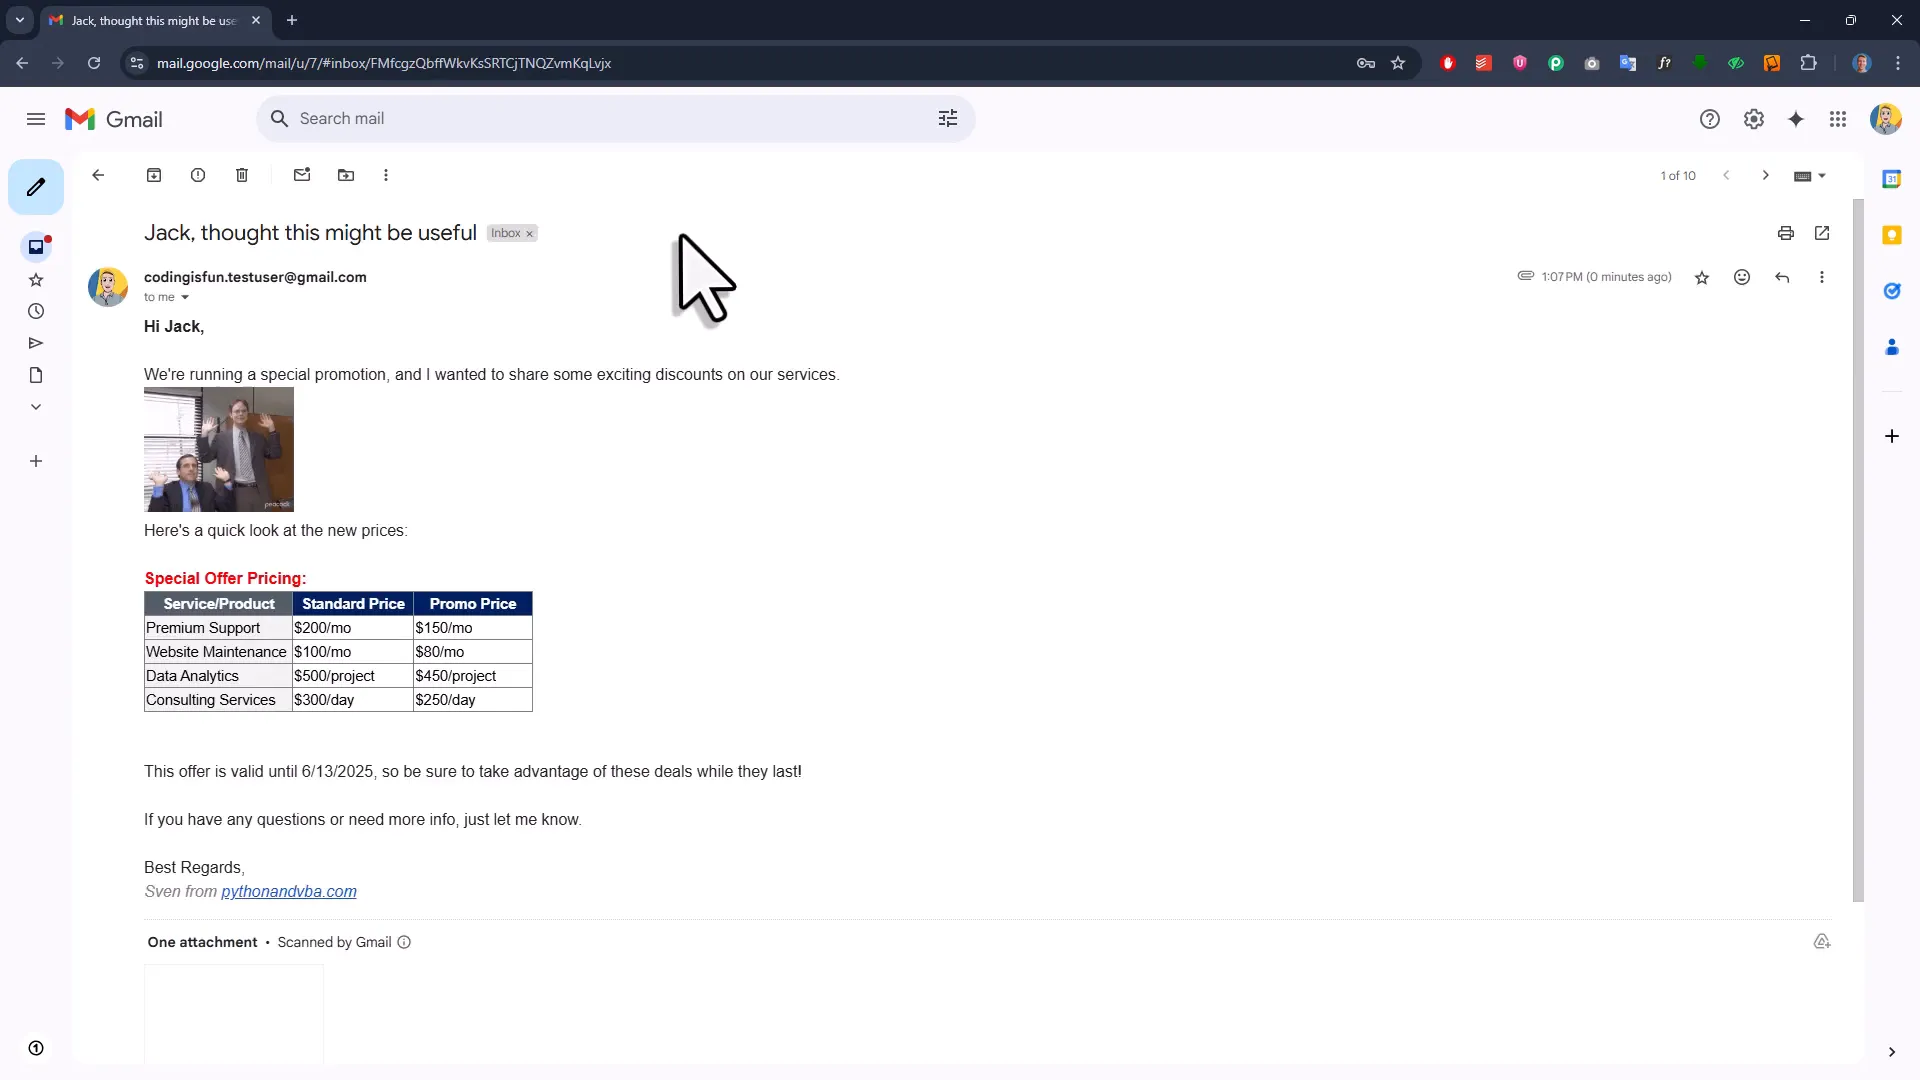
=TODAY()+7to include a date one week from today. - Range Placeholders: This is a game changer—include an Excel range (like a pricing table or data chart) directly in your email. Just specify the sheet name and cell range in the placeholder, and the tool will embed the actual table into your email.
Imagine sending your clients a personalized pricing table, perfectly formatted and ready to use, right inside the email—not just a boring attachment or screenshot.
Crafting the Perfect Email Body with Style and HTML
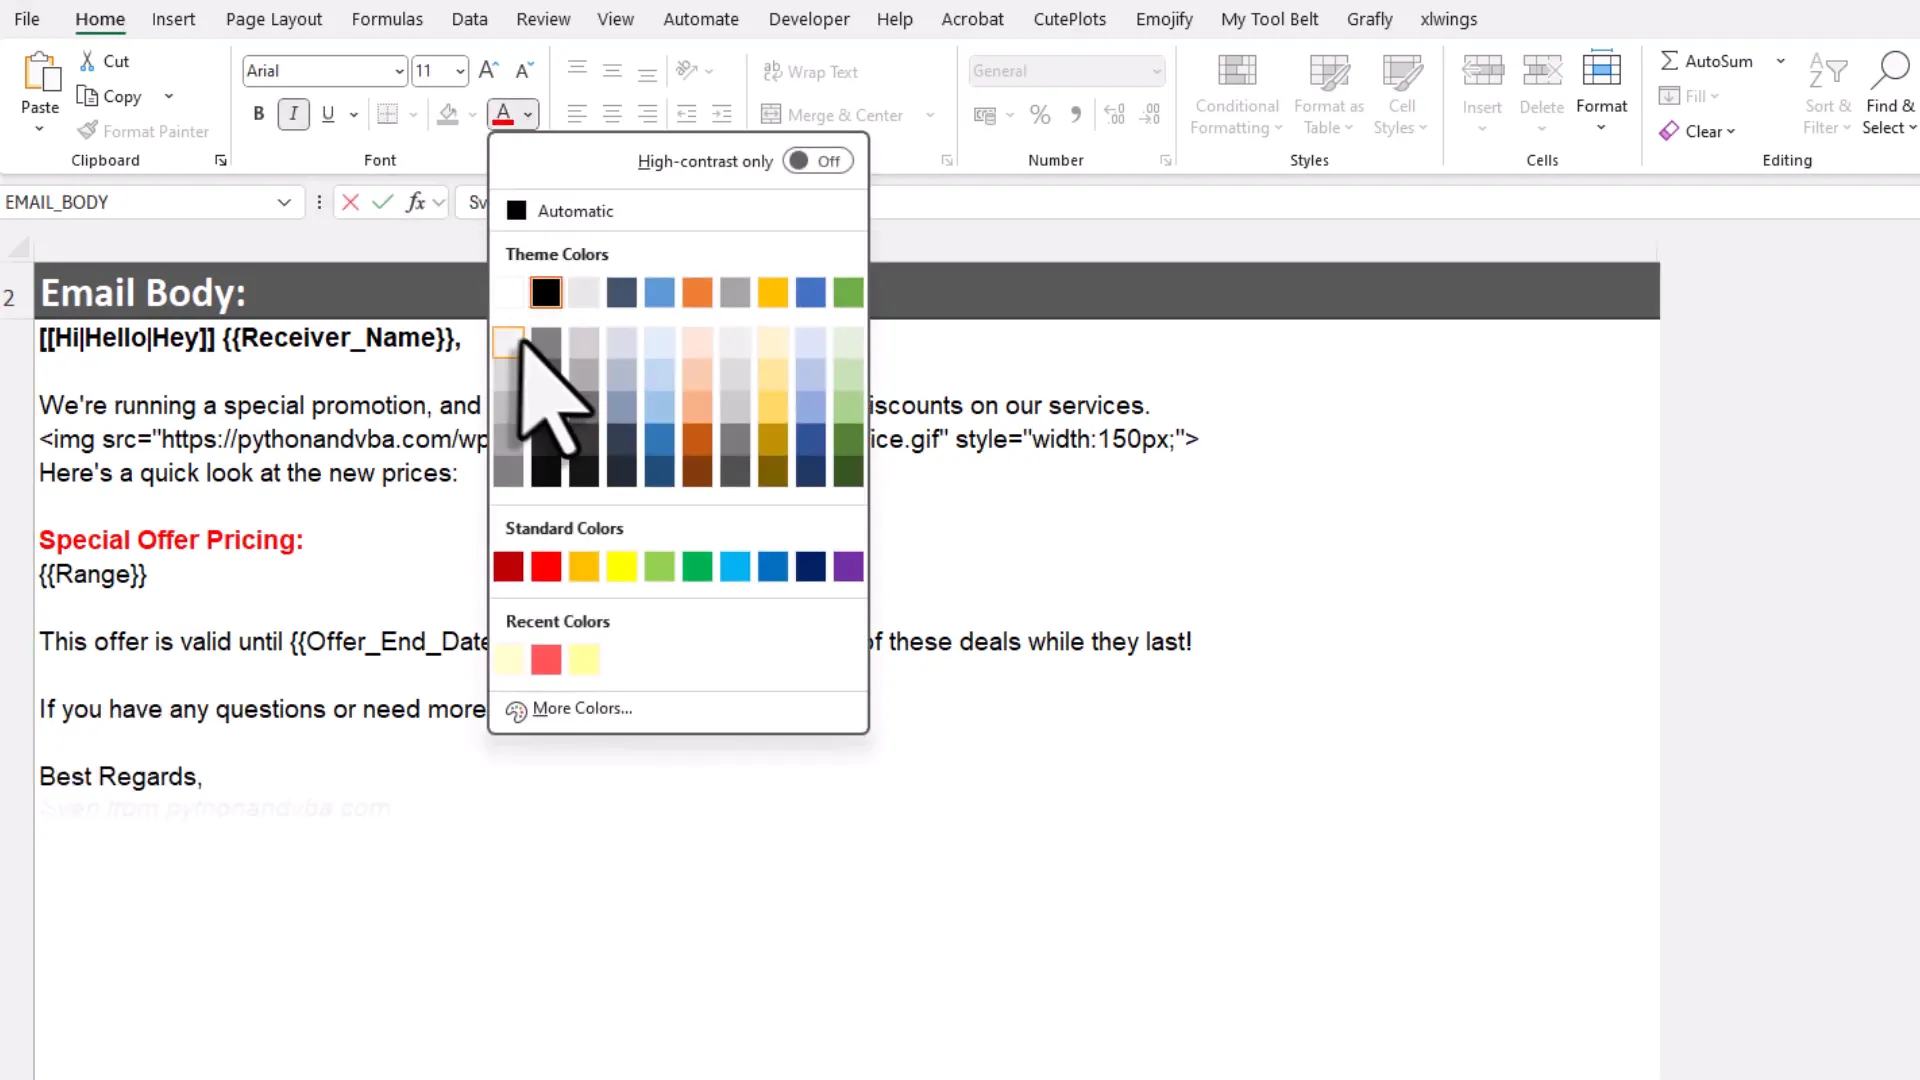
Now, onto the heart of your message—the email body.
In the tool, the email body is contained in one big Excel cell. You can double-click it and type your message as you would in any email client. But here’s the kicker: you can use Excel’s built-in formatting tools to style your text. Want bold, colored, or underlined text? Go for it.
If you’re feeling fancy, you can even use HTML tags inside the body. Want to add an inline image? Just insert an HTML tag with the image URL. (Note: The image must be hosted online—local file paths won’t work here.)
Placeholders and spin text work here too, so your greeting, date, or embedded Excel table will appear perfectly personalized for each recipient.
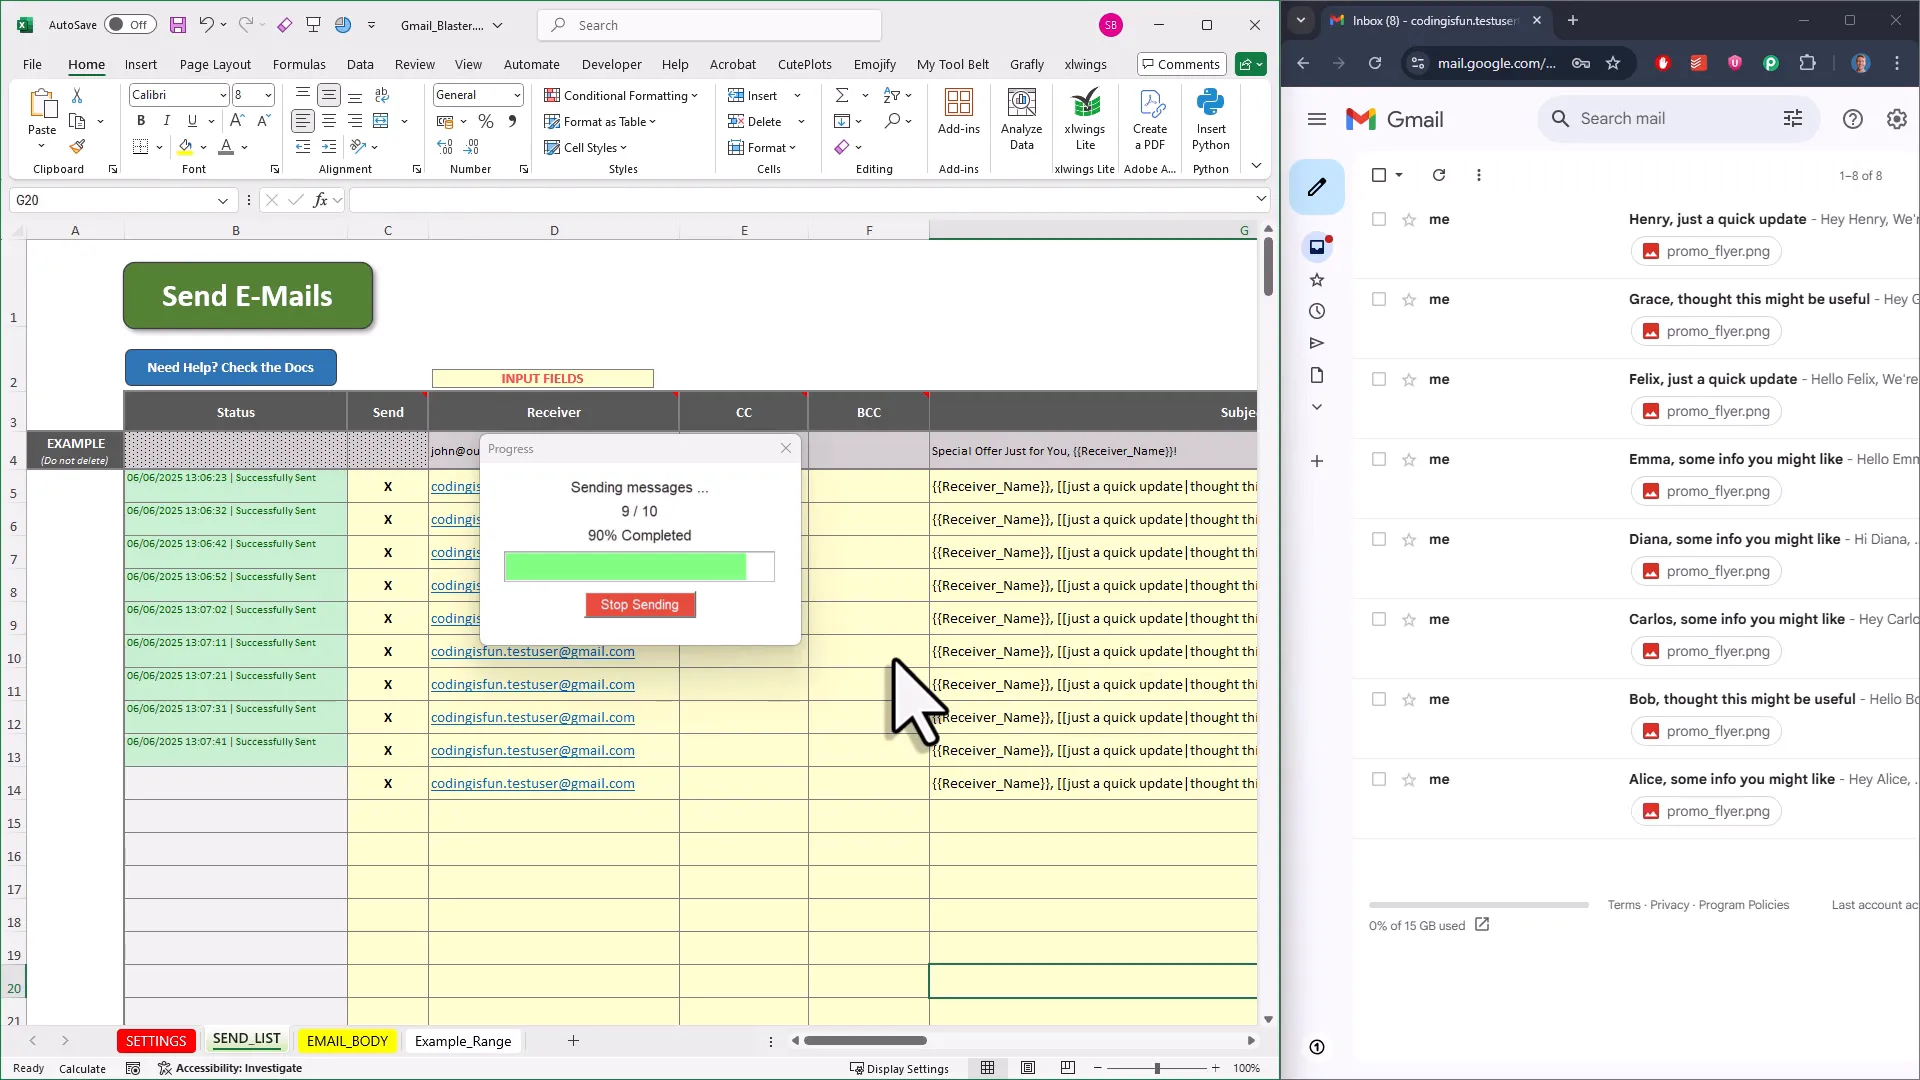
Sending Your Emails: Watch the Magic Happen
With everything set up, it’s time to send your emails. Here’s what happens:
- Mark the rows you want to send with an “X”.
- Click the send button.
- Confirm the action when prompted.
The tool will then process each row, sending emails one by one. You’ll see a progress bar showing the status, and the status column will update to indicate whether each email was sent successfully or if there were any errors.
Sending ten emails took me about one and a half minutes—pretty efficient for personalized bulk emailing!
What Your Recipients See: Clean, Personalized, and Interactive Emails
Once the emails hit the inbox, the magic is clear. The placeholders are replaced with the actual names, dates, and data ranges. The spin text randomizes greetings and subject lines, so each message feels unique.
The formatting you applied in Excel carries over perfectly—bold fonts, colors, even GIF animations.
Best of all, the Excel tables you inserted appear as real tables, not images. This means recipients can copy and paste the data directly into their own spreadsheets, making collaboration and analysis a breeze.
Attachments show up as expected, ready to be opened or downloaded.
Adding a Professional Touch with HTML Signatures
Plain text signatures are fine, but for that extra polish, you can add an HTML signature to your emails.
Here’s how:
- Create or obtain your HTML signature code. If you’re not a coder, free tools like emailsignatures.com can help you design one.
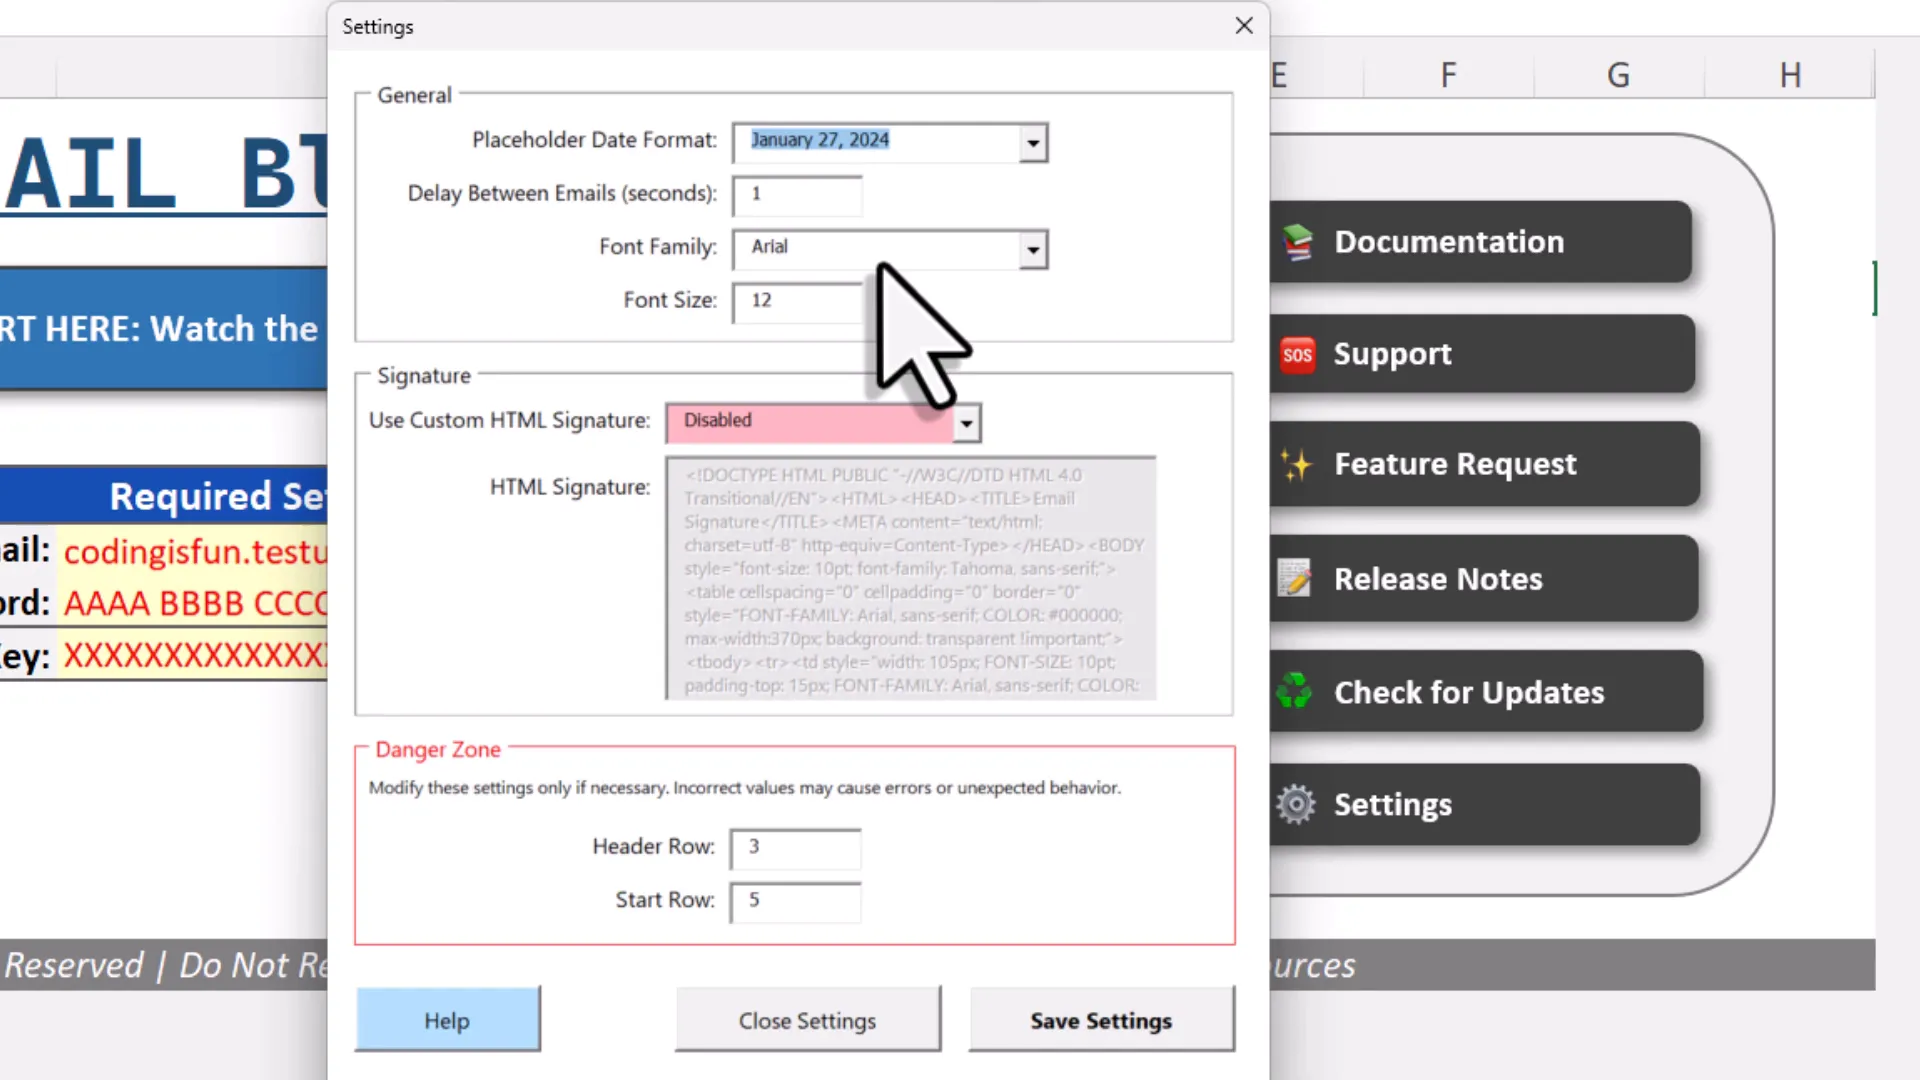
- Go to the tool’s settings sheet and open the settings menu.
- Enable the HTML signature option and paste your HTML code into the signature box.
- Save your settings.
Note: You can’t simply pull your Gmail account’s existing signature; you’ll need to convert it into HTML and paste it here manually.
Once set up, your emails will feature your signature with images, links, and styling—just like a professional email client.
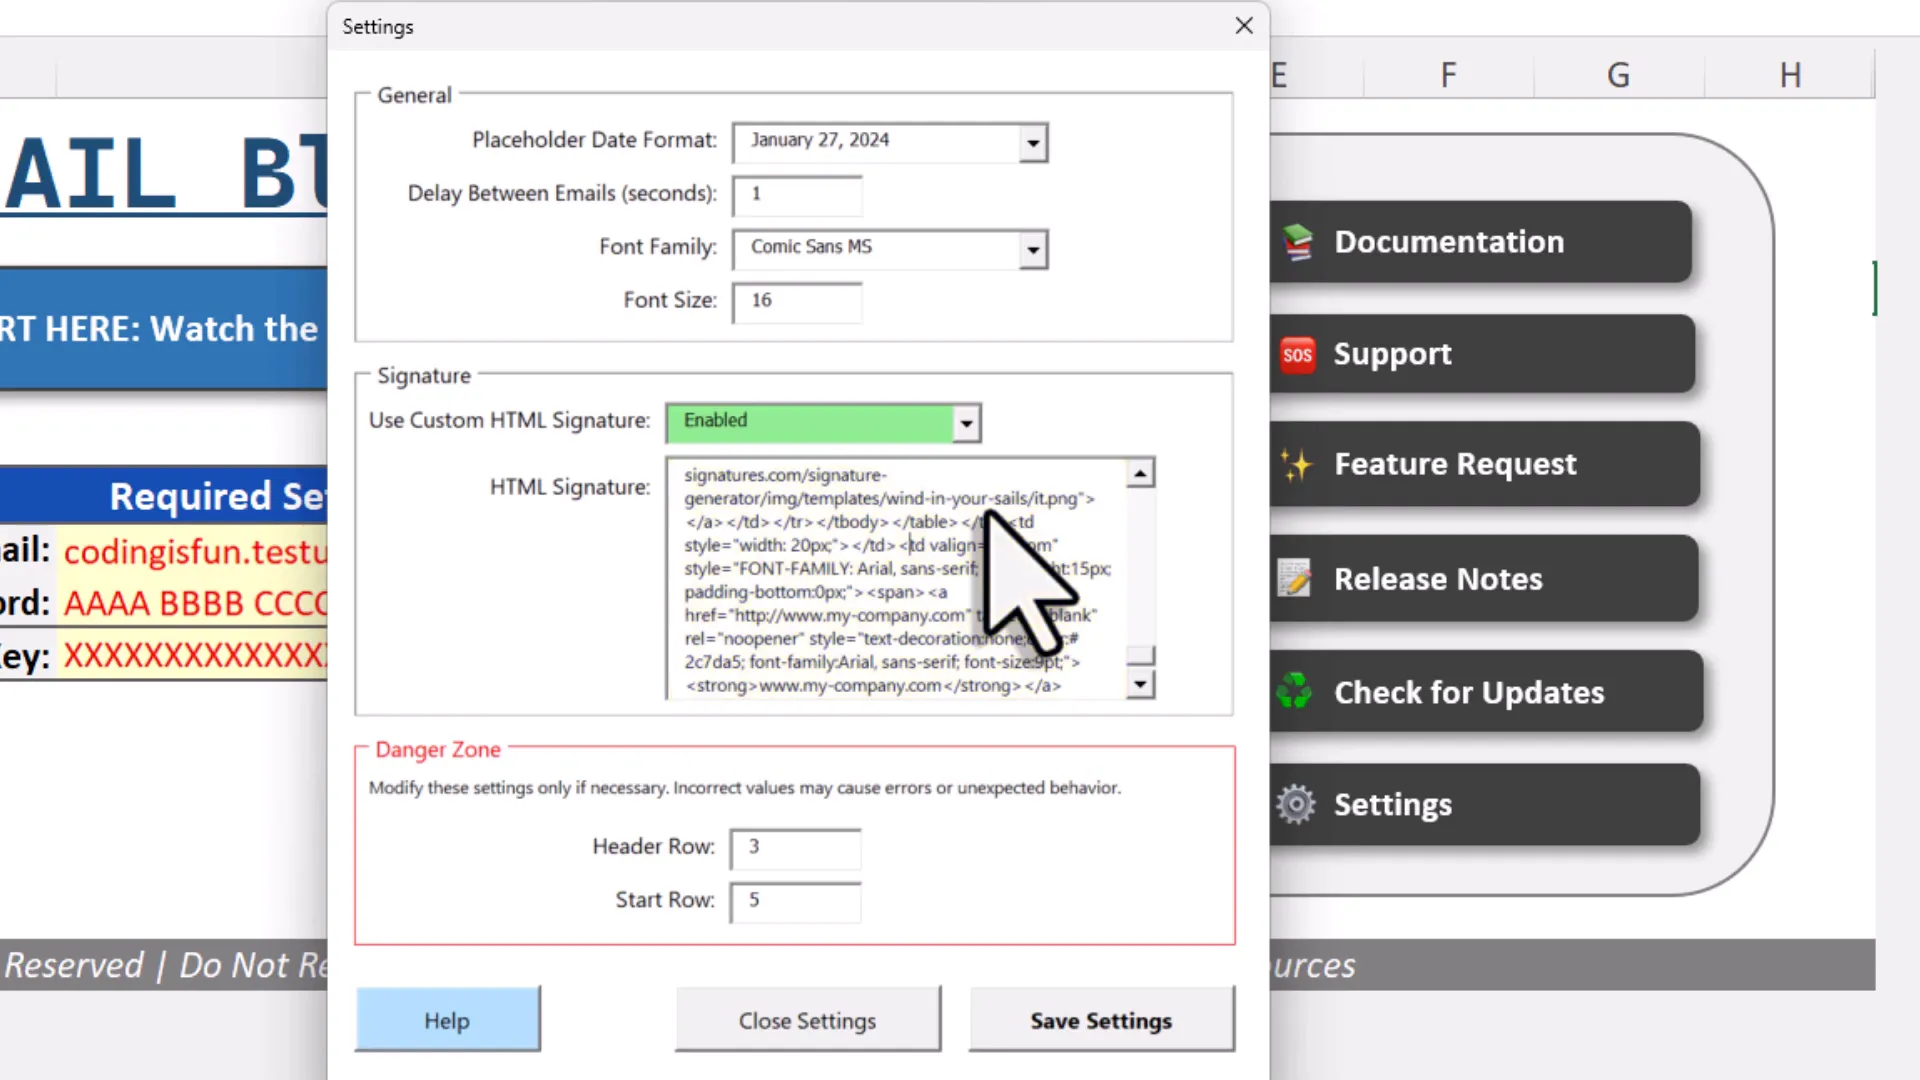
Customizing Your Email Experience: Fonts, Delays, and Date Formats
The tool lets you tweak a few more settings to match your style and needs:
- Date Formats: Choose how date placeholders appear—whether it’s “MM/DD/YYYY”, “DD MMM YYYY”, or any other style.
- Font Selection: Pick from a long list of fonts, from classic Arial to quirky Comic Sans (because why not?).
- Font Size: Adjust the font size to make your emails easier to read or more eye-catching.
- Delay Between Emails: Set a delay in seconds between each email to avoid hitting Gmail’s sending limits or triggering spam filters.
These small customizations make your bulk emails look less like bulk emails and more like carefully crafted messages.
What You Need to Start Sending Bulk Emails from Excel Using Gmail
Ready to dive in? Here’s what you’ll need:
- A Gmail account: This is your sender address. The tool uses your Gmail to send emails.
- A Gmail app password: Not your regular password, but a special password you generate in your Google account settings. This adds security and lets the tool send emails on your behalf.
- The license key: To activate the tool, you’ll need a license key that you get when you purchase the tool from my website.
The setup for the app password is quick and straightforward, with step-by-step instructions available. I also provide a quick start video to walk you through the process.
Once you have these, you’re good to go!
Important Tips on Email Sending Etiquette
Since this tool uses your free Gmail account, it’s essential to respect some guidelines to keep your account safe and your emails effective:
- Send emails only to people who expect them. This tool is great for clients, employees, or contacts who know you, not for cold outreach or mass spamming.
- Observe Gmail’s sending limits. Typically, free Gmail accounts allow around 500 emails per day. If you need to send more, consider upgrading to Google Workspace.
- Use delays between emails. This helps avoid triggering spam filters and keeps your account in good standing.
Think of it like sending invitations to a party—you want to invite friends, not strangers off the street.
System Requirements and Limitations
One last thing before you get started:
- The Gmail Blaster tool works only on Windows.
- It requires the desktop version of Excel (2007 or higher, incl. 365).
This is because the tool relies on VBA macros and Windows-specific features to communicate with Gmail.
Wrapping It Up: Bulk Emailing Made Easy
Sending personalized bulk emails from Excel using Gmail doesn’t have to be a headache anymore. With the Gmail Blaster tool, you get a simple, efficient, and powerful way to reach your audience with style and personalization.
Whether you’re updating your team, reaching out to clients, or sending newsletters, this tool gives you the flexibility to add attachments, embed Excel data, style your emails, and even include professional HTML signatures—all without leaving Excel.
So next time you’re staring down a mountain of emails to send, remember: you don’t have to climb it one email at a time. With this tool, you can send those emails in bulk—personalized, polished, and painless.
Happy emailing! (Get the tool here: Gmail Blaster)