The EASIEST way to insert a NAVIGATION into your Streamlit app
Introduction
Today, I’m diving into how to add a navigation menu to your Streamlit app. We’ll explore two main examples: one where the navigation is embedded in the sidebar and another where it’s positioned directly on the main page. Let’s get started!
Installation
To kick things off, you’ll need to install an additional library. Open your command prompt or terminal and type:
pip install streamlit-option-menu
Don’t worry; I’ll link the documentation for this module below so you can check it out later. Once you’ve got that installed, I’ll import the “option menu” from the “streamlit-option-menu”.

Option Menu
In our first example, let’s create a navigation menu inside the sidebar. The module is pretty straightforward. The “option menu” requires just two arguments: the menu title and the list of options you want to display. When a user selects one of the options, it gets stored in a variable called ‘selected’.
To test this out, I’ll add a simple if condition to display the title based on the selection. After saving the script, I’ll rerun the web app.
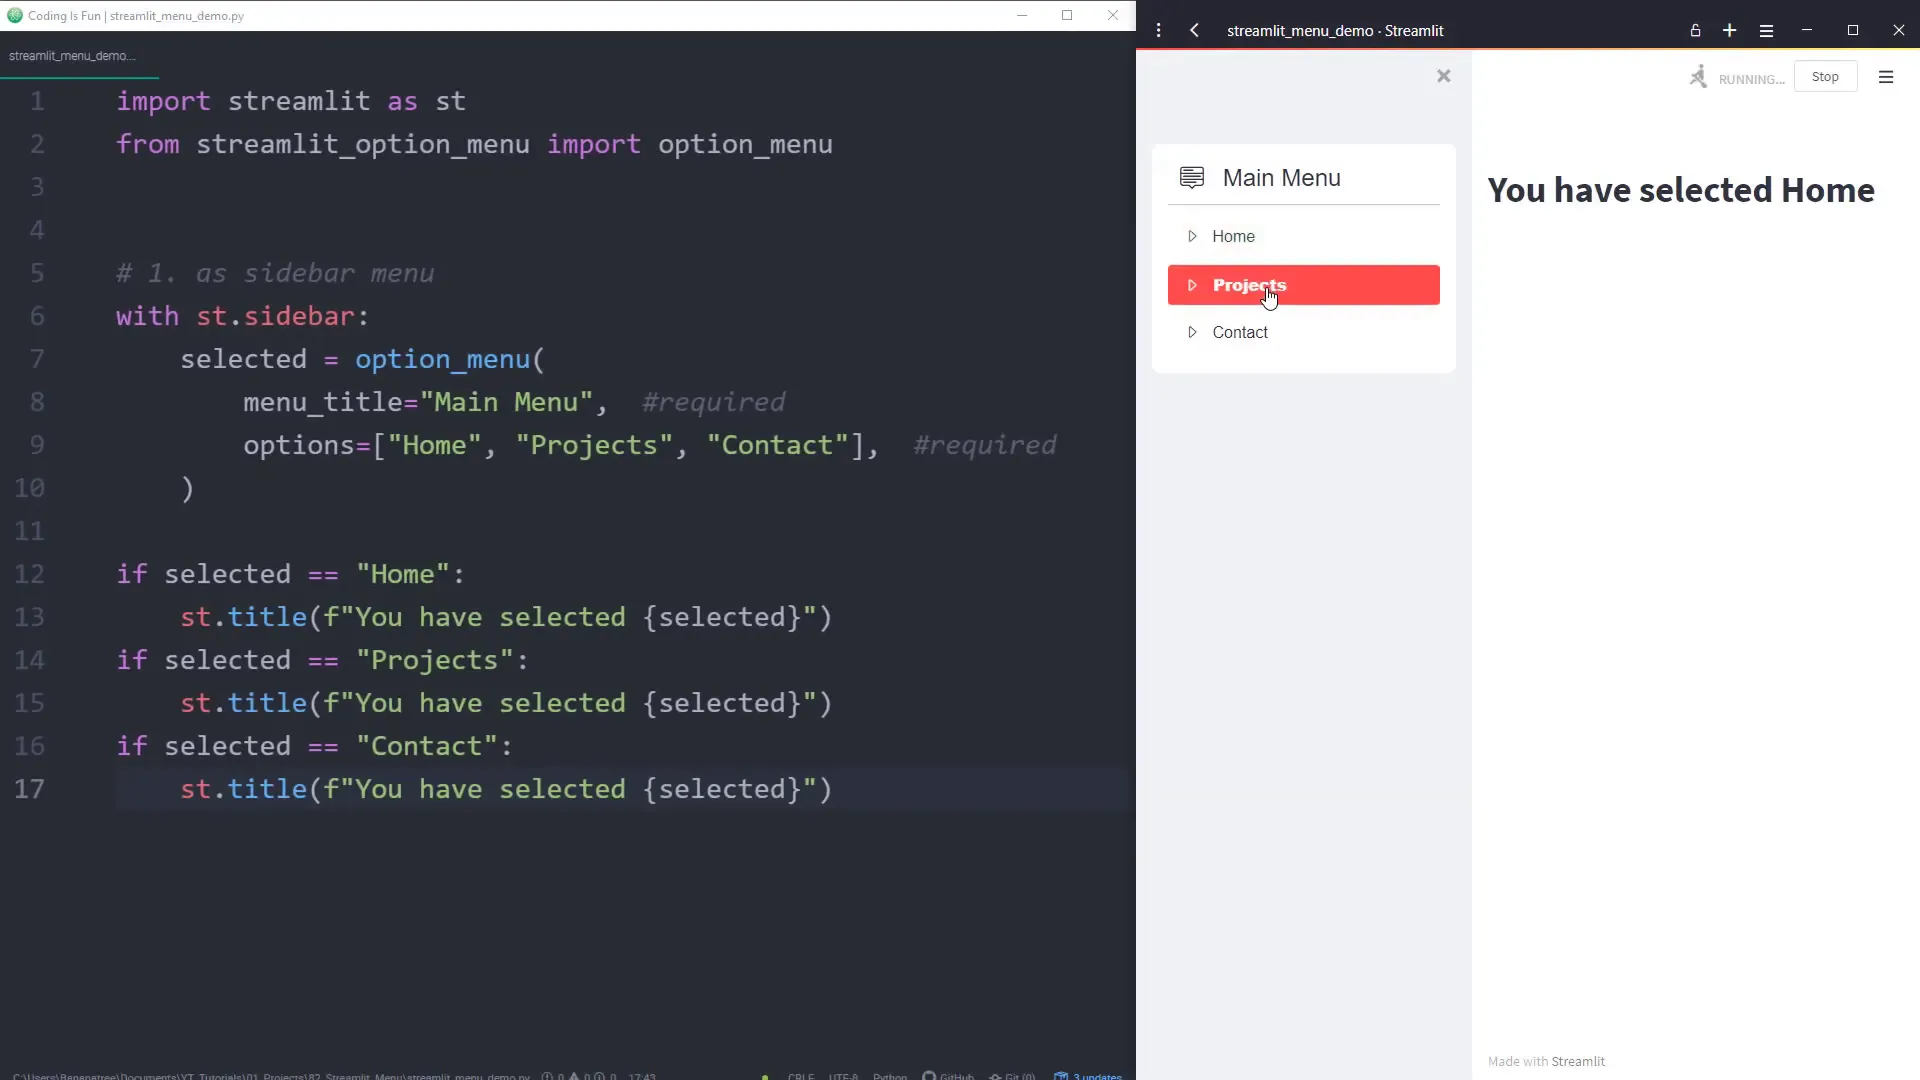
Now, we have our navigation menu! I can navigate through different options, and the title changes accordingly. If you prefer not to display the menu title, just set it to ‘None’. This will give a cleaner look.
Next, let’s look at some optional arguments. For each option in your list, you can specify an icon. You can find all available icons on the Bootstrap website. I’ll include that link below as well. For my menu, I chose icons like the house, book, and envelope. You can even set an icon for the menu title. Plus, you can use the default_index to determine which option should be selected first when the web app opens. The index starts at 0, which means the first item (home) will be selected by default.
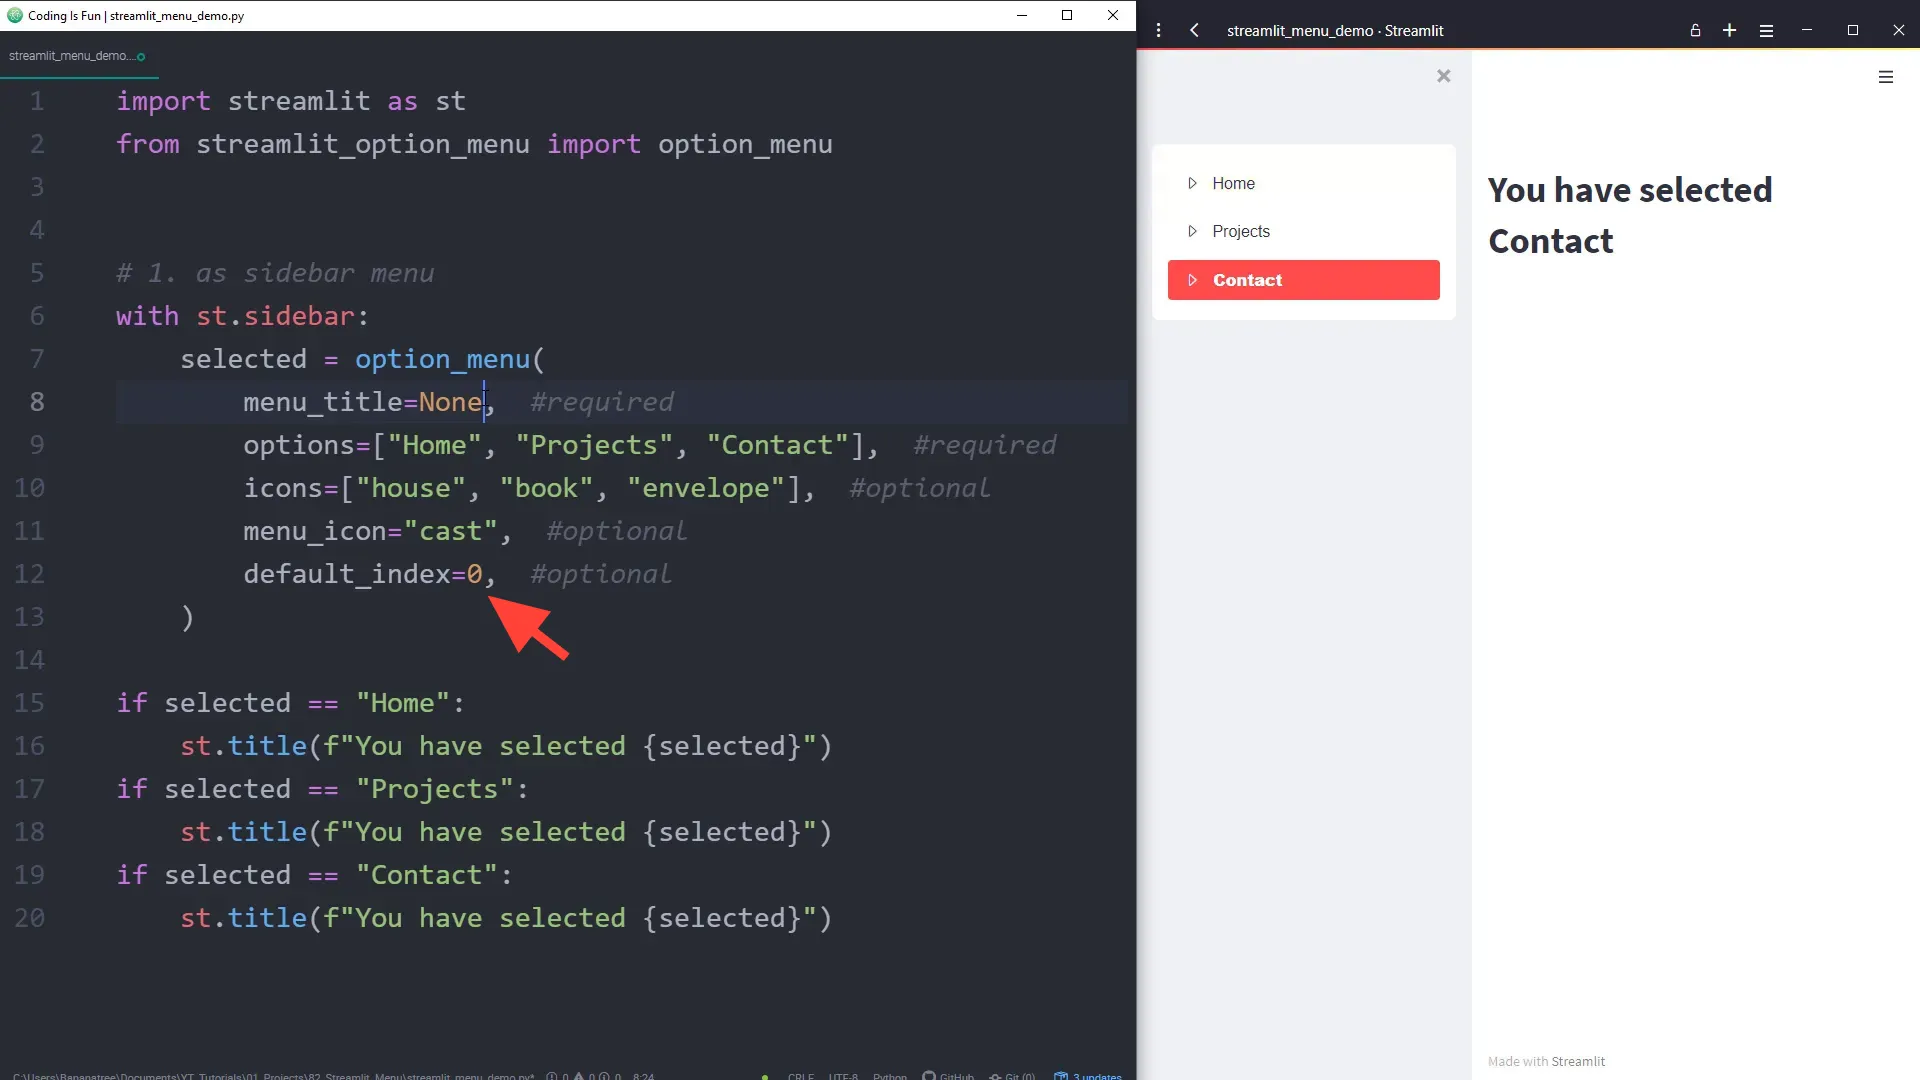
After rerunning the app, we can see all the different icons displayed beautifully!
Option Icons
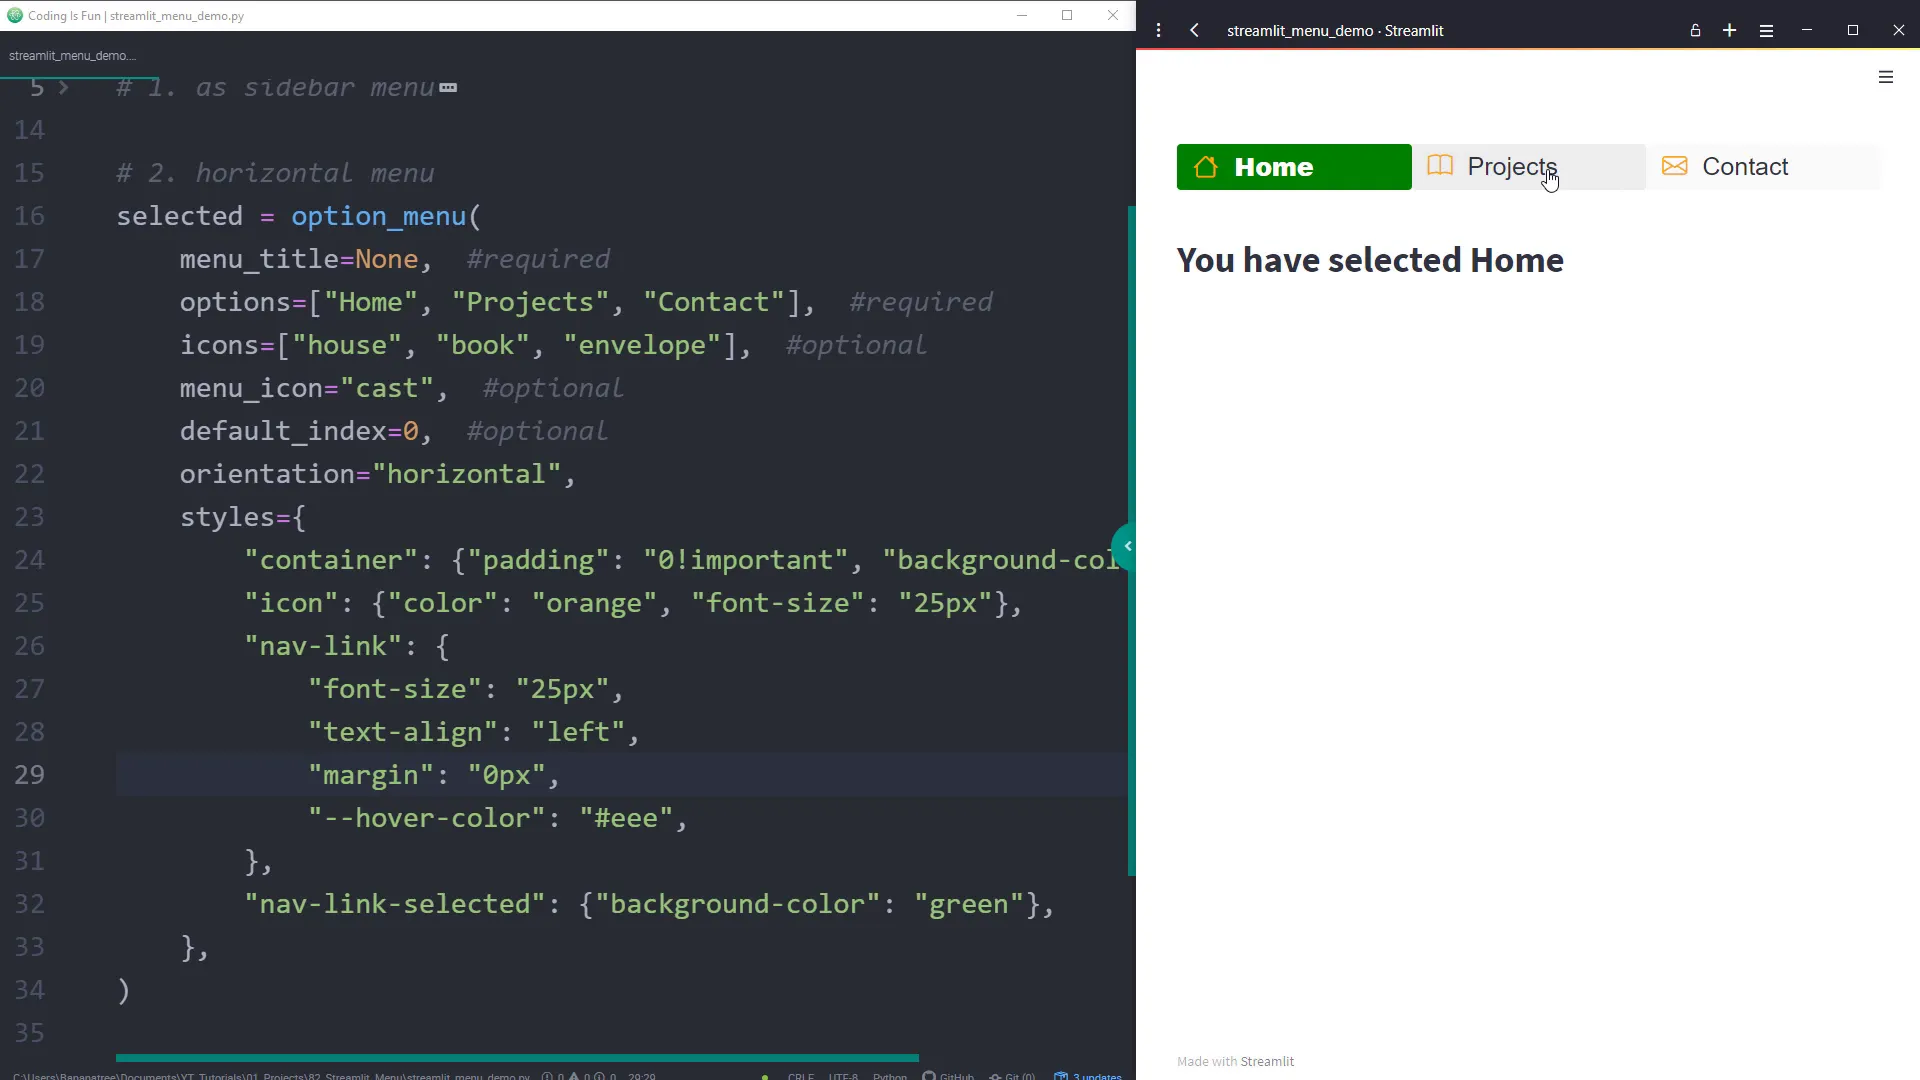
Now, let’s move on to the second example where I’ll place the navigation bar horizontally on the main page. I’ll copy the previous code, comment out the sidebar version, and insert an additional argument to set the orientation to horizontal. After rerunning the app, we now have a sleek navigation bar that looks fantastic!
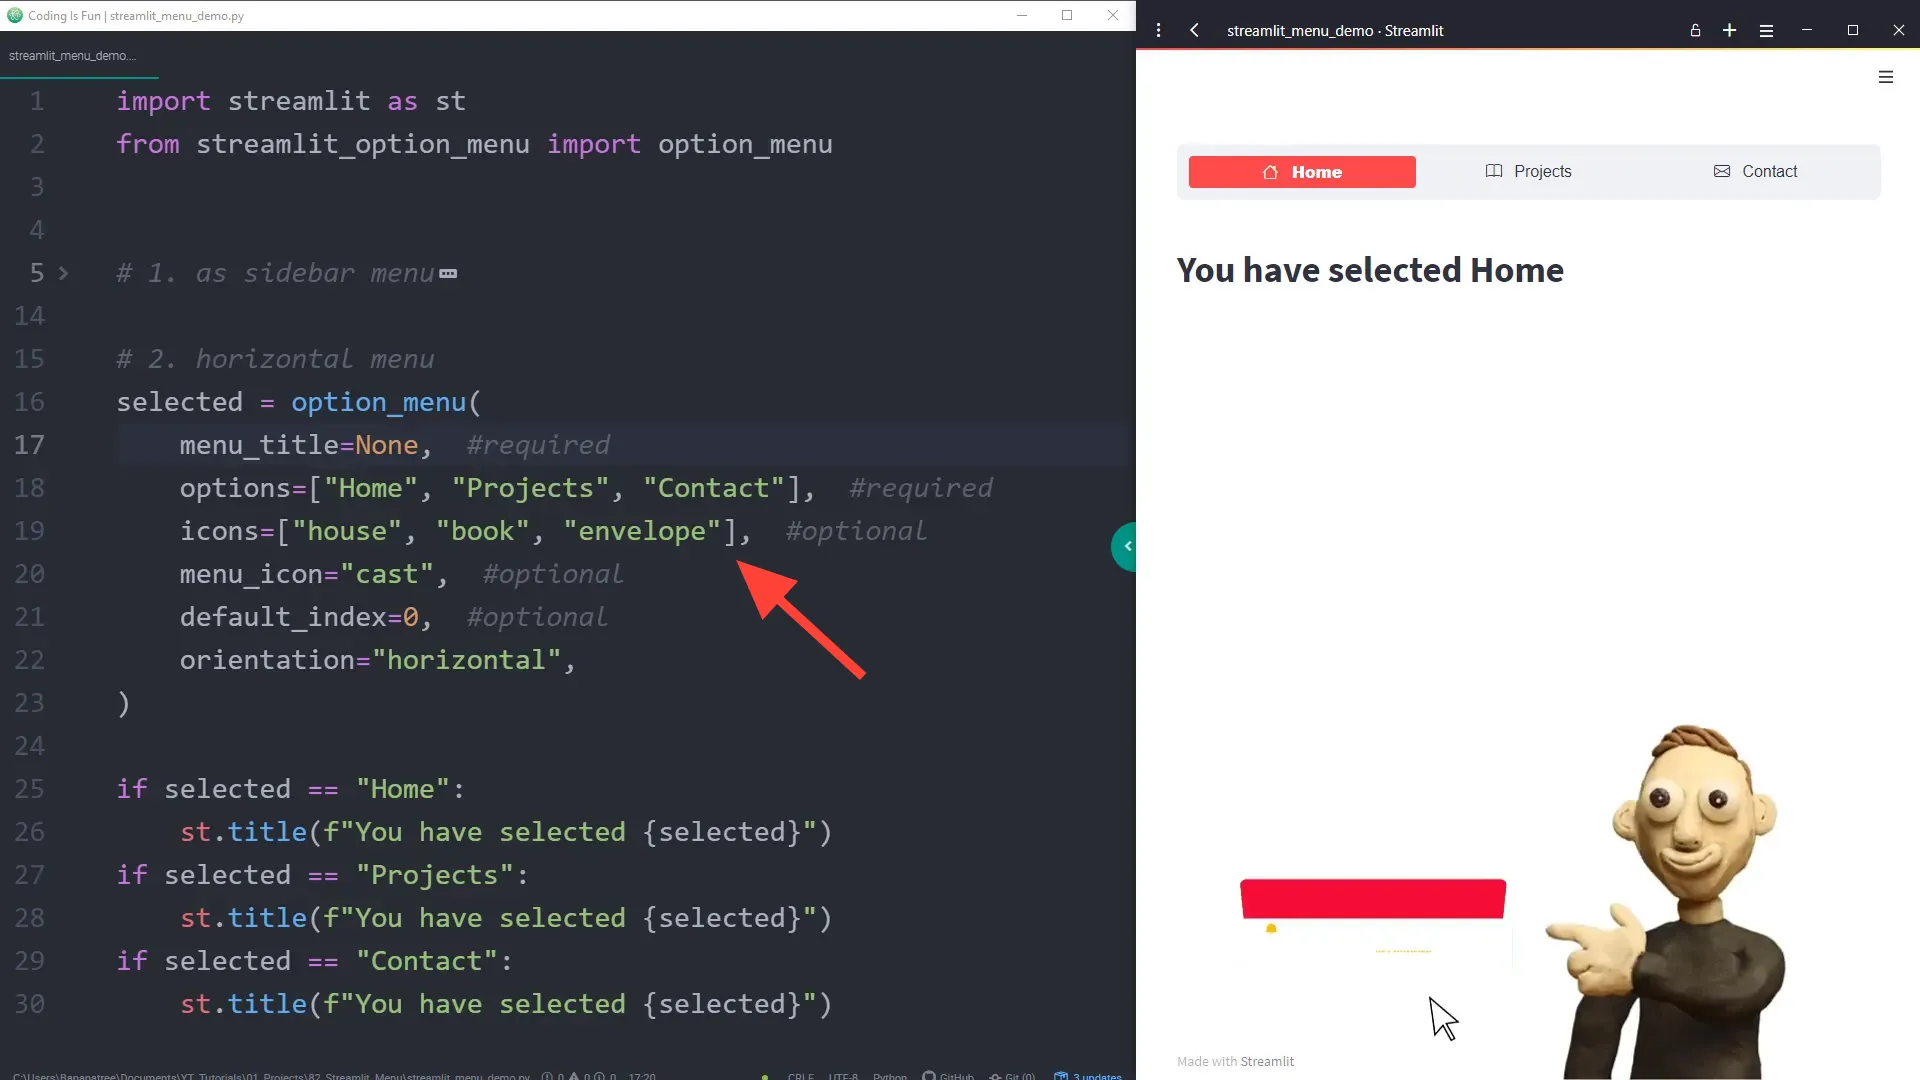
Let’s also set the menu title to none since I don’t need it here. It’s looking pretty slick already! If you want to customize the look and feel even more, you can use the styles argument. I found some code directly from the documentation that allows you to customize various elements of the navigation bar, like the background color and font size.