The Easiest Way to Use ChatGPT in Excel!
Introduction to AI in Excel
Artificial Intelligence is no longer a distant dream; it’s right at our fingertips, even within the confines of Excel. Imagine harnessing the power of AI to analyze data, generate insights, and automate tasks—all without needing to be a coding expert. With tools like xlwings Lite, integrating AI into your spreadsheets becomes a straightforward process. This opens up a world of possibilities, from simple calculations to complex data analysis.
In this section, we’ll explore what AI in Excel can do for you. We’re talking about using AI to enhance decision-making, streamline repetitive tasks, and even generate creative content. The combination of Excel’s robust data handling capabilities and AI’s analytical power is a game-changer.
Getting Started with xlwings Lite
To tap into this potential, you first need to install xlwings Lite. This add-in allows you to run Python code directly inside Excel, enabling seamless integration with AI services like OpenAI’s ChatGPT. You don’t need to worry about setting up a Python environment; xlwings Lite takes care of that for you.
Once you have xlwings Lite installed, you’ll find that writing Python code becomes as easy as entering a formula. This means you can start creating custom AI functions tailored to your specific needs right away.
Installing the xlwings Lite Add-In
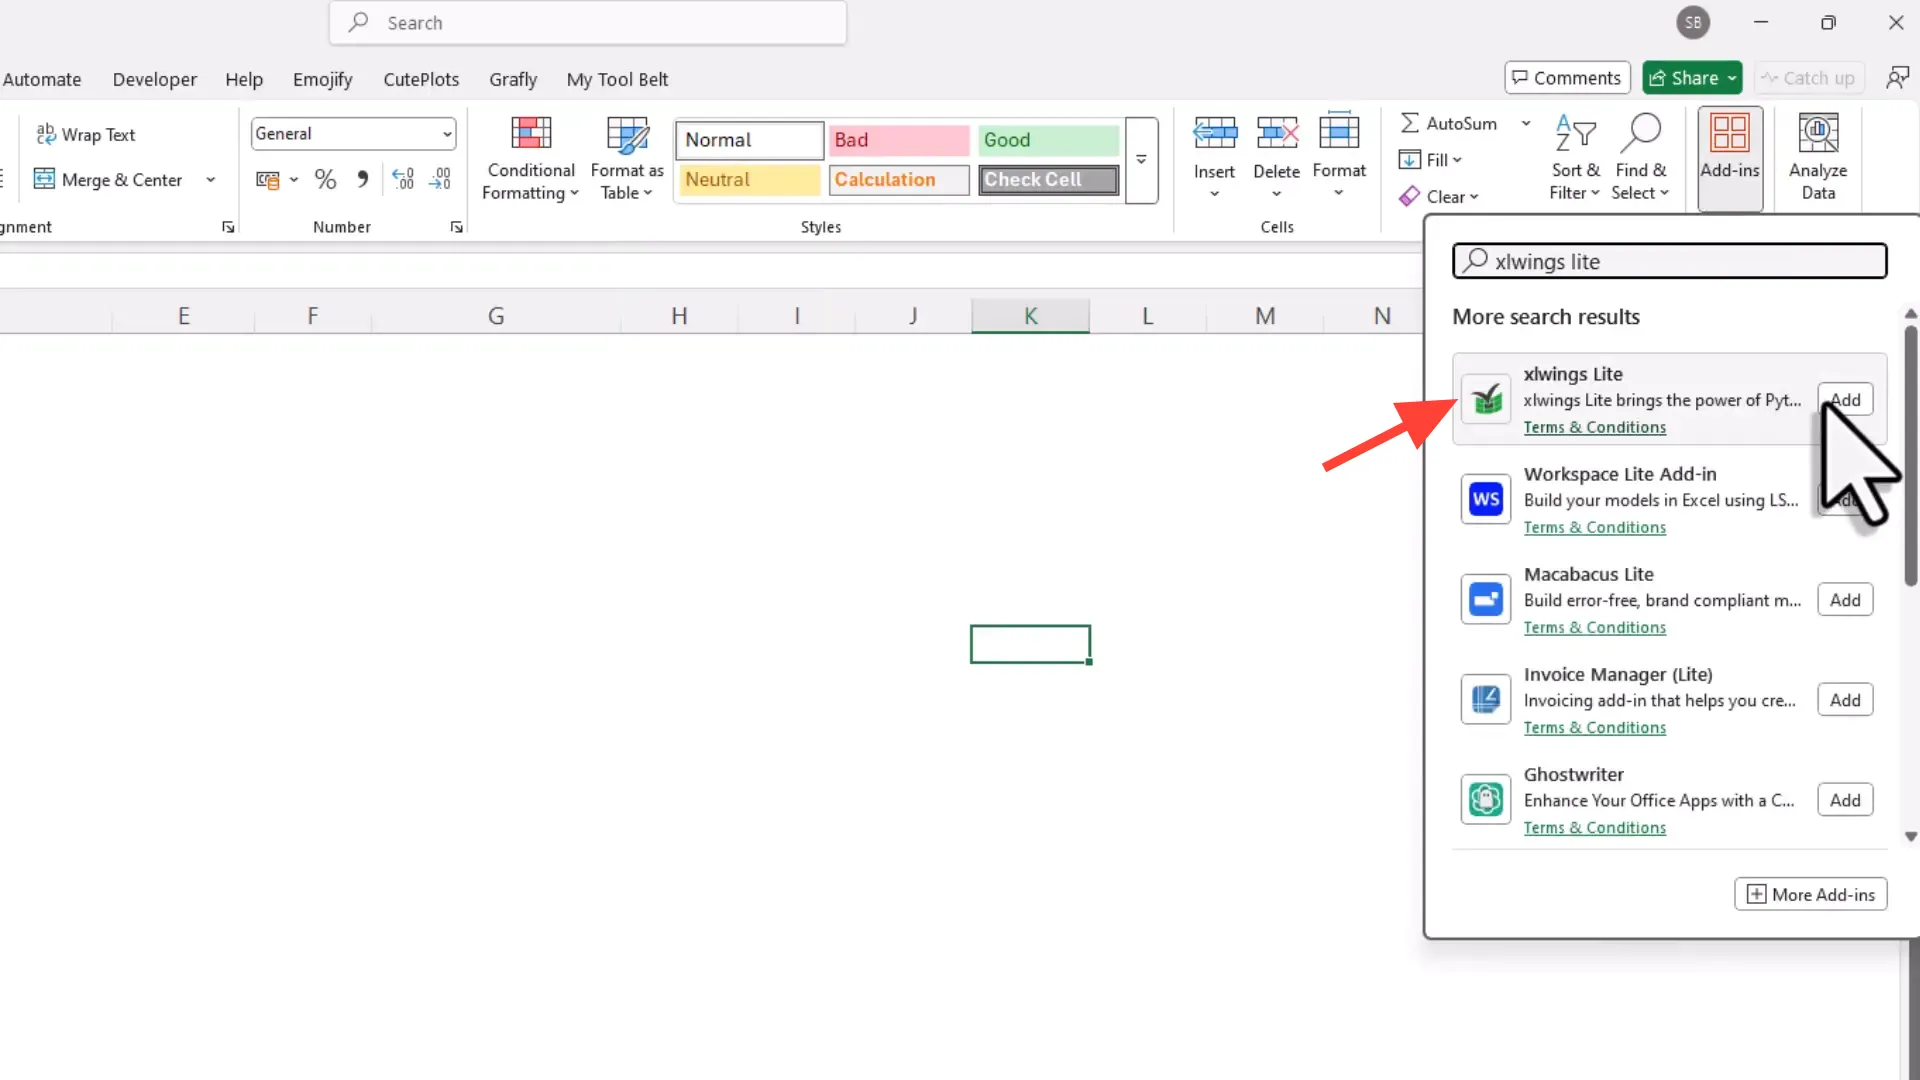
Installing the xlwings Lite add-in is a breeze. Here’s how to do it:
- Open Excel and either create a new workbook or open an existing one.
- Navigate to the Home tab and click on Add-ins.
- In the search bar, type xlwings Lite.
- Once you find it, click on Add.
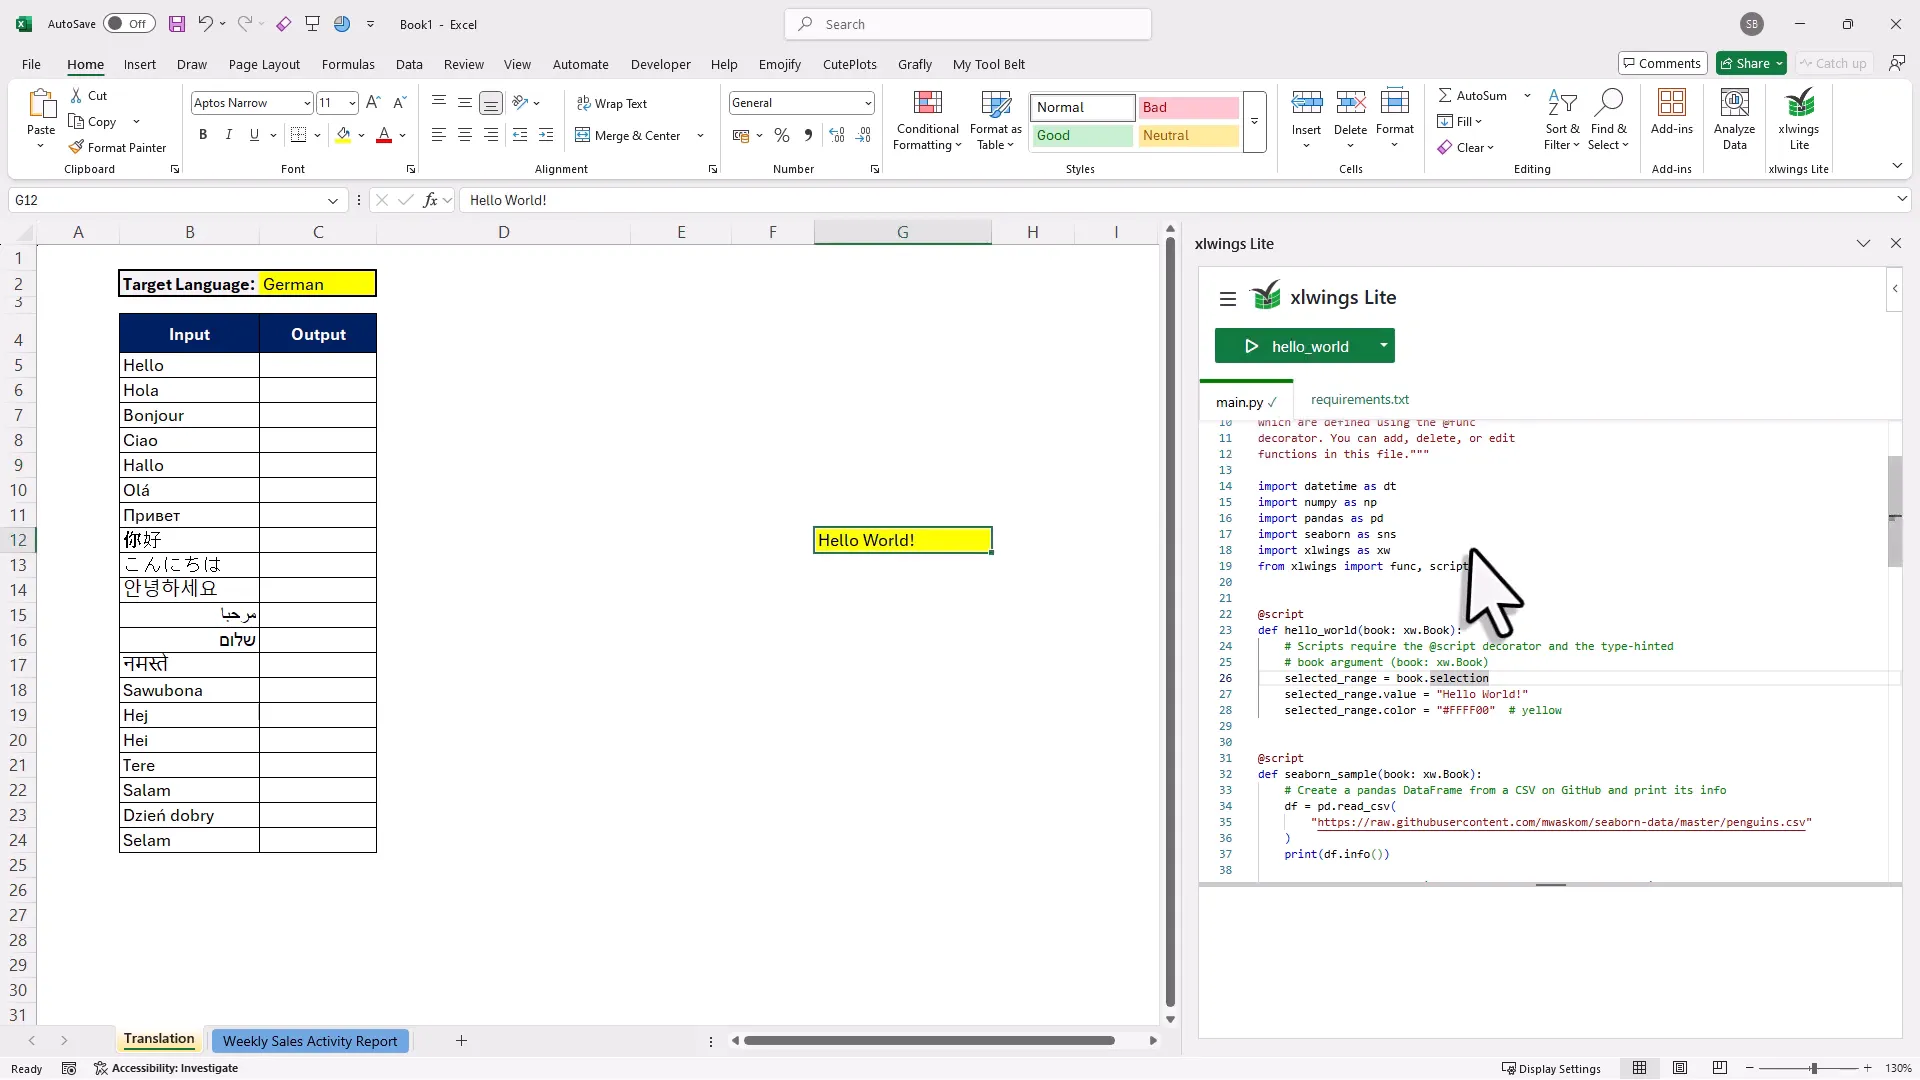
After installation, a new task pane will appear. This is where the magic happens. You can write Python code directly in this pane, making it easy to create custom functions.
Executing Python Code in Excel
Now that you have xlwings Lite set up, it’s time to execute some Python code. This is where you’ll see how powerful this tool can be. In your Excel sheet, click on any cell and then use the task pane to execute a simple Python command. For example, you could insert a simple “Hello World” message into a cell.
Executing Python code not only allows for custom functions but also enhances your Excel capabilities by integrating Python libraries. This means you can perform advanced calculations, data manipulation, and even access web APIs directly from your spreadsheet.
Sending Excel Data to OpenAI
One of the standout features of using xlwings Lite is the ability to send data from Excel directly to OpenAI’s API. This opens the door to a myriad of applications, from generating text to analyzing data. Here’s a brief overview of how this works:
- Prepare your data in Excel—this could be anything from a list of names to a set of numerical values.
- Write a Python function that takes this data and sends it to OpenAI.
- Receive the response and display it back in your Excel sheet.
This process allows you to leverage AI in ways that were previously unimaginable within Excel. Whether you want to generate summaries, translate text, or even analyze trends, the possibilities are endless.
Inserting Your OpenAI API Key
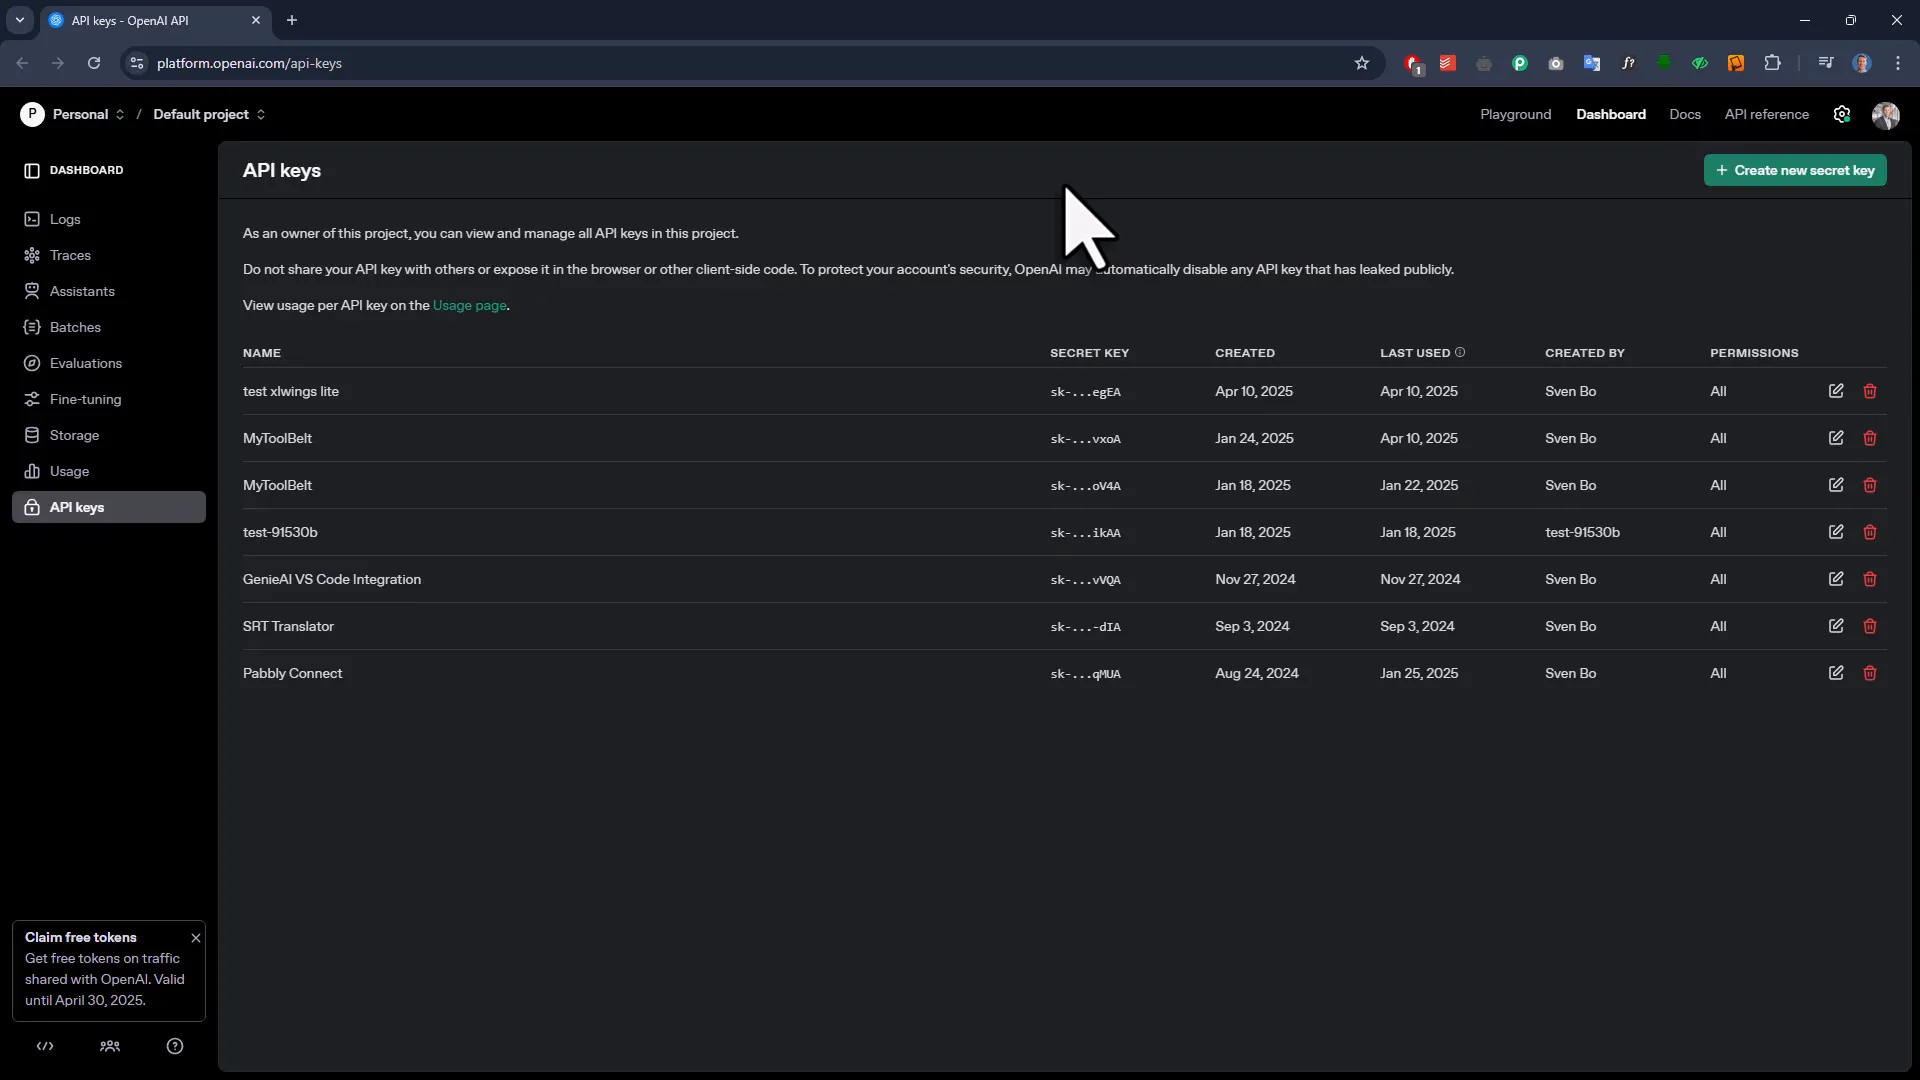
Before you can start sending requests to OpenAI, you need to insert your API key. Here’s how you can do that:
- Visit the OpenAI website and create an account if you haven’t already.
- Navigate to the API Keys section and create a new key. You can give it a descriptive name for your reference.
- Copy the API key that you generated.
- Return to your Excel sheet and paste the API key into the designated area in the xlwings Lite task pane.
Remember, using the OpenAI API isn’t free, so ensure you have a balance in your account to avoid interruptions. This simple step is crucial for making your AI functions operational.
Understanding API Costs
When diving into the world of AI, especially with tools like OpenAI, understanding the cost structure is essential. OpenAI operates on a tiered pricing model, which means the more you use, the more it can cost. Each API call incurs a fee, and this can add up quickly if you’re not careful.
Start by familiarizing yourself with the pricing details on the OpenAI website. It’s crucial to know how much each request will cost you based on the model you choose. Some models are more expensive than others. For example, the more advanced models tend to have higher costs but offer better performance.
Budgeting for these costs can prevent surprises. Set limits on your usage to maintain control over your expenses. By doing so, you can leverage AI’s capabilities without breaking the bank.
Creating Your First AI Function
Now that you’re aware of the costs associated with API calls, let’s create your first AI function in Excel. This function will allow you to send prompts to OpenAI and receive responses directly in your spreadsheet.
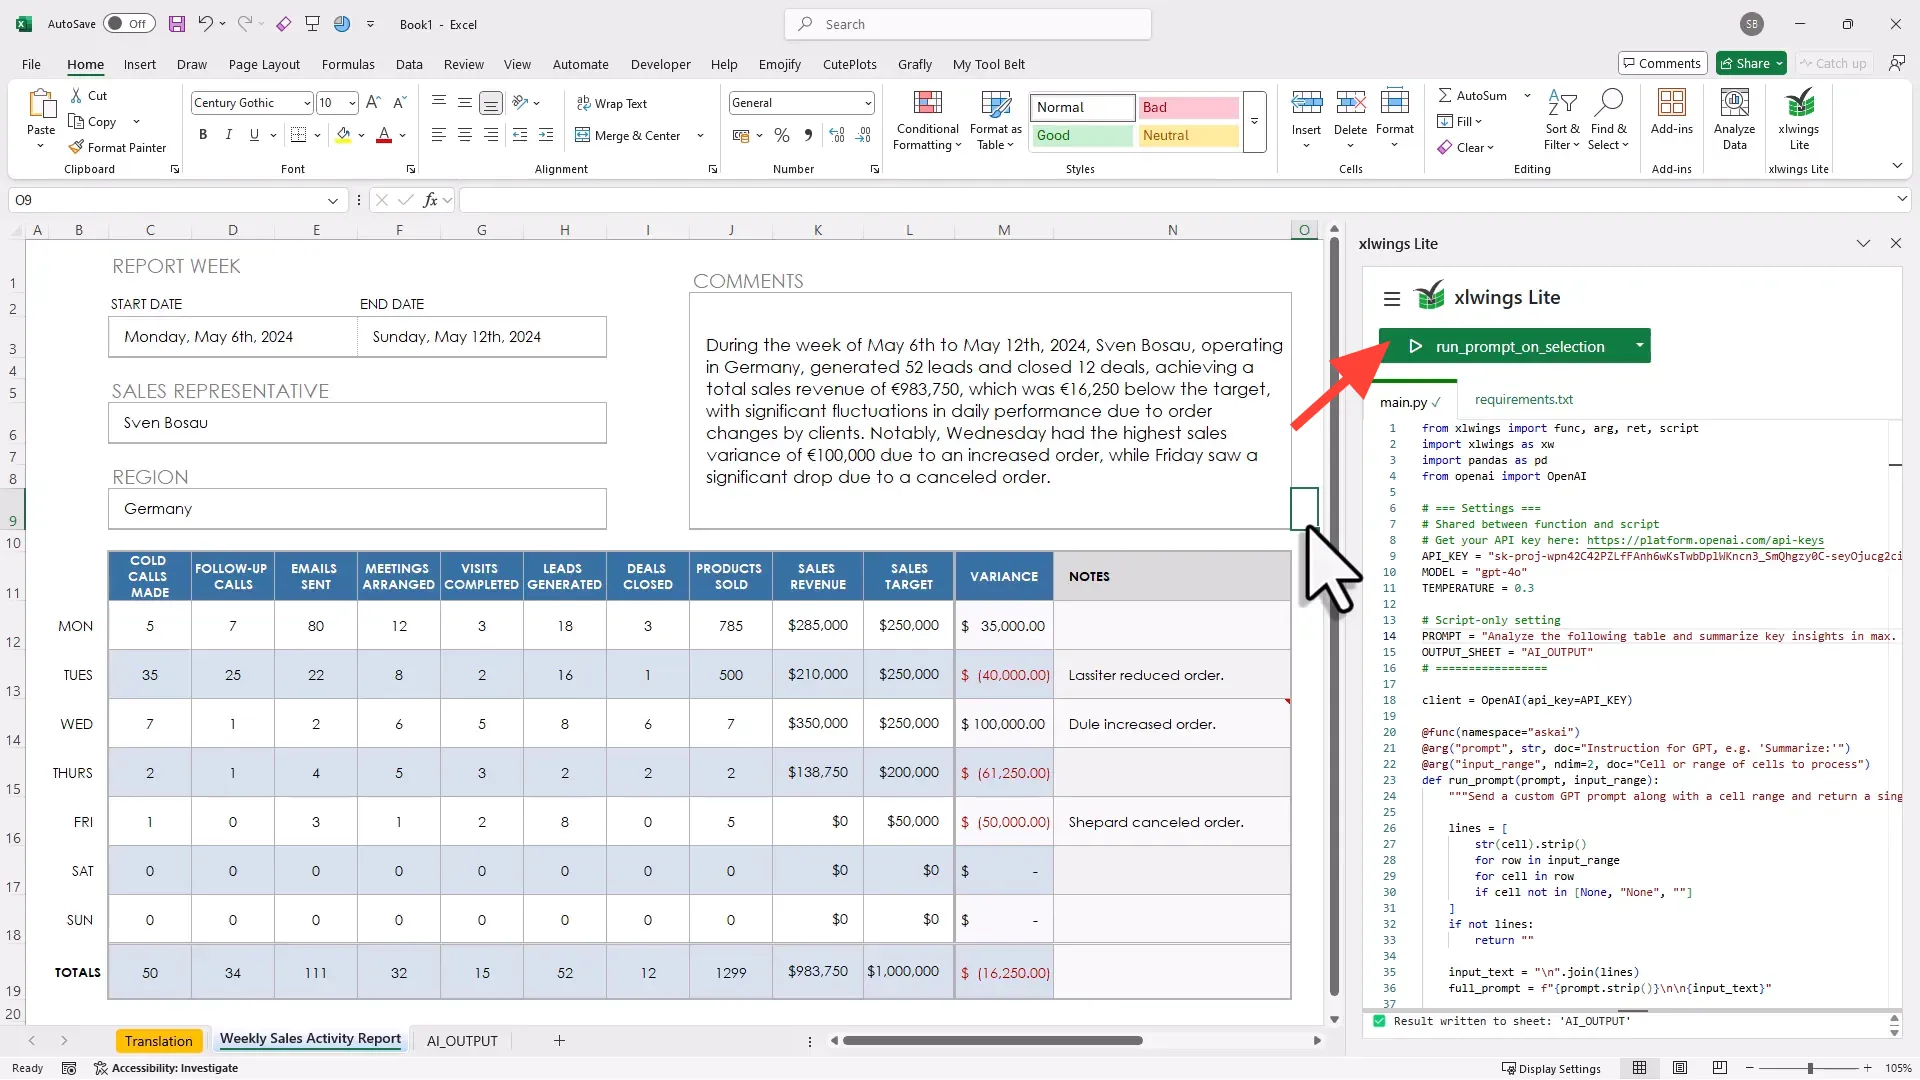
Begin by writing a simple Python function using xlwings. This function will take two parameters: your prompt and the range of cells to process. Here’s a basic example:
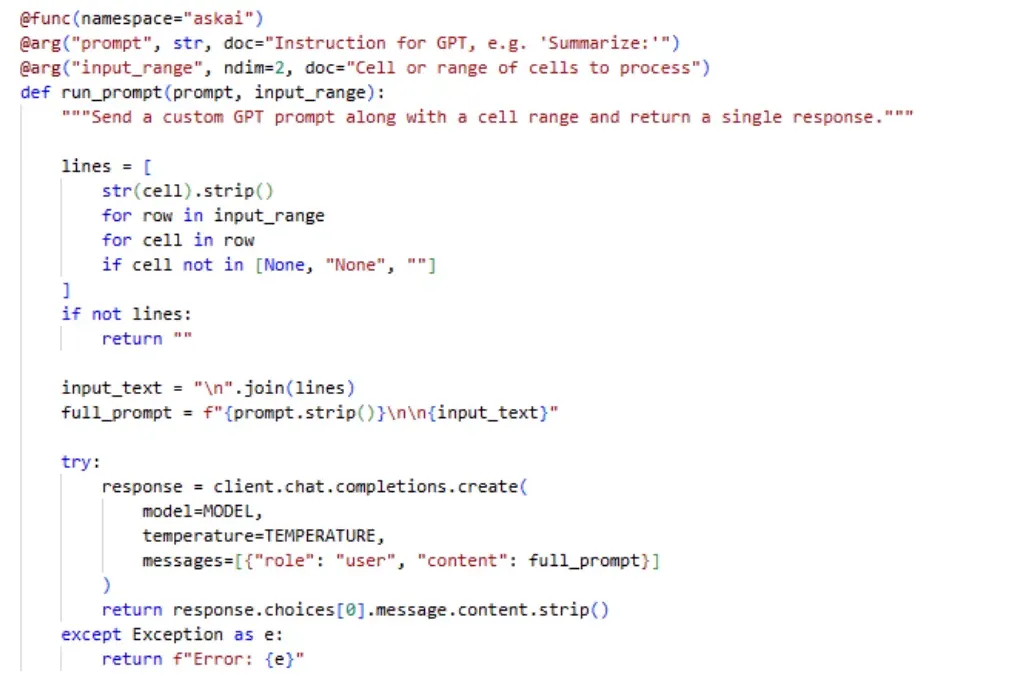
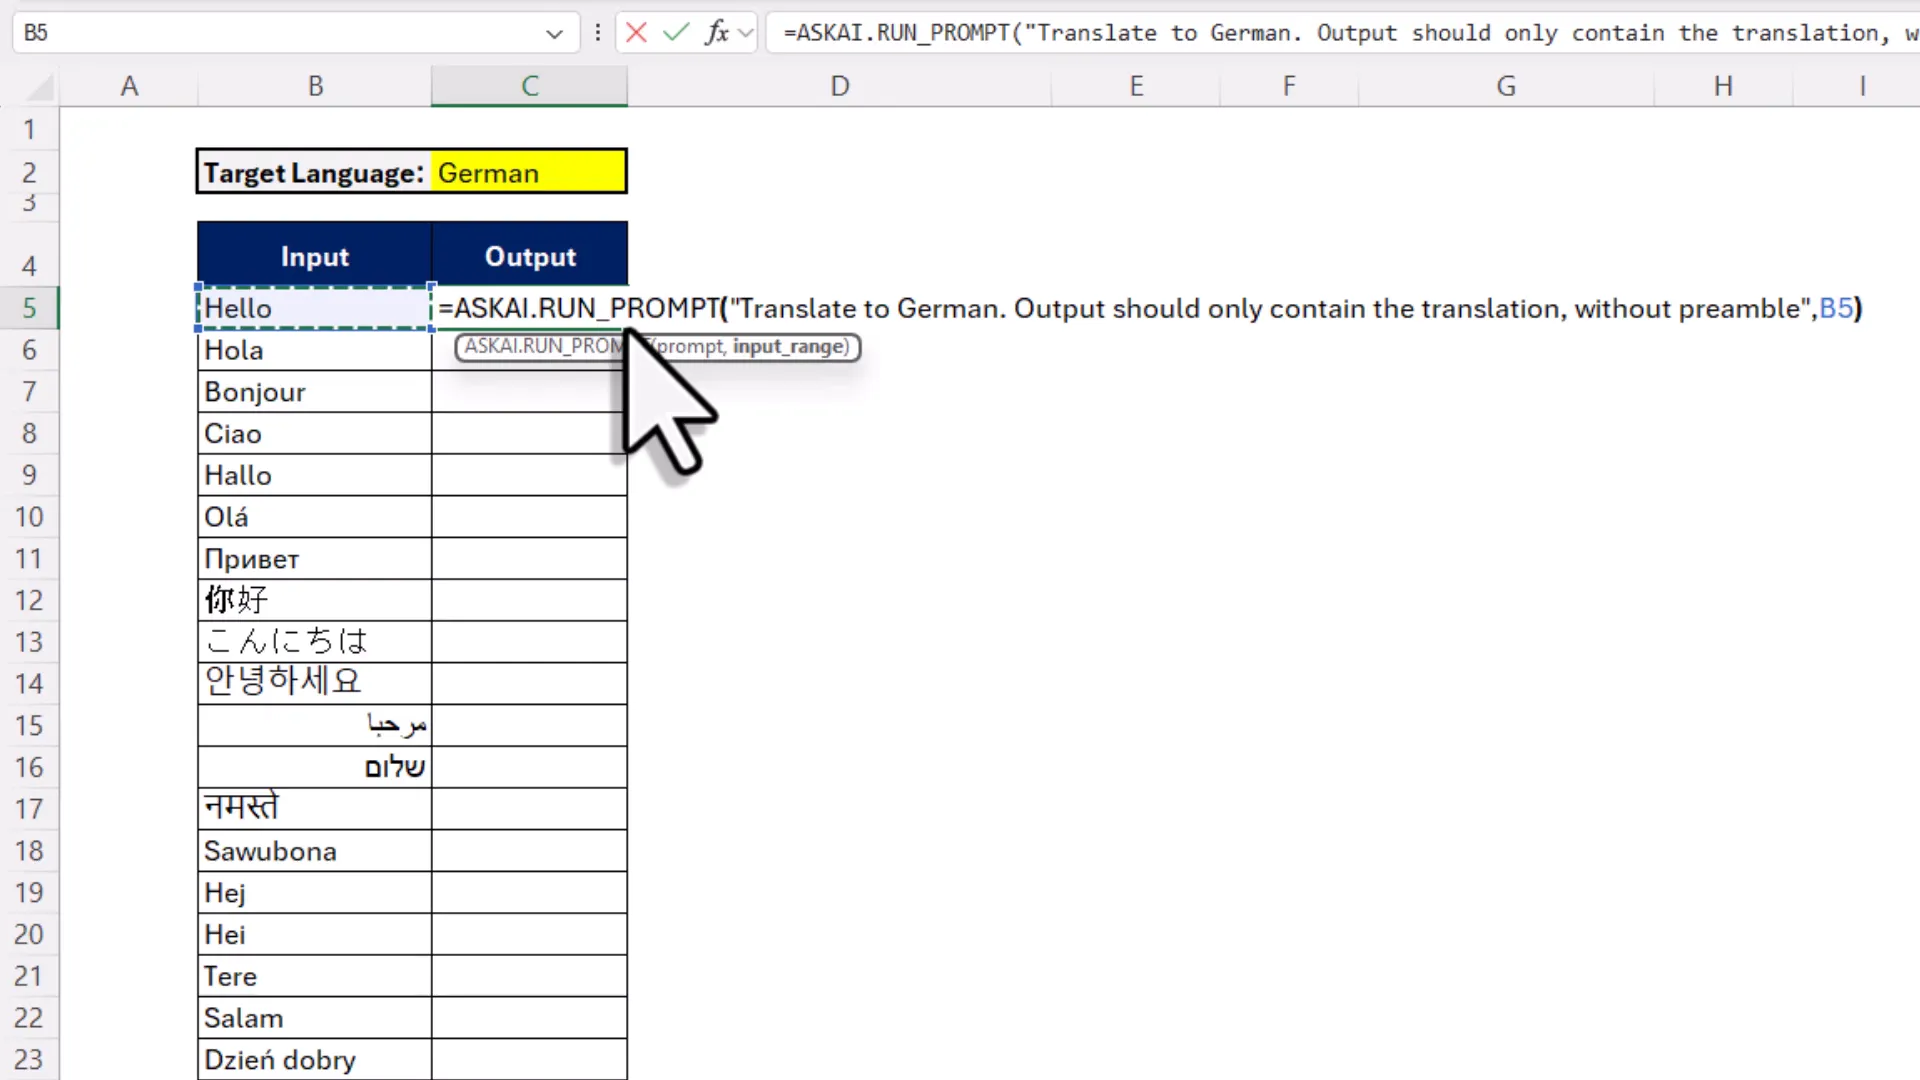
Once you have this function set up, you can call it from Excel just like any other formula. Input your prompt and select the range of cells you want to process, and watch as the AI generates responses in real-time.
Using the Prompt List Function
To make your workflow more efficient, you can utilize the prompt list function. This allows you to send multiple inputs to the AI in one go, making your API calls more efficient.
Similar to the previous function, this one will accept a prompt and a range of cells. However, it will handle the input as a list. Here’s how to implement it:
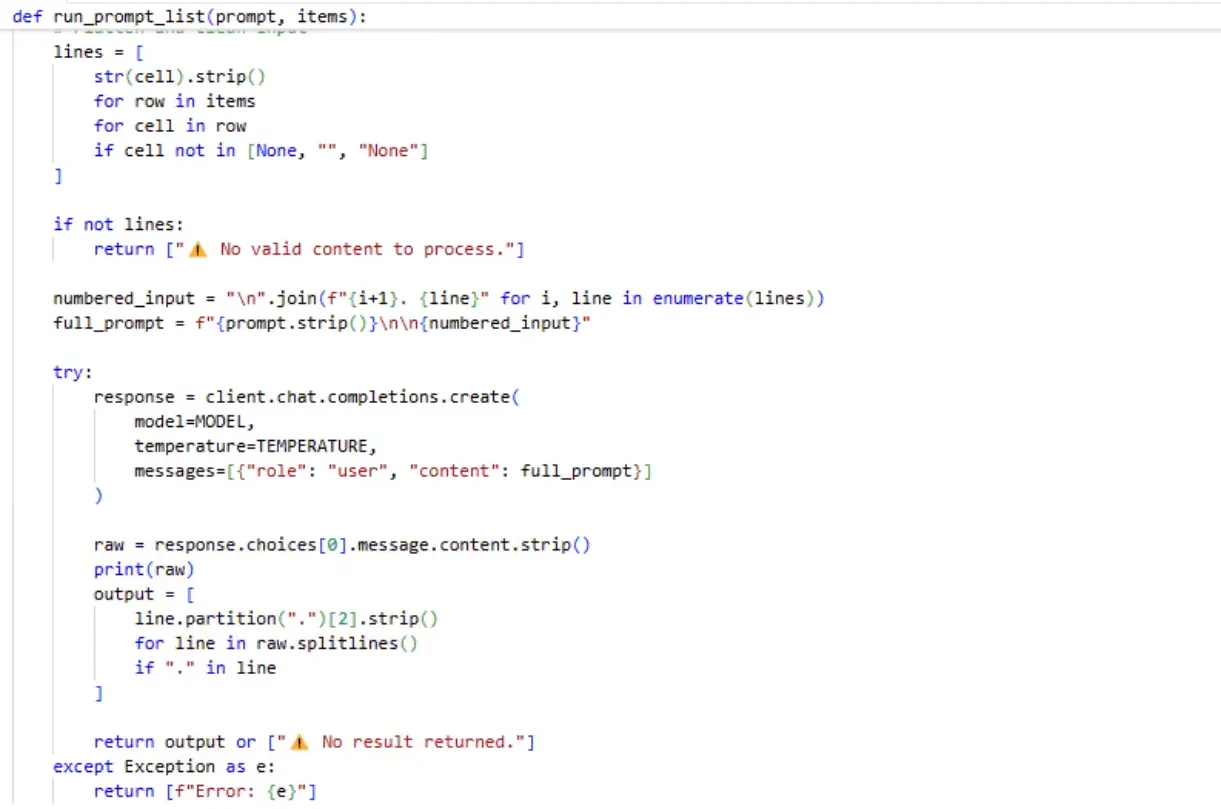
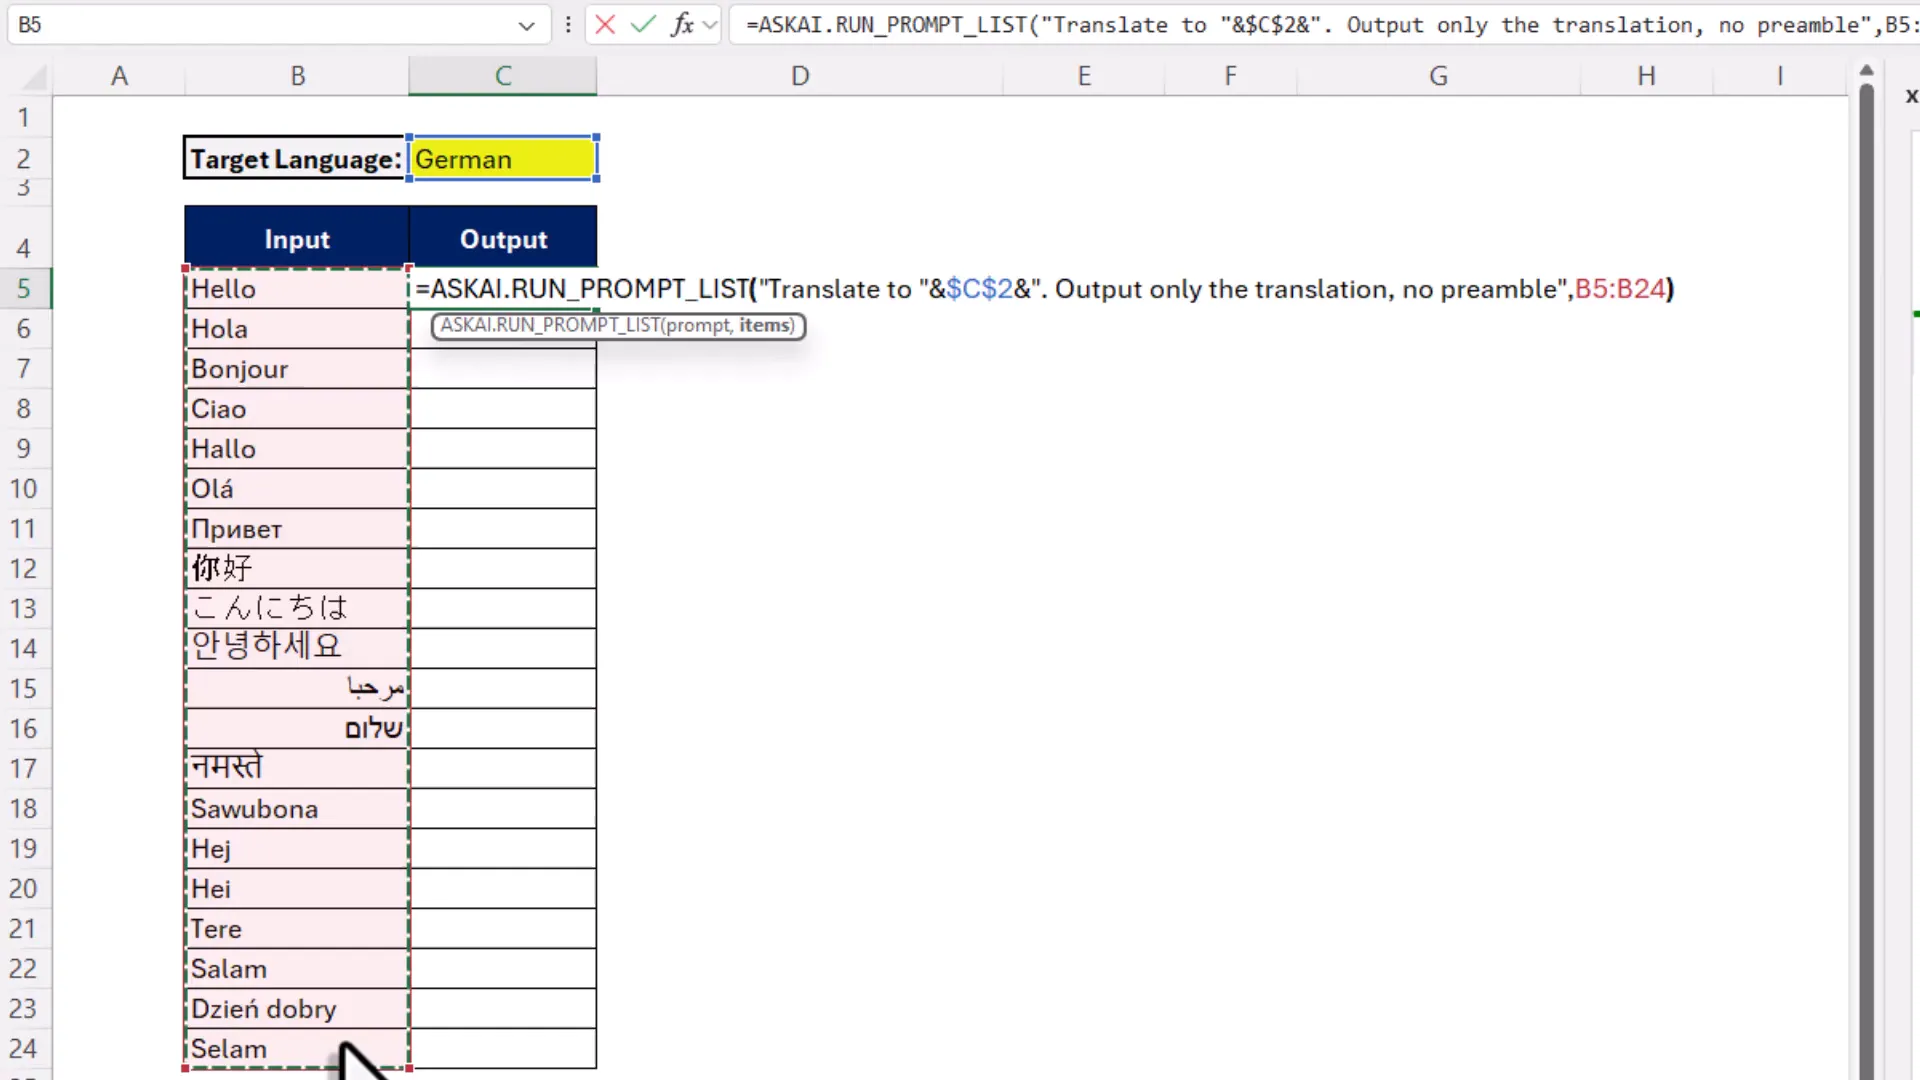
This function allows you to input an entire row or column of data, streamlining the process. Just select your range and let the AI handle the rest.
Running Scripts with a Button
For those who prefer a more interactive approach, you can create buttons in Excel to run your Python scripts. This feature enhances usability and allows you to execute complex scripts without manual input.
Now, clicking the button will execute your script. This is especially useful for tasks like data analysis, where you want to run the same process repeatedly without having to input everything manually.
Saving and Accessing Your Code
Once you’ve created your custom functions in Excel, you’ll want to ensure they are easily accessible for future use. By saving your workbook with the code embedded, you can retain access to your custom functions without needing to rewrite them each time.
To save your workbook, simply click on File and then Save As. Choose a location on your computer and select the appropriate file format.
When you reopen the workbook, your functions will still be available. However, if you want to use the same functions in different workbooks, you’ll need to copy and paste the code into each one.
Introducing My Tool Belt Add-In
To streamline your experience further, I’ve developed a separate Excel add-in called MyToolBelt. Unlike xlwings Lite, this add-in is built entirely in VBA and is designed to enhance your Excel capabilities without needing Python.
The advantage of My Tool Belt is that it only requires a one-time installation, making it available across all your workbooks. This saves you the hassle of copying code from one workbook to another. Plus, it includes additional features that can enhance your workflow.
To get started with My Tool Belt, download the add-in from the provided link. Once installed, you’ll find a new function called toolbelt_askai. This function simplifies the process of sending prompts to OpenAI, requiring only the prompt as its parameter.
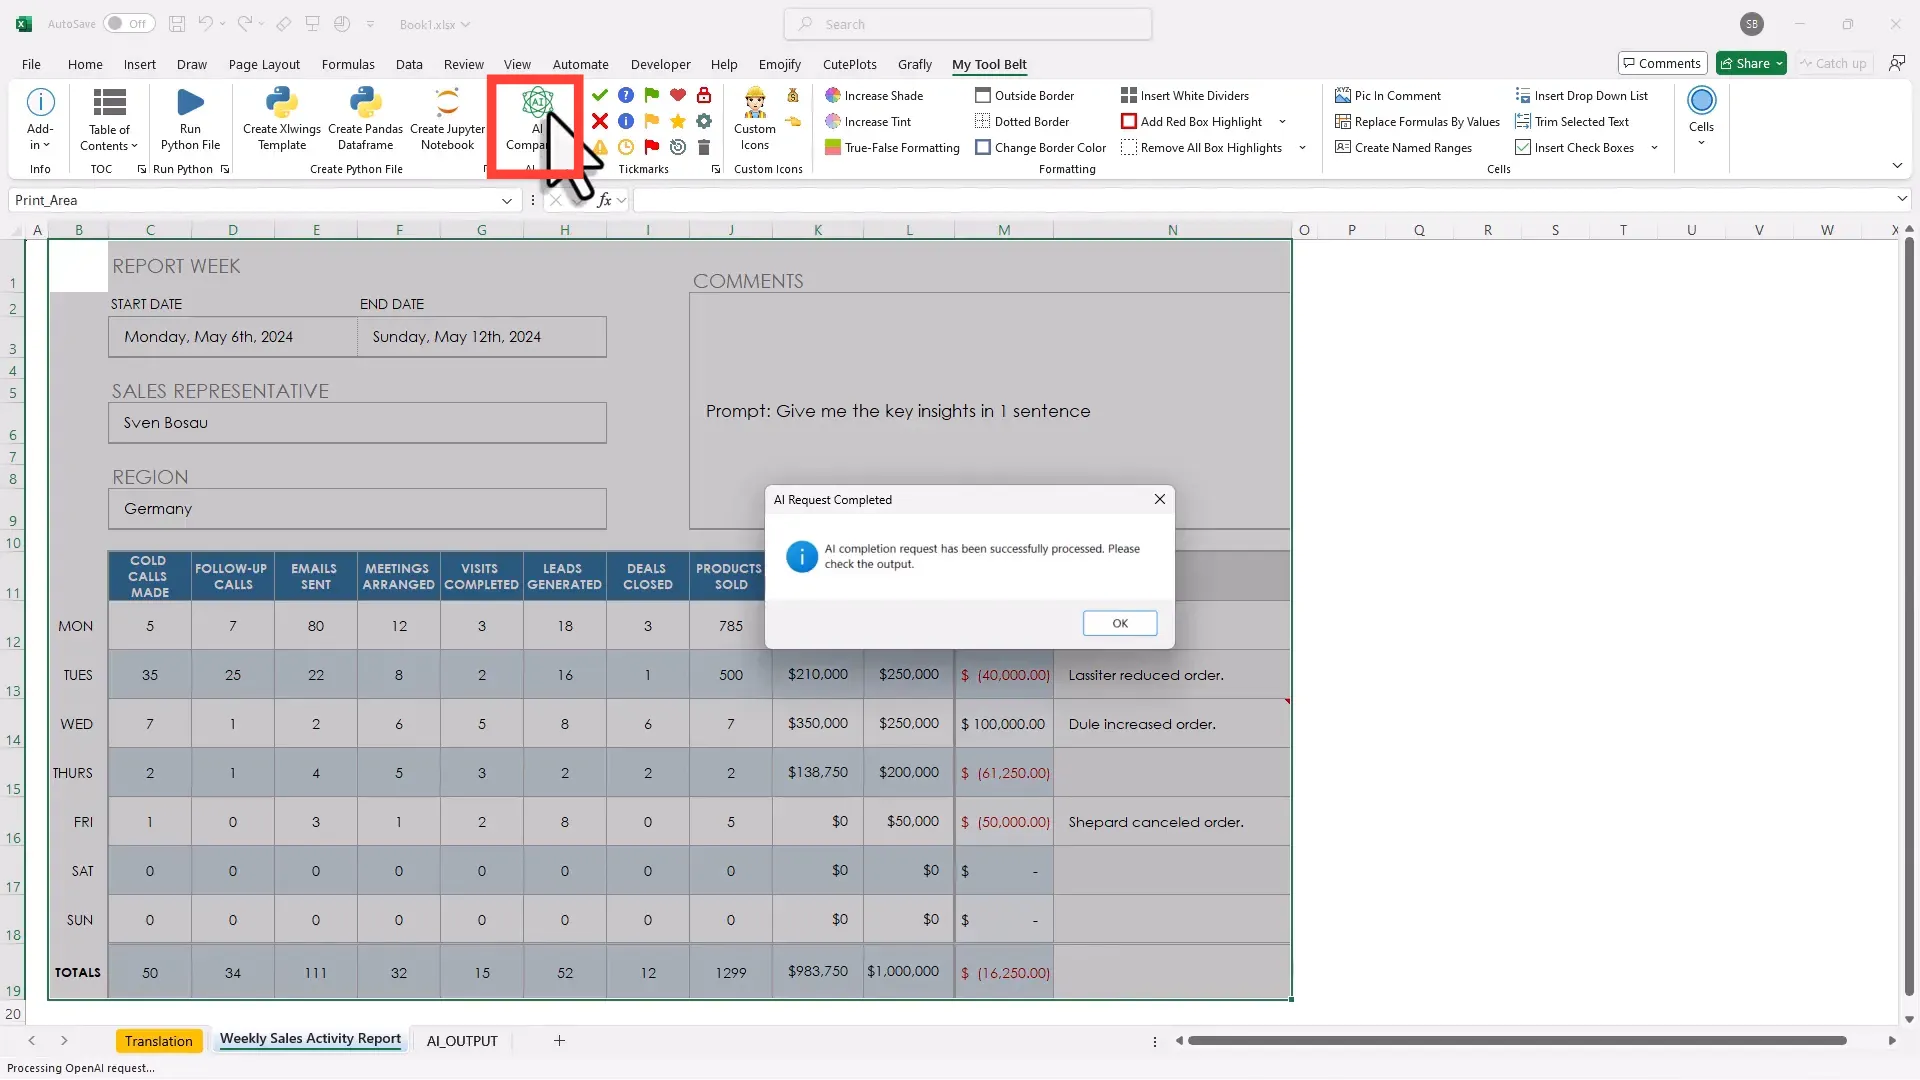
Using the AI Companion Feature
With My Tool Belt, you can easily implement the AI Companion feature. This allows you to input prompts directly into your Excel cells. For instance, if you want to summarize a dataset, simply write your prompt in a cell and select the relevant data range.
Once you hit enter, the AI will process your request and return the result in the selected cell. This dynamic updating feature means that if you change your input, the AI will automatically recalculate and provide the updated output.
This approach not only improves efficiency but also enhances interactivity. You can experiment with different prompts and see real-time results, making it a versatile tool for various applications in Excel.
Conclusion
Integrating AI into Excel has never been easier. With tools like xlwings Lite and My Tool Belt, you can create powerful functions that enhance your data analysis and streamline your workflow. From converting data to Markdown, saving your code, to leveraging the AI Companion feature, these tools offer a comprehensive solution for both novice and experienced users.
By following the steps outlined in this guide, you can harness the capabilities of AI to transform your Excel experience. Whether you’re analyzing data, generating insights, or automating tasks, the possibilities are limitless. Dive in and explore the potential that AI offers in your spreadsheets.