Build and Deploy a Multi-Page Web Application Using Python (Streamlit)
Introduction
Creating a web application from scratch can seem daunting, especially if you’re not familiar with HTML, CSS, or JavaScript. Fortunately, with the power of Python and the Streamlit package, you can build a fully functional multi-page web application without writing a single line of those languages. In this guide, we’ll walk you through the process of creating and deploying a web application using Streamlit.
Overview of the Application
Before we dive into the coding aspect, let’s take a quick tour of our web application. Here’s what you can expect:
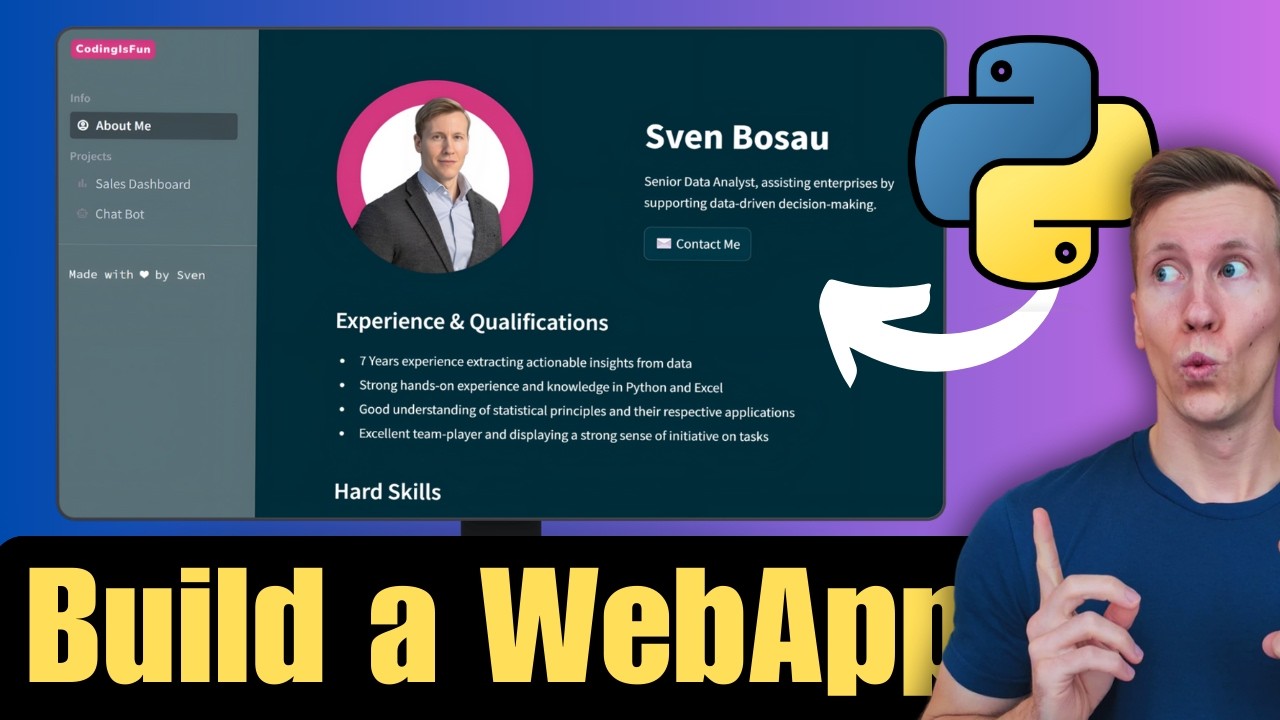
- Landing Page: Features a contact button that opens a fully functional contact form in a new window.
- Contact Form: Allows users to submit messages, which can be automatically forwarded via email or stored in a Google Sheets document.
- Navigation Menu: Located on the left side, it includes various sections and can be hidden or shown as needed.
- Additional Features: A sales dashboard and a chatbot application are also integrated into the app.
What You Need
To follow along with this tutorial, you should have:
- Basic knowledge of Python.
- Streamlit installed (if you haven’t installed it yet, you can do so using
pip install streamlit). - Familiarity with using pip for package management.
Setting Up Your Environment
-
Install Required Packages: In addition to Streamlit, we will be using
pandasfor the sales dashboard andrequestsfor handling the contact form submissions. Install them using:pip install pandas requests -
Create Your Project: Launch your favorite code editor (like VS Code) and create a new Python file named
streamlit-app.py. -
Basic Structure: Start by importing Streamlit and displaying a simple title on the website. You can run your app using:
streamlit run streamlit-app.py
Creating a Multi-Page Application
Setting Up Navigation
To transform your single-page application into a multi-page one, follow these steps:
-
Create a Views Folder: This folder will contain all your different pages. You can create files like
about-me.py,chatbot.py, andsales-dashboard.py. -
Define Routes: In your main file, define the routes for each page.
-
Add Navigation Logic: Use the Streamlit navigation feature to include all the pages in a list. This will allow users to switch between pages easily.
Adding Content to Each Page
For each page, you can include relevant content. For instance, the About Me page can display a profile picture and a contact button. Here’s how to implement it:
- Columns: Use Streamlit’s column feature to display content side by side.
- Contact Button: When clicked, this button can trigger a popup window containing the contact form.
Implementing the Contact Form
To create a structured contact form:
-
Create a Forms Folder: Inside this folder, create a file named
contact.pyto define your contact form. -
Define Form Elements: Use Streamlit’s form element to include fields like name, email, and message.
-
Webhook Integration: To handle form submissions, consider using a no-code tool like Pabbly Connect to set up webhooks for automating the process of forwarding messages or storing them.
Deploying Your Application
Once your application is ready, it’s time to deploy it:
-
Upload to GitHub: Initialize a new repository and push your code to GitHub.
-
Streamlit Community Cloud: Navigate to the Streamlit Community Cloud, log in, and create a new application using your GitHub repository link.
-
Set Up Secrets: If you have sensitive information like webhook URLs, use a
secrets.tomlfile to keep them safe and avoid exposing them in your code. -
Launch Your App: Once deployed, your application will be live on the internet, accessible to anyone with the link.
Final Checks
After deployment, make sure to test all functionalities, including the contact form, to ensure everything is working correctly.
Conclusion
Congratulations! You’ve just built and deployed your own multi-page web application using Python and Streamlit. This powerful combination allows you to create interactive web applications quickly and efficiently. If you found this guide helpful, consider sharing it with others or checking out additional resources for more advanced features.