Automate Your Gmail with Excel & Python (FREE Template)
Introduction
In this section, I will guide you through the essential steps to set up your Gmail account for sending emails using Python. To begin with, it’s crucial to create an app password, which is a special password that allows third-party applications like Python to access your Gmail account securely. This method is necessary because your regular Gmail password won’t suffice for this purpose.
Setting up Google App Password
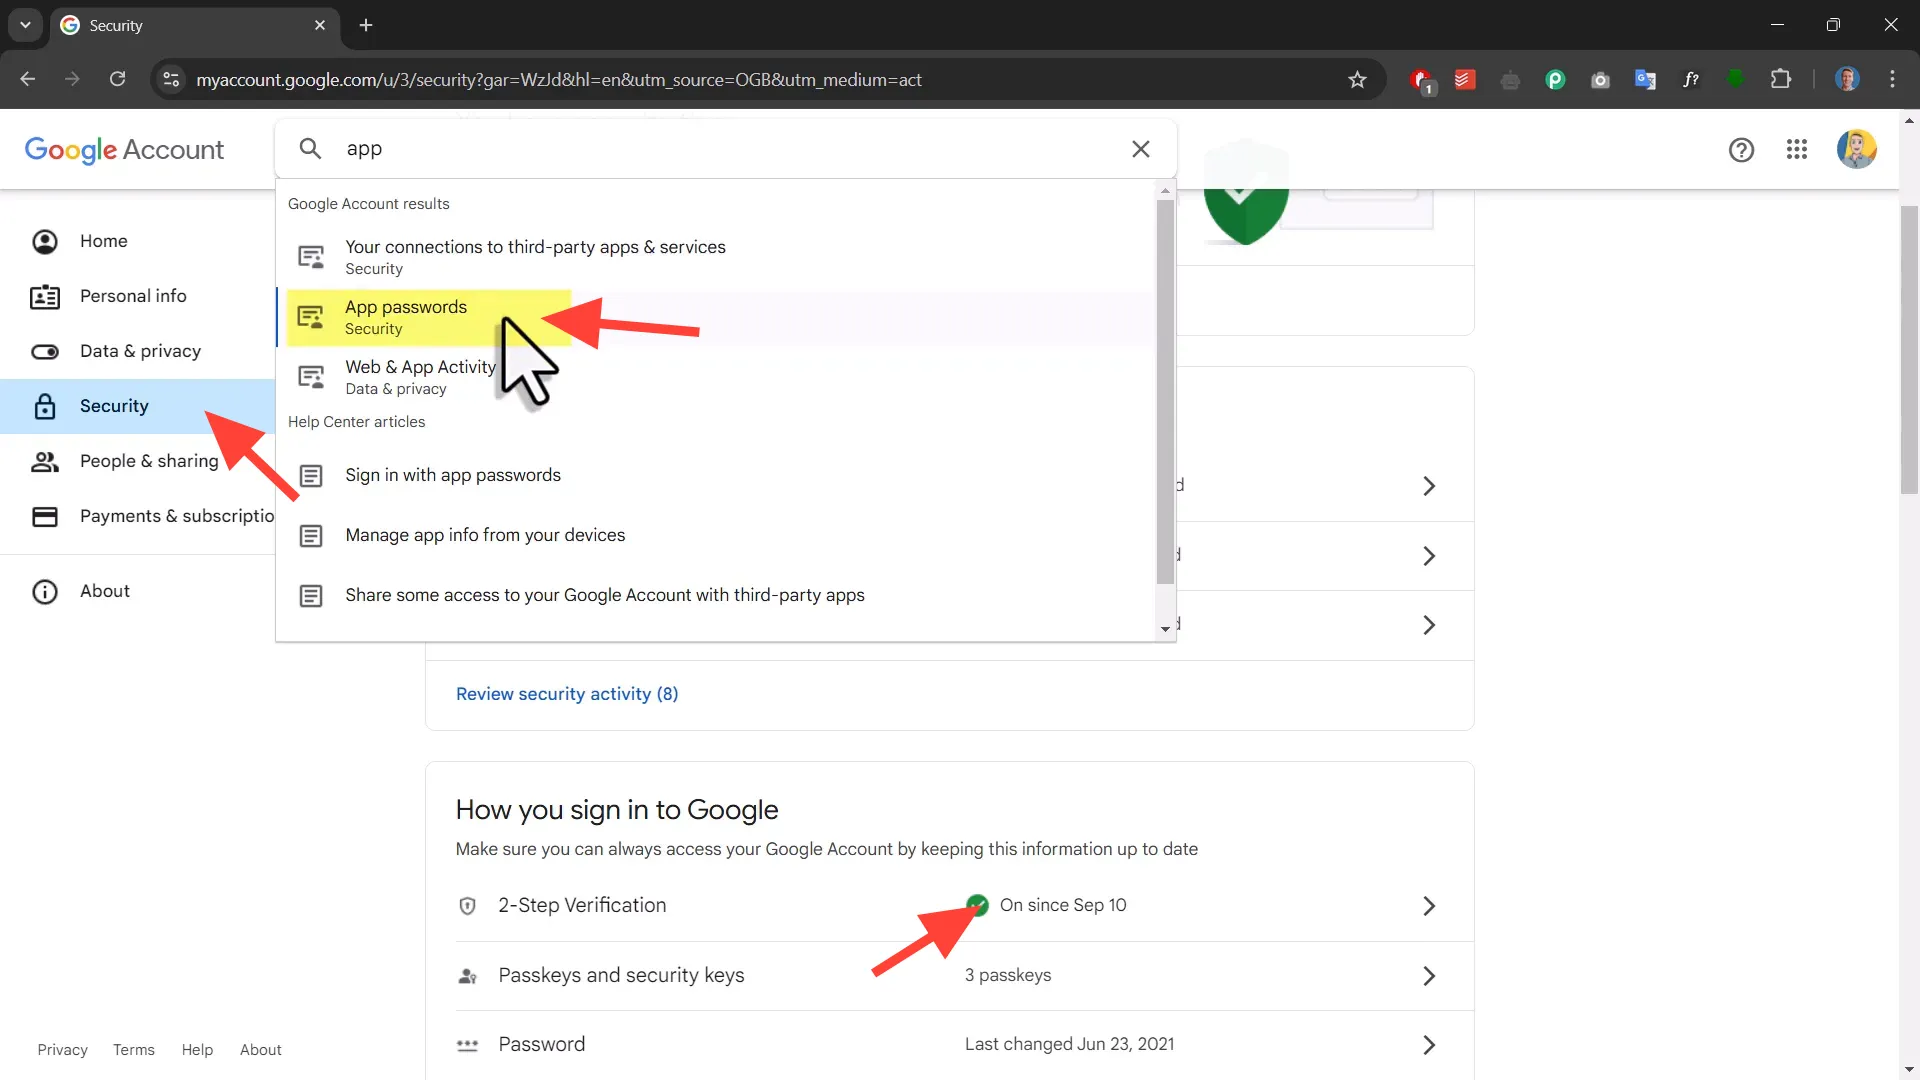
Creating an app password is straightforward. First, ensure you have two-step verification enabled on your Google account. This adds an extra layer of security. Here’s how to do it:
- Log in to your Google account and navigate to the Security section.
- Check if Two-Step Verification is enabled. If it’s not, follow the prompts to enable it.
- Once enabled, look for App Passwords in the security settings.
- Click on App Passwords and re-enter your password when prompted.
- Name your app password, for instance, Python Gmail Blaster, and click Create.
- Copy the generated app password; you’ll need it for your Python script.
Keep in mind that this password grants access to your account. Therefore, safeguard it carefully and do not share it with anyone.
Sending Emails with Python (Simple Example)
Now that the app password is ready, I can illustrate how to send emails using Python. I’ve prepared a basic script that leverages the email modules available in Python.
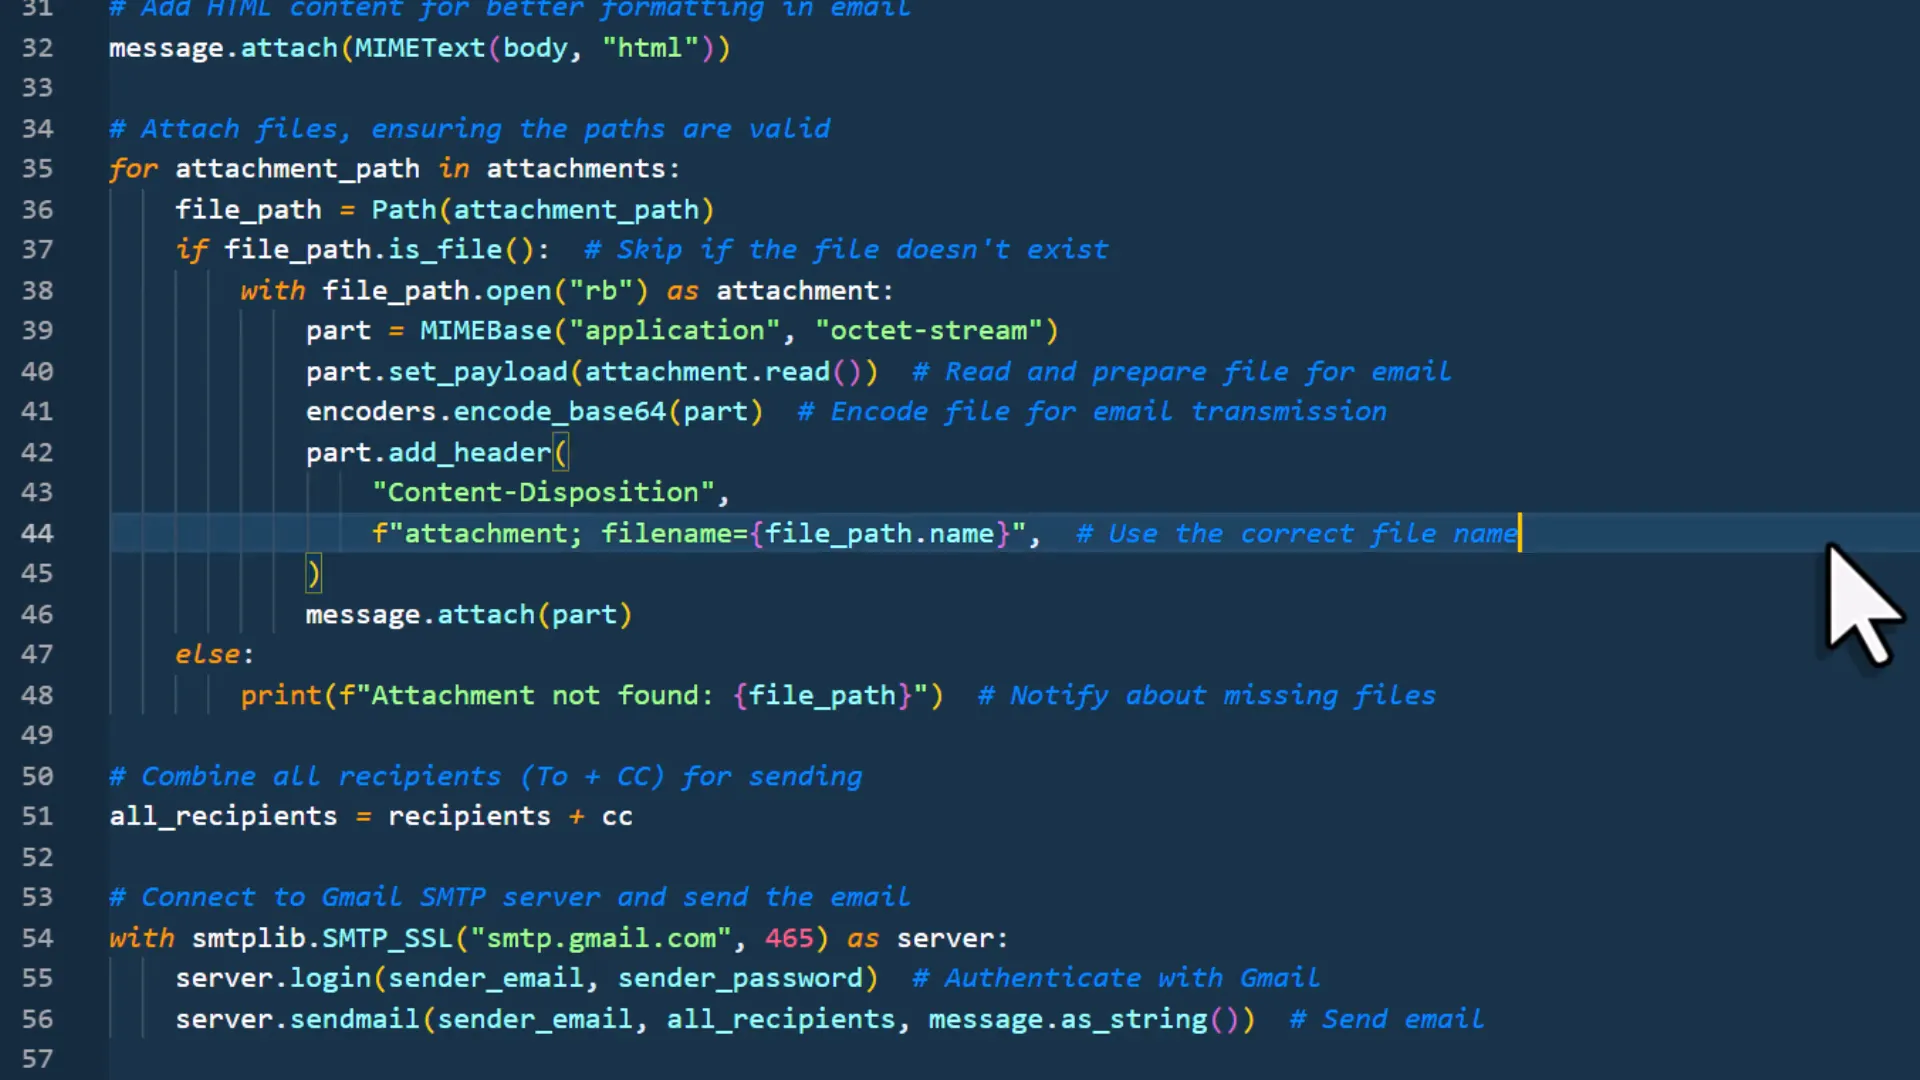
The script begins with importing the necessary libraries, followed by configuring the email parameters such as sender email, recipient email, subject, and body. You can also include attachments if needed.
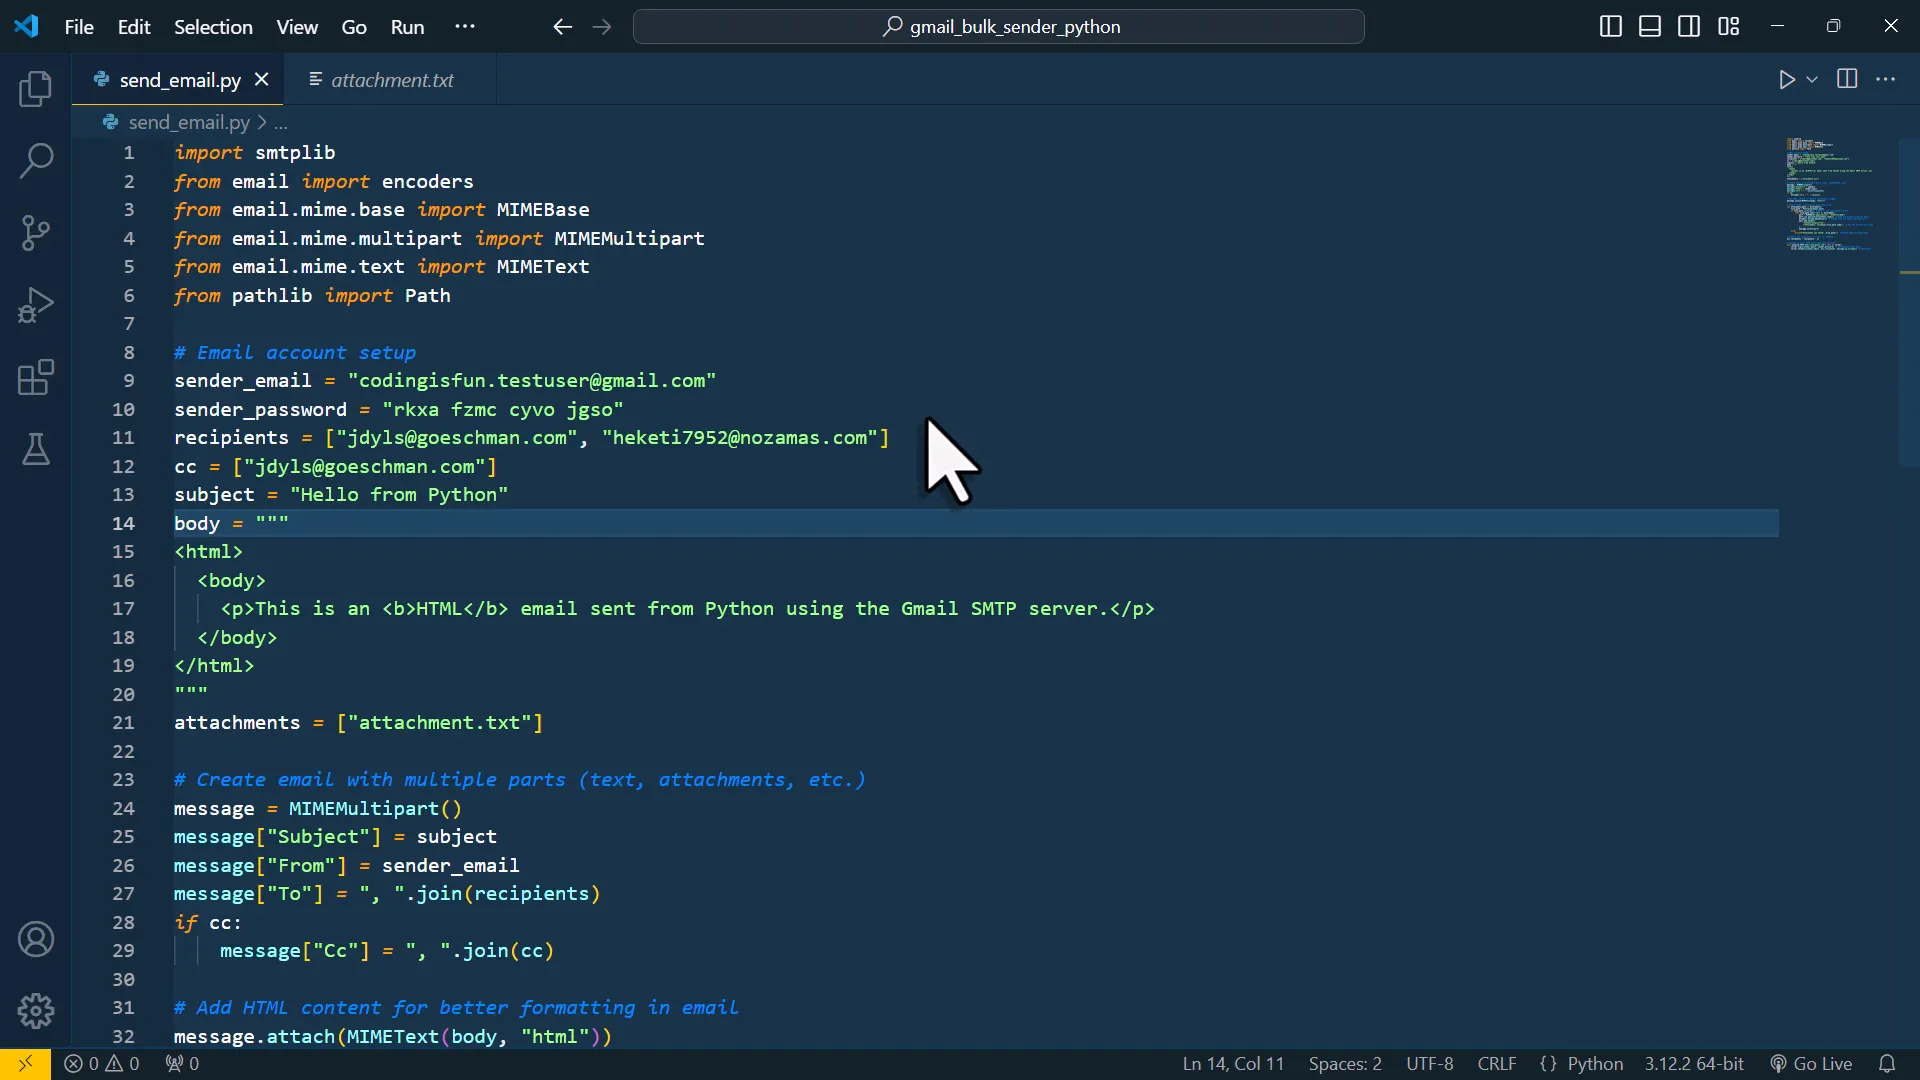
For the email body, I recommend using HTML tags for better formatting. This allows for features like bold text, images, and more. Once everything is configured, the script authenticates using the app password and sends the email. Here’s a brief overview of the process:
- Import the email libraries.
- Set up the email parameters.
- Create the email object and add the content.
- Log in to your Gmail account using the app password.
- Send the email and check your inbox for confirmation.
Connecting Excel with Python
To enhance the functionality, I will connect Excel with Python using a package called xlwings. This allows for a seamless interaction between the two, enabling me to use Excel as a user-friendly interface for sending emails.
First, I need to install xlwings. This can be done easily via pip in the terminal:
- Open your terminal and navigate to your project directory.
- Run the command pip install xlwings.
- After installation, create a new project by executing xlwings quickstart YourProjectName –standalone.
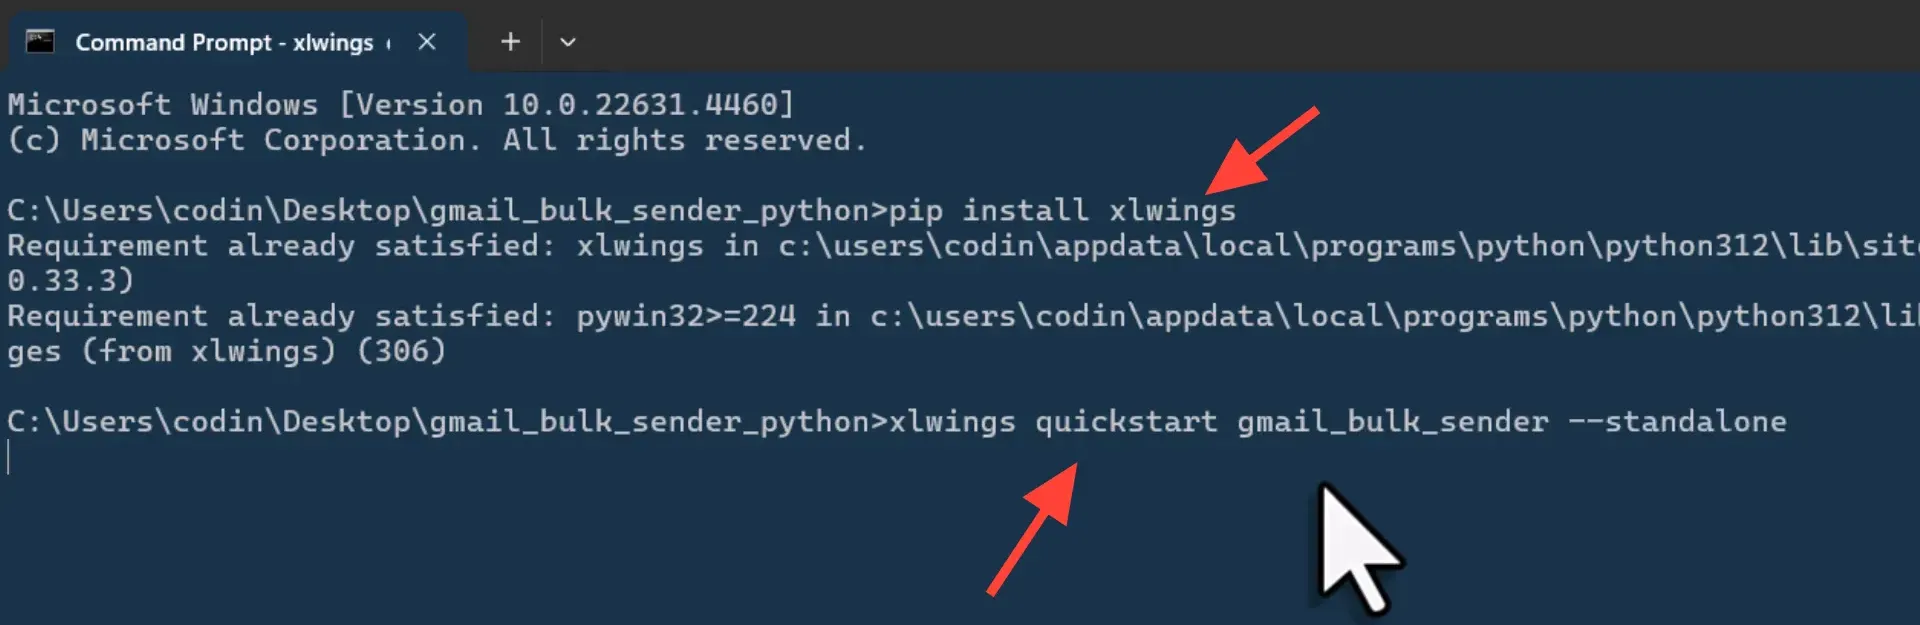
This command generates a new folder containing both an Excel file and a Python file. I will now open the Excel file to set up the user interface.
Building the Excel User Interface
In Excel, I will navigate to the Developer tab (if it’s not visible, I can enable it by customizing the ribbon). Here, I will add a button to execute the Python script when clicked.
- Go to the Developer tab and select Insert.
- Choose the button control and draw it onto the sheet.
- Assign the macro to the button, which should be linked to the Python script.
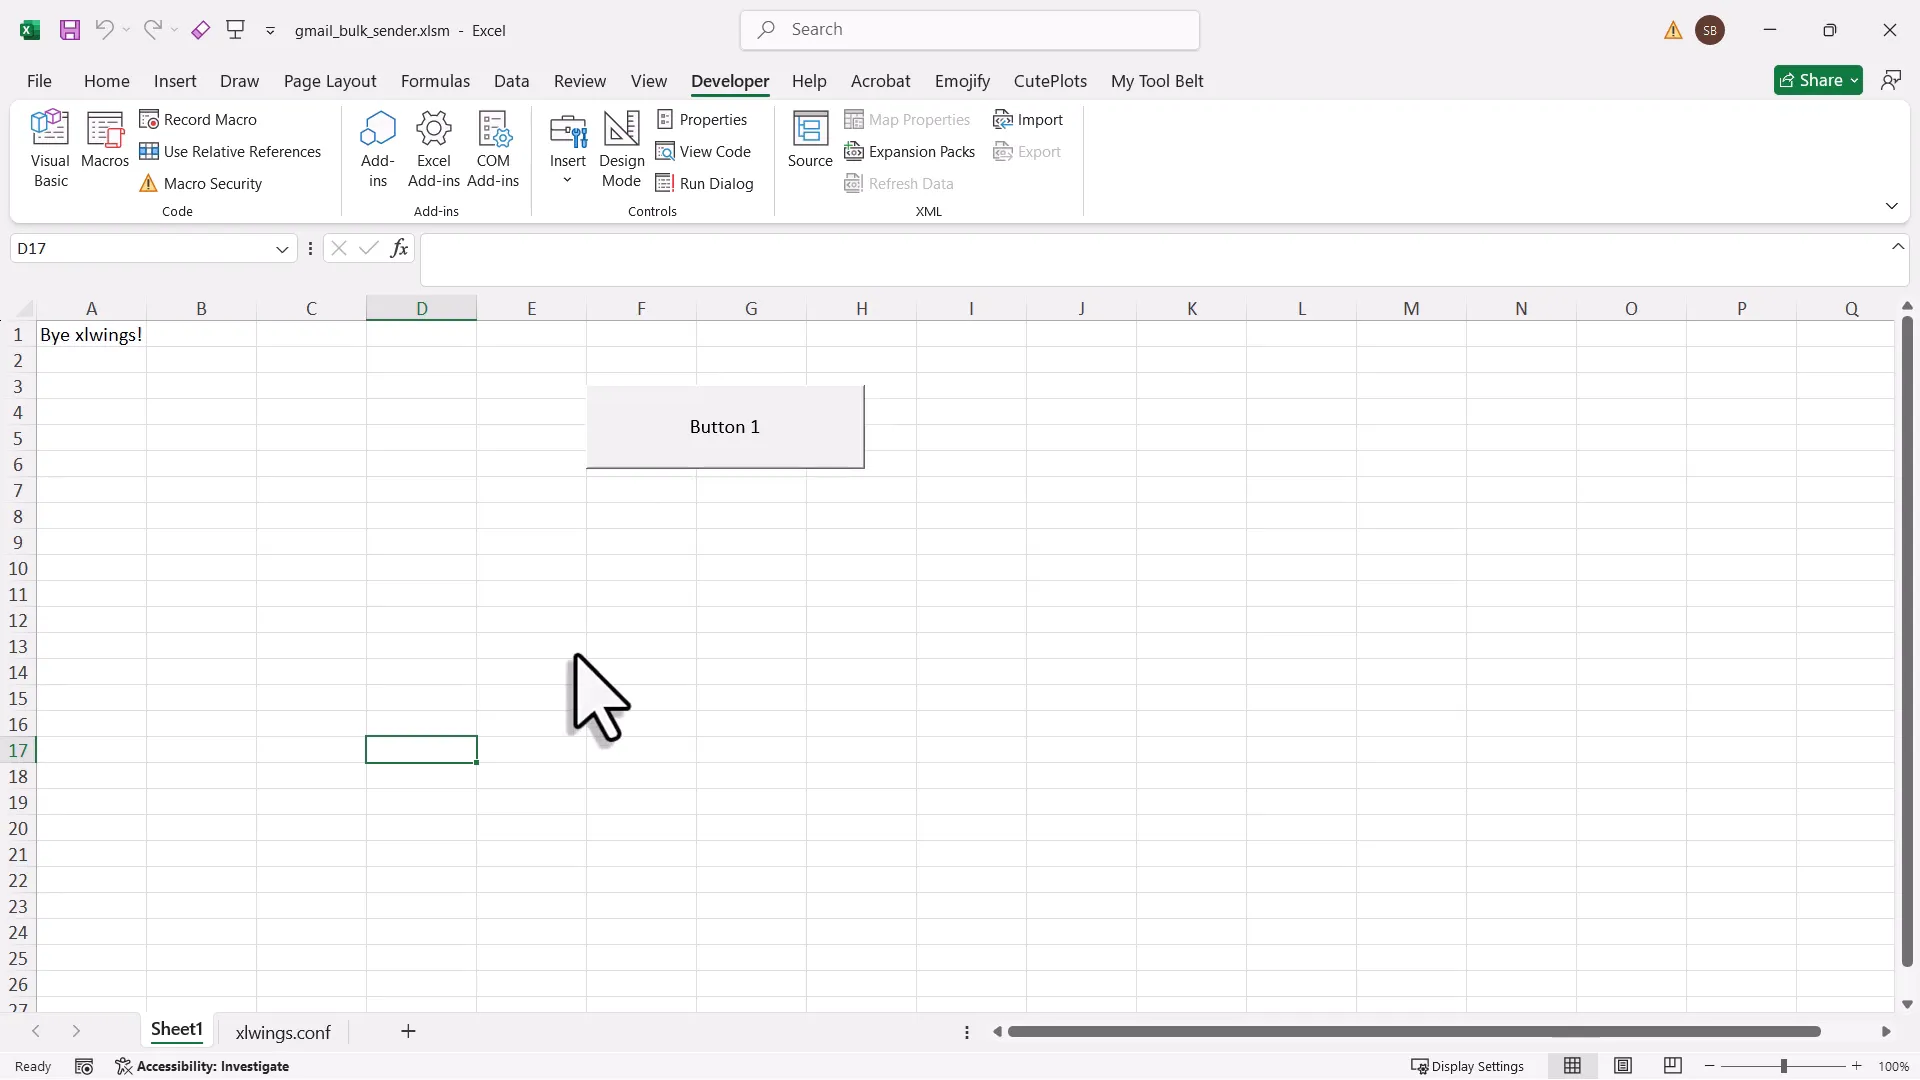
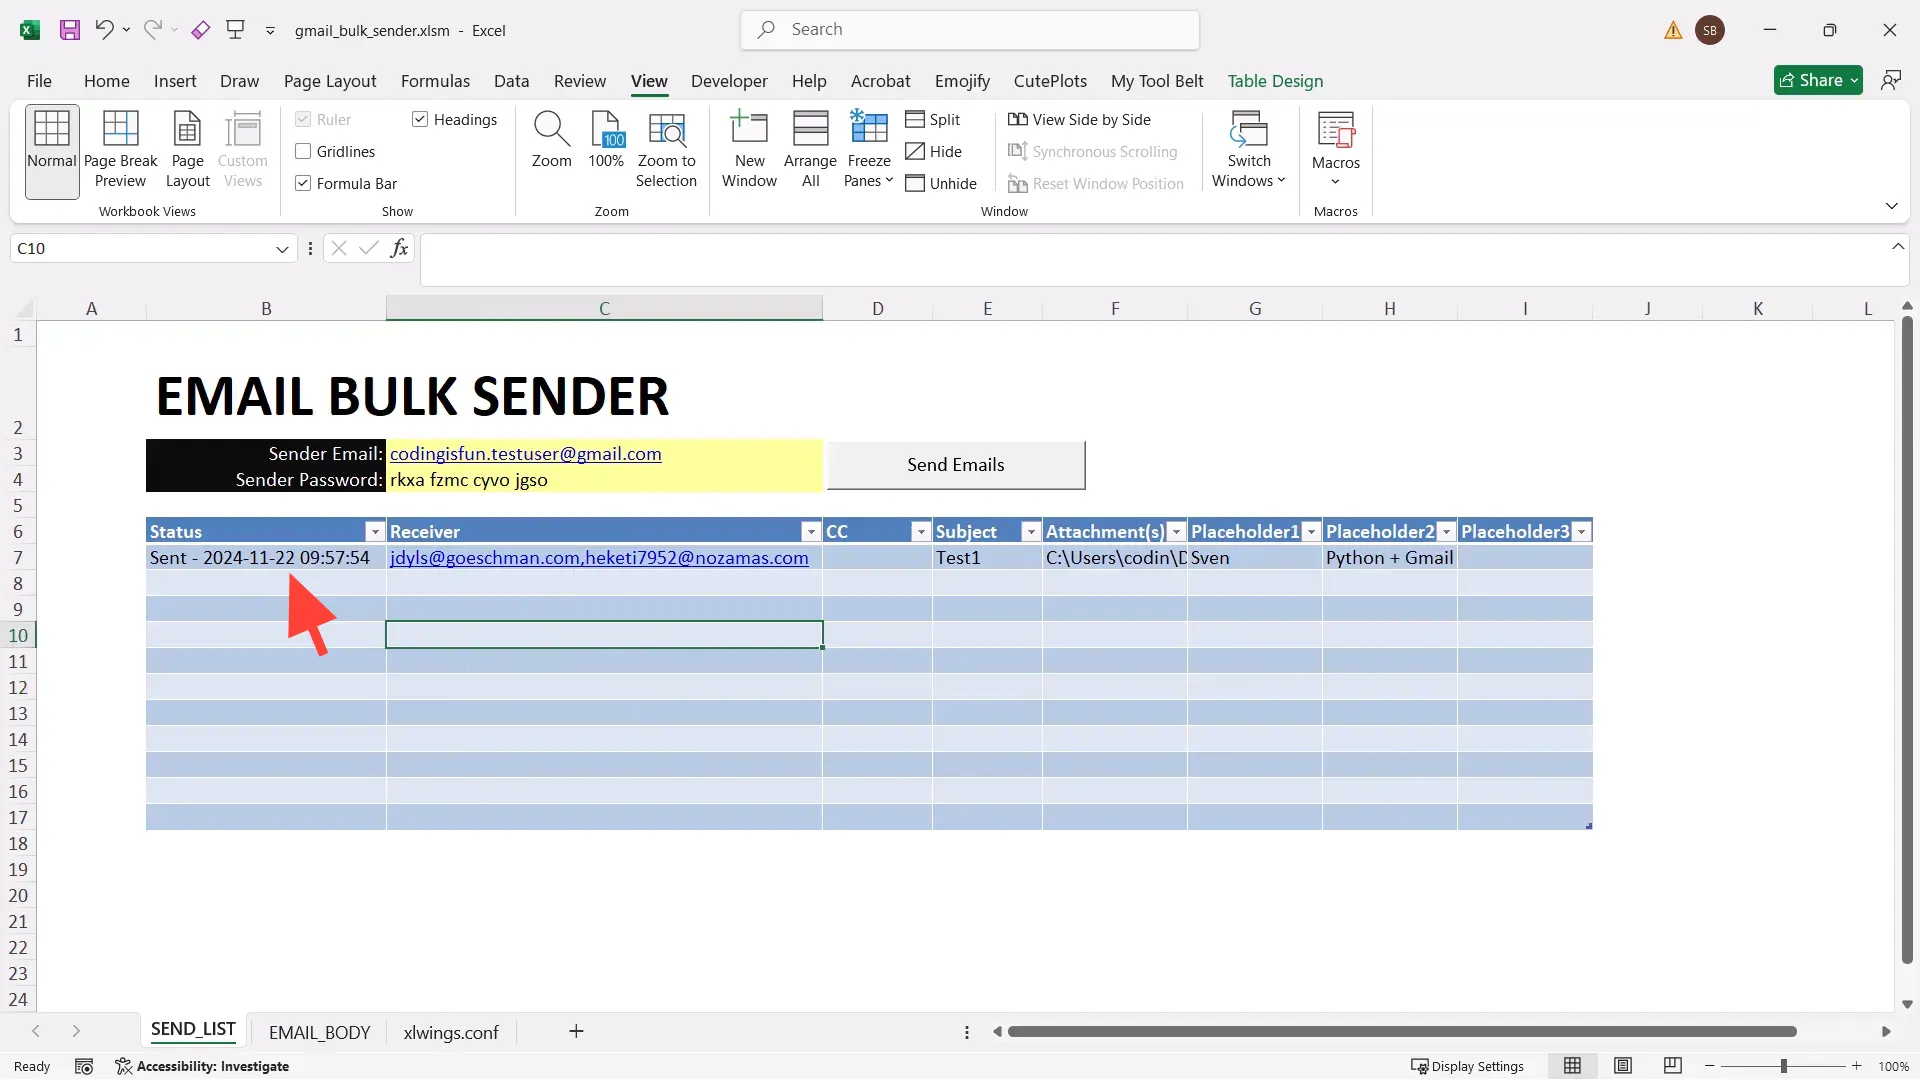
Next, I will rename the button to Send Emails for clarity. After this, I will set up the necessary input fields in the Excel sheet for the sender’s email, password, and other relevant details.
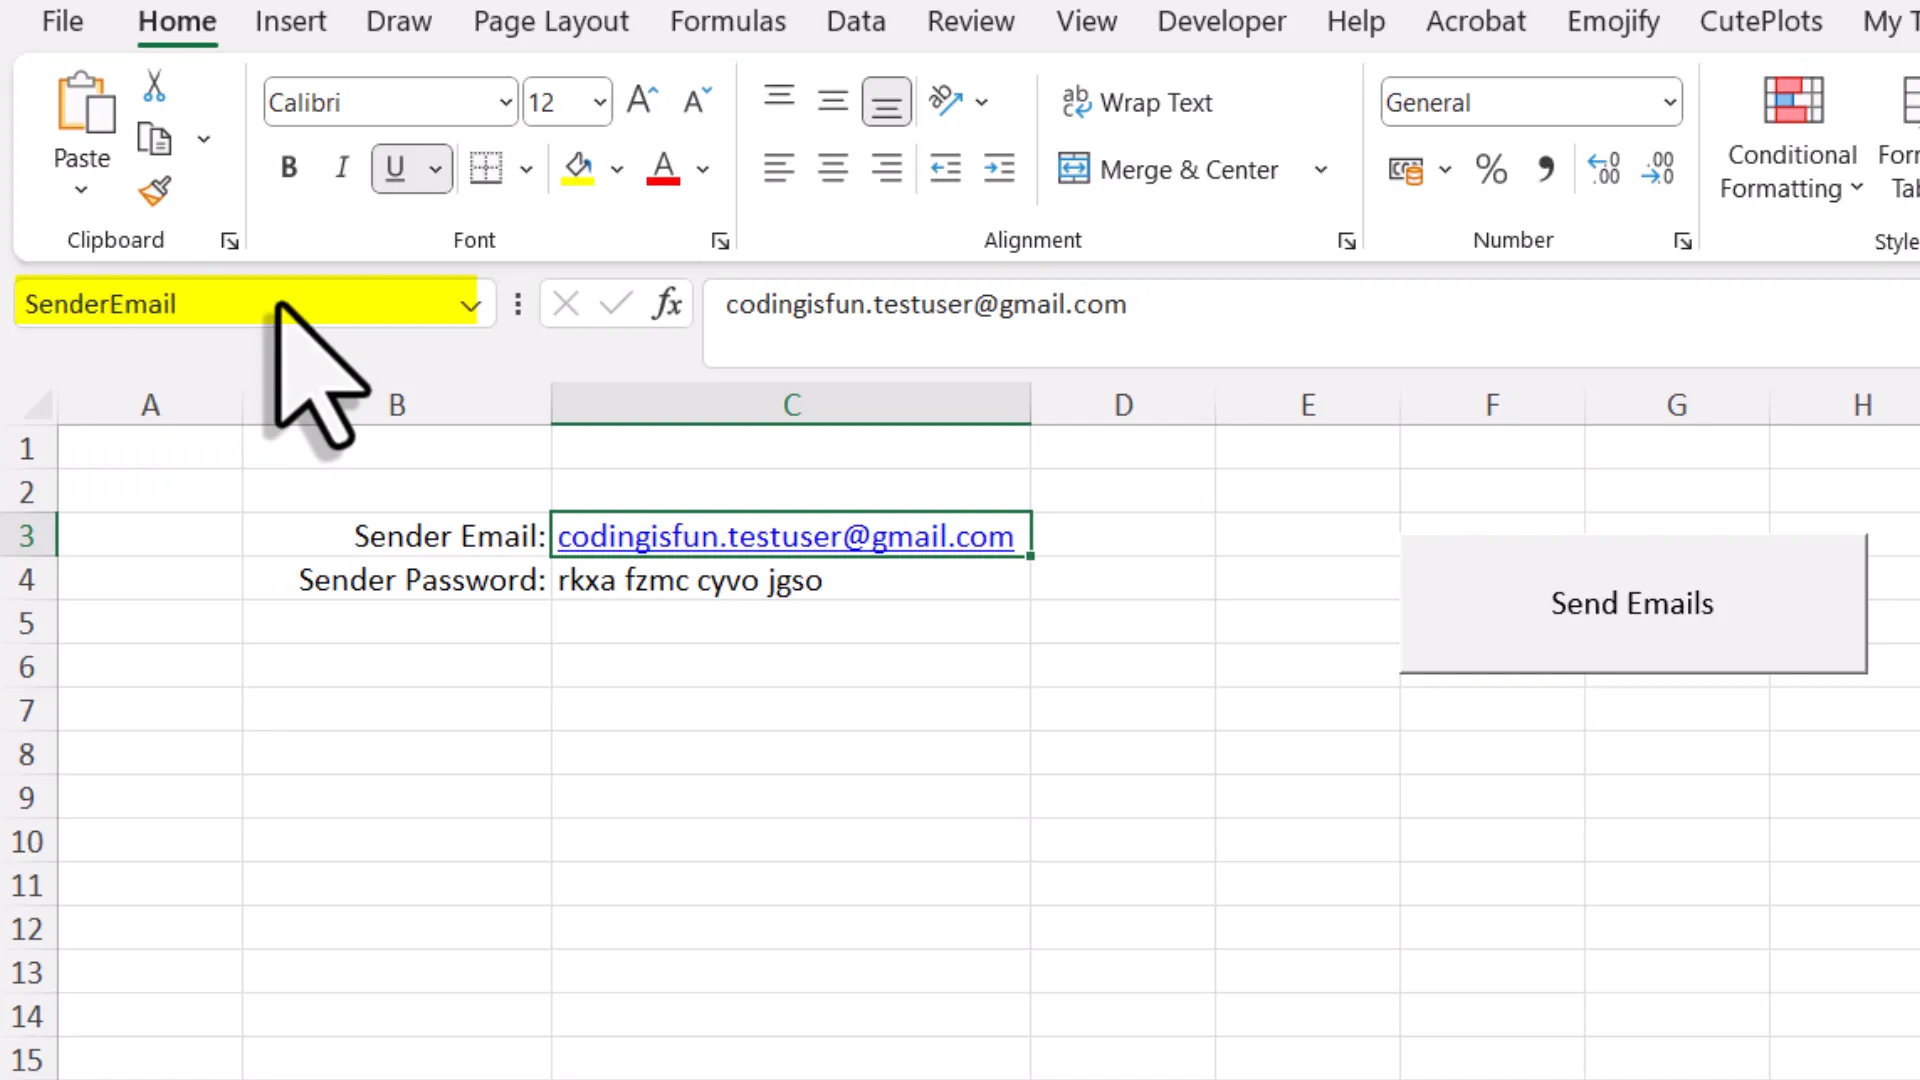
To improve usability, I will name the cells where the sender email and password are stored. This way, I can easily reference them in the Python code without hardcoding cell references.
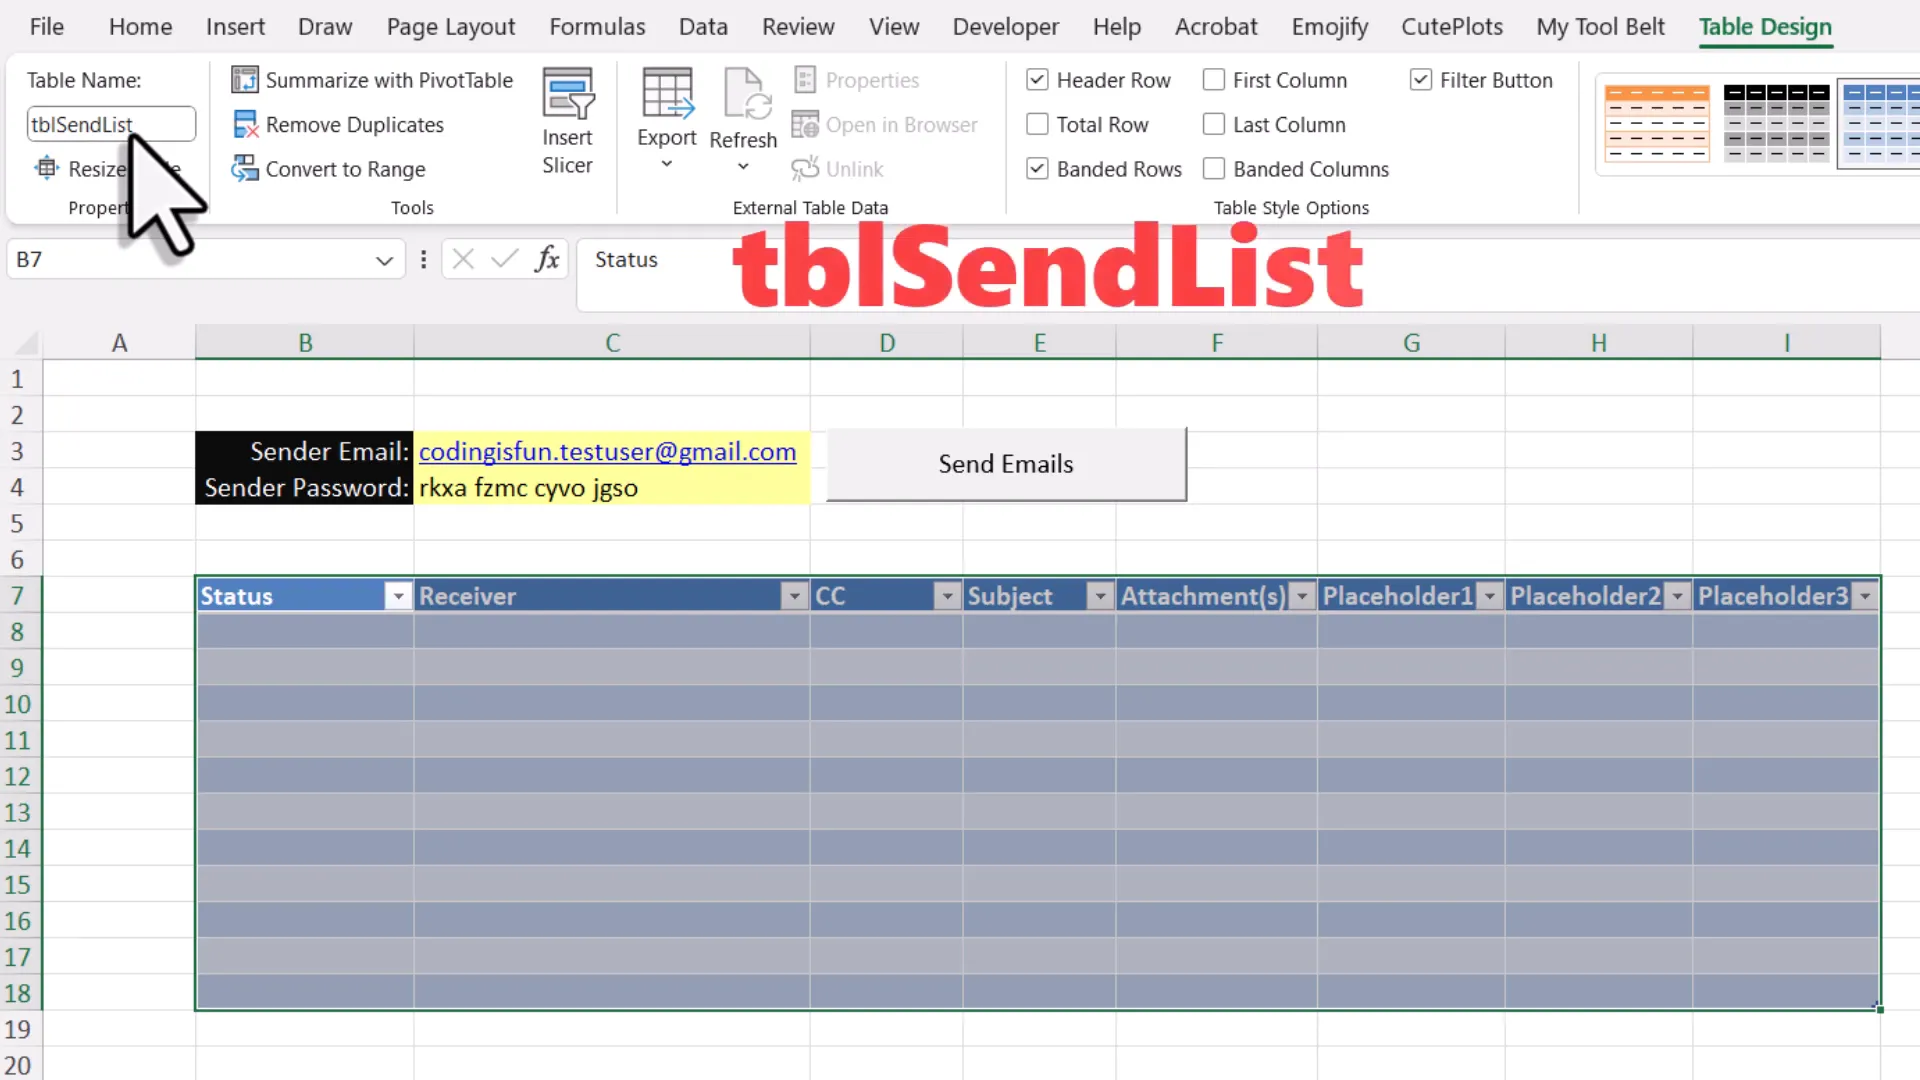
Once the basic structure is in place, I will create a table for organizing the email details. This table will include columns for status, recipient email, subject, and attachments. After creating the table, I will also set up a separate sheet for the email body where I can write the actual message to be sent.
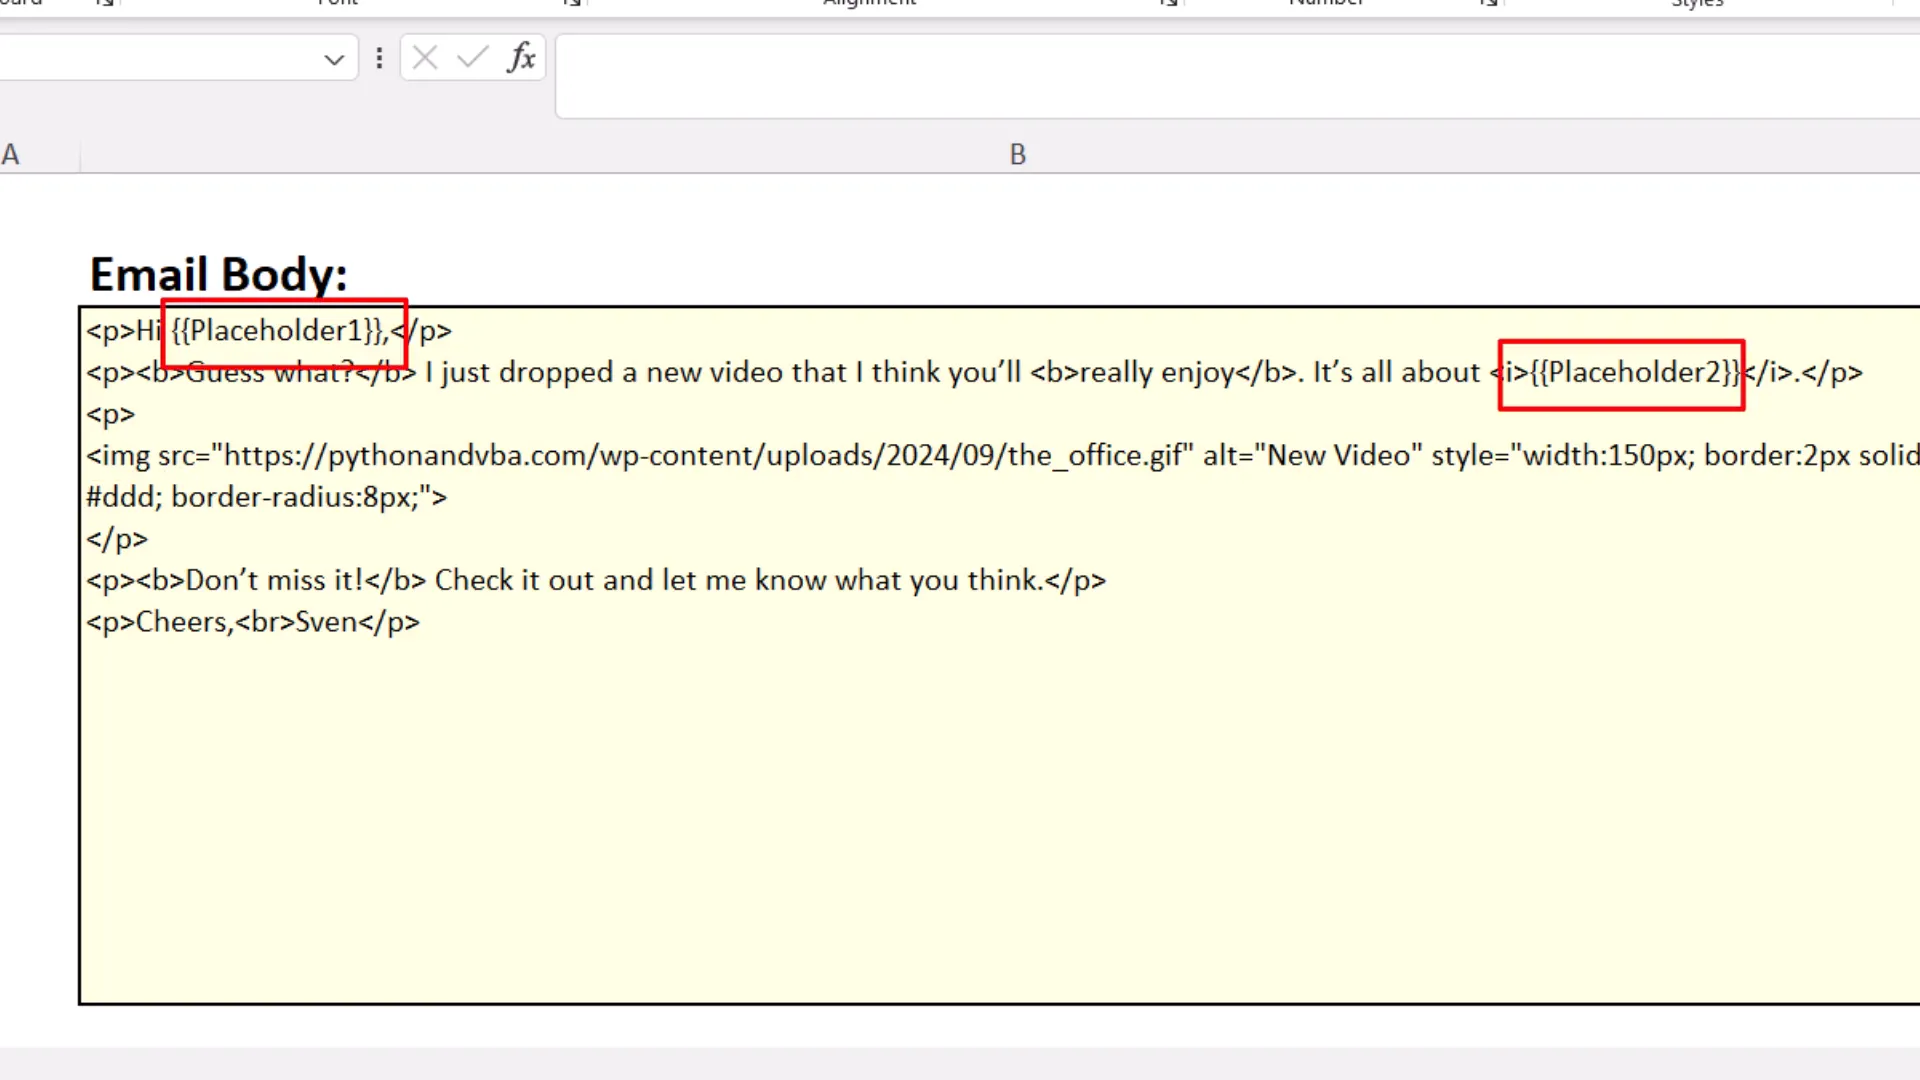
With the user interface built, I’ll ensure that the email body cell supports HTML formatting. This allows me to customize the email content more effectively. I will also introduce placeholders in the email body to personalize each message for every recipient.
As I finalize the setup, I will clean up the Excel sheet by hiding unnecessary rows and columns for a cleaner look. This results in a simple and intuitive interface for users to interact with.
Python Code to Send Emails from Excel
With the user interface set up in Excel, it’s time to dive into the Python code that powers the email sending process. The script is designed to interact with the Excel sheet, retrieve necessary information, and send emails based on the data provided.
First, the script will import the required libraries, including the email modules for composing and sending emails. Once the libraries are in place, I will define the main function to handle the email sending process.
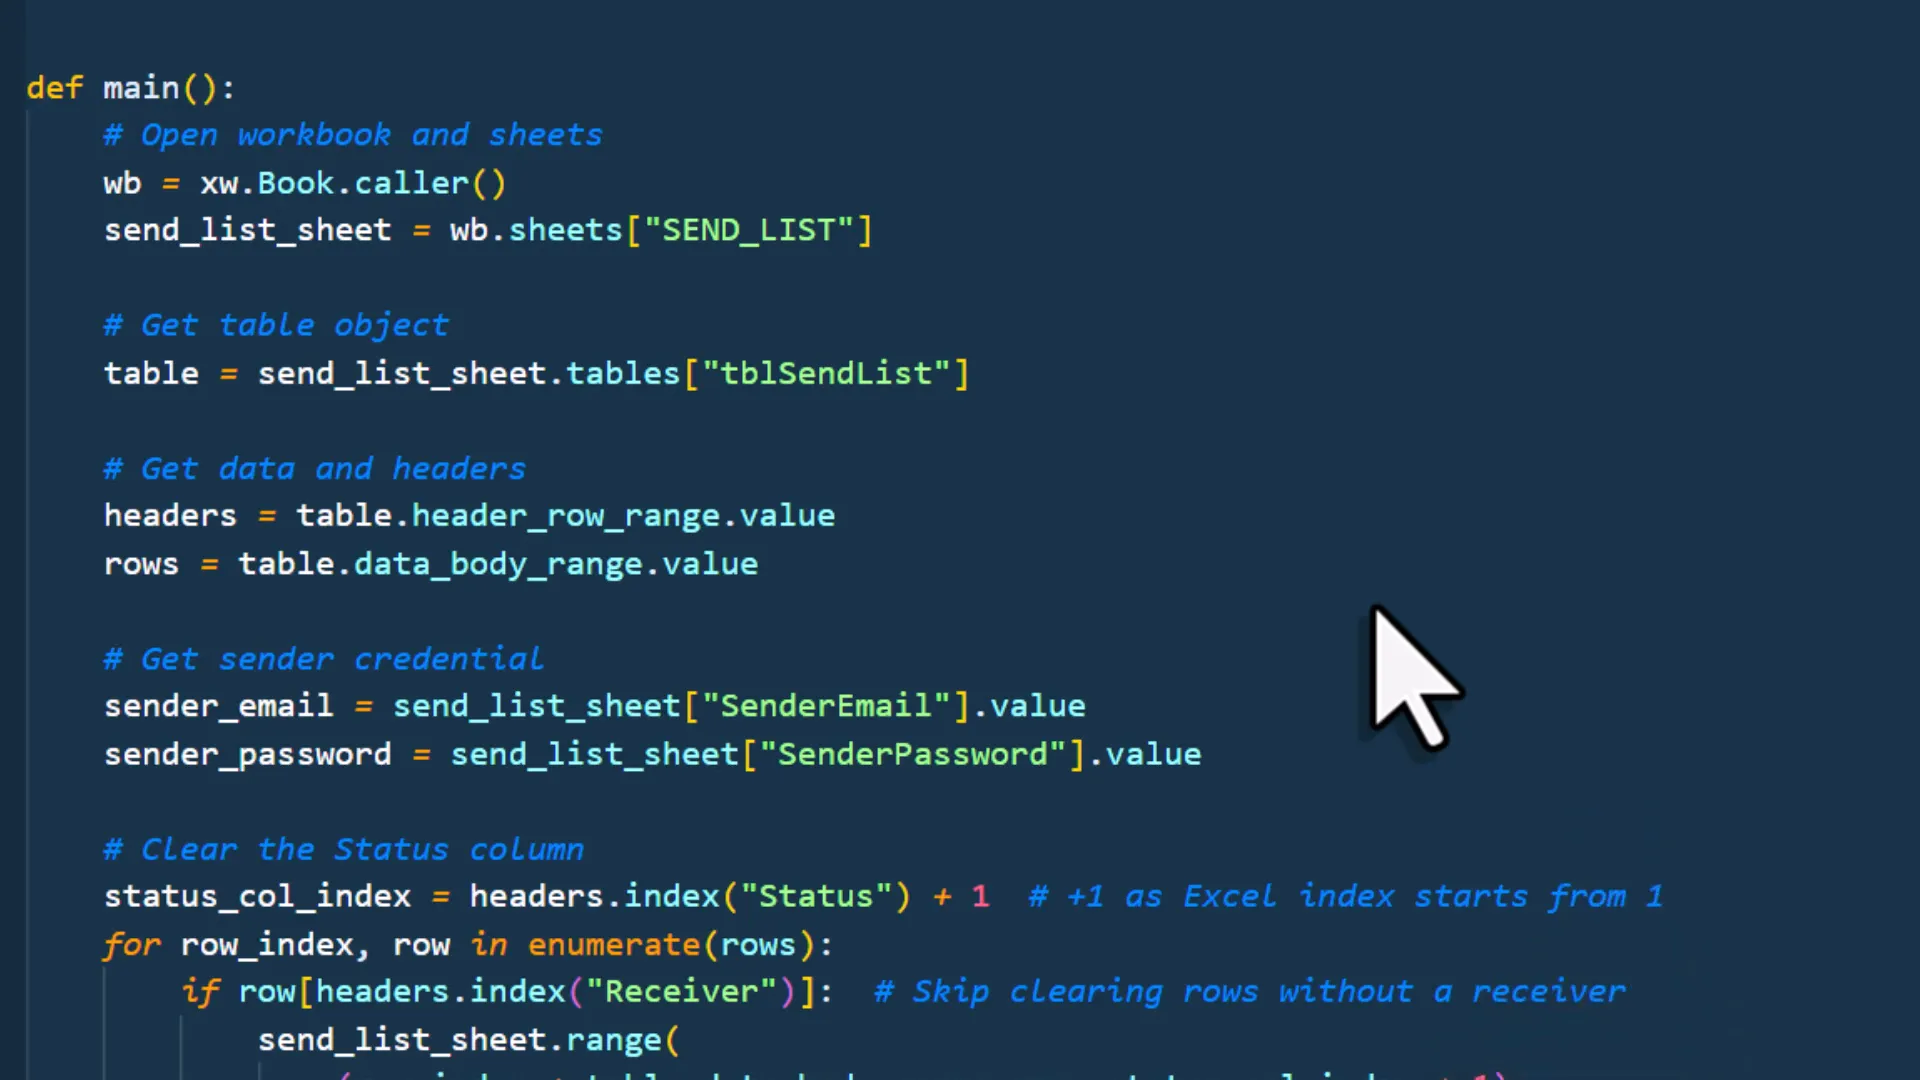
Inside the main function, I will access the specified Excel sheet and gather all the values needed to send the emails. This includes the sender’s email, password, recipient addresses, subject lines, attachments, and the email body content. Using named ranges simplifies this process significantly.
After retrieving the necessary data, the script will clear any previous statuses in the Excel sheet to ensure accurate feedback for the current operation. Then, it will loop through each row in the table, preparing to send emails one by one.
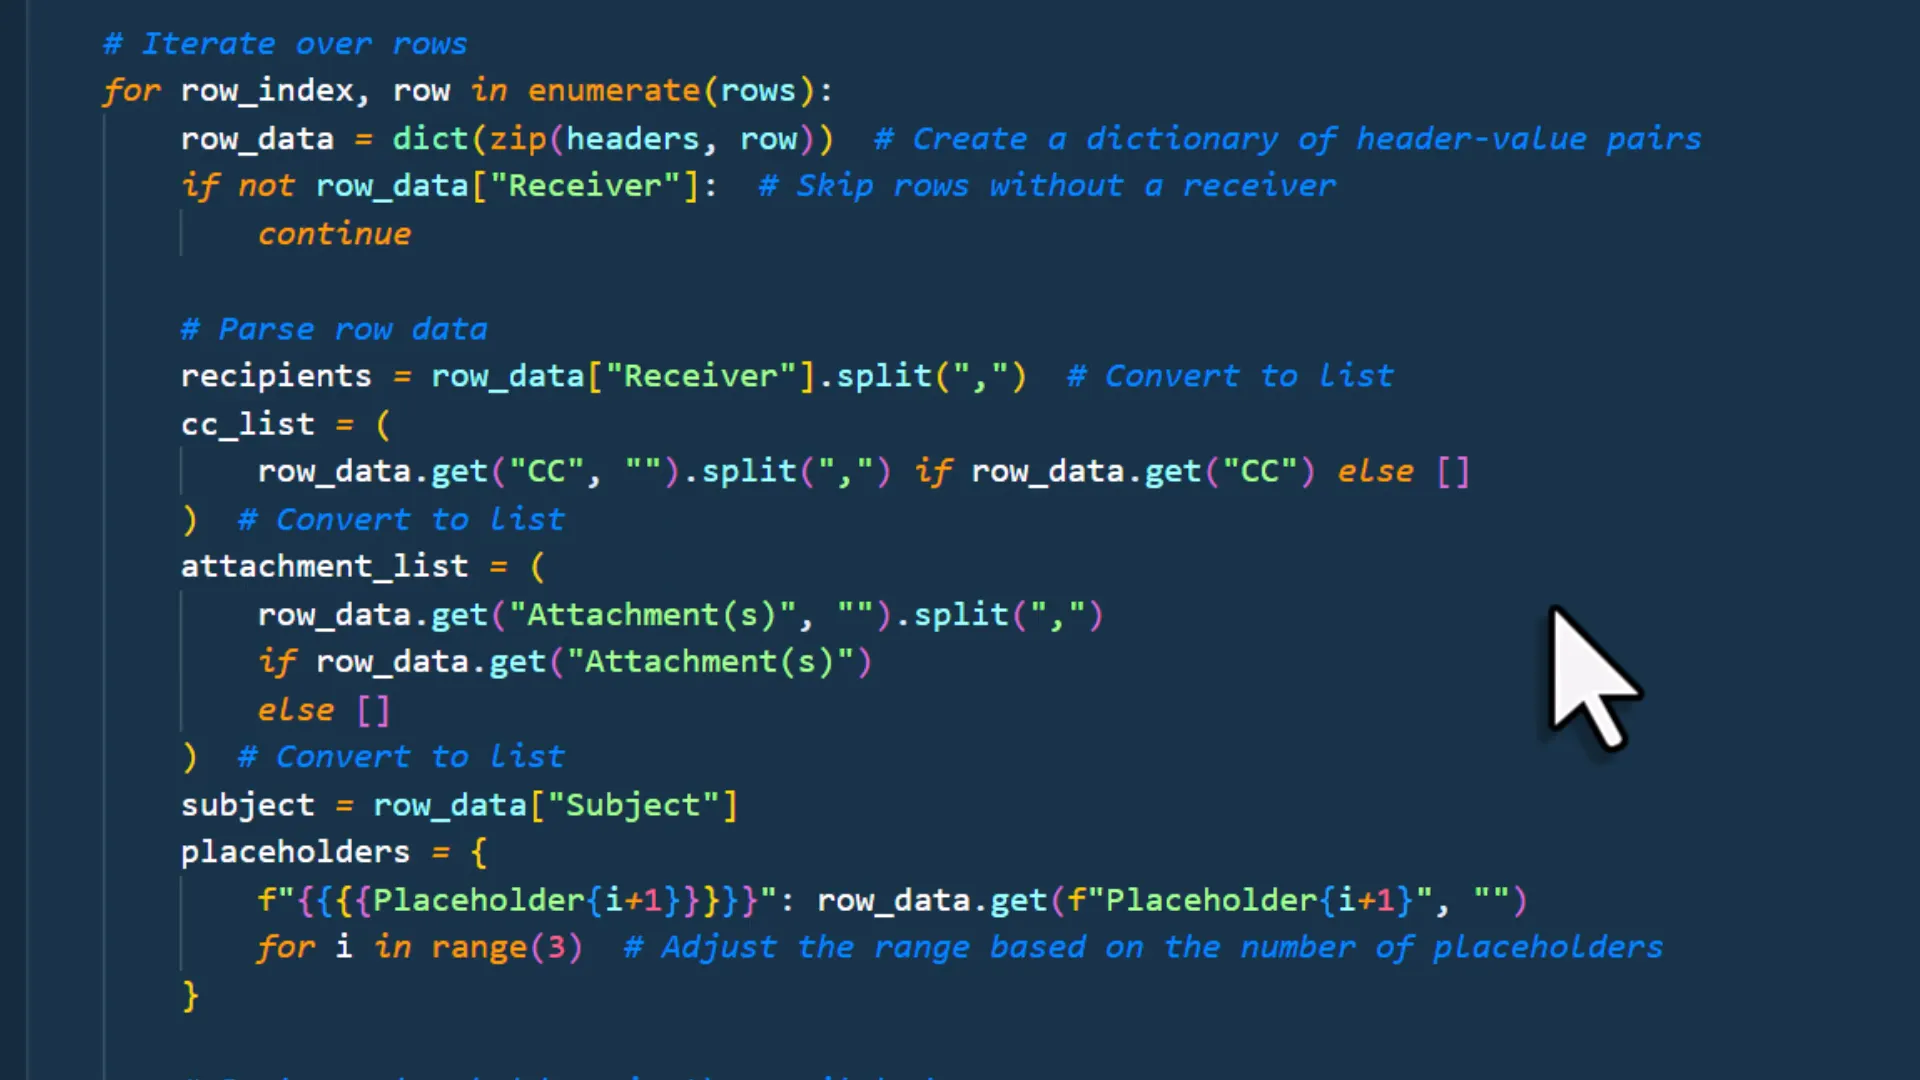
For each email, the placeholders in the body will be replaced with actual values corresponding to the recipient. This personalization is key to making the emails feel tailored and engaging. Once the email is composed, the script will log into the Gmail account using the app password and send the email.
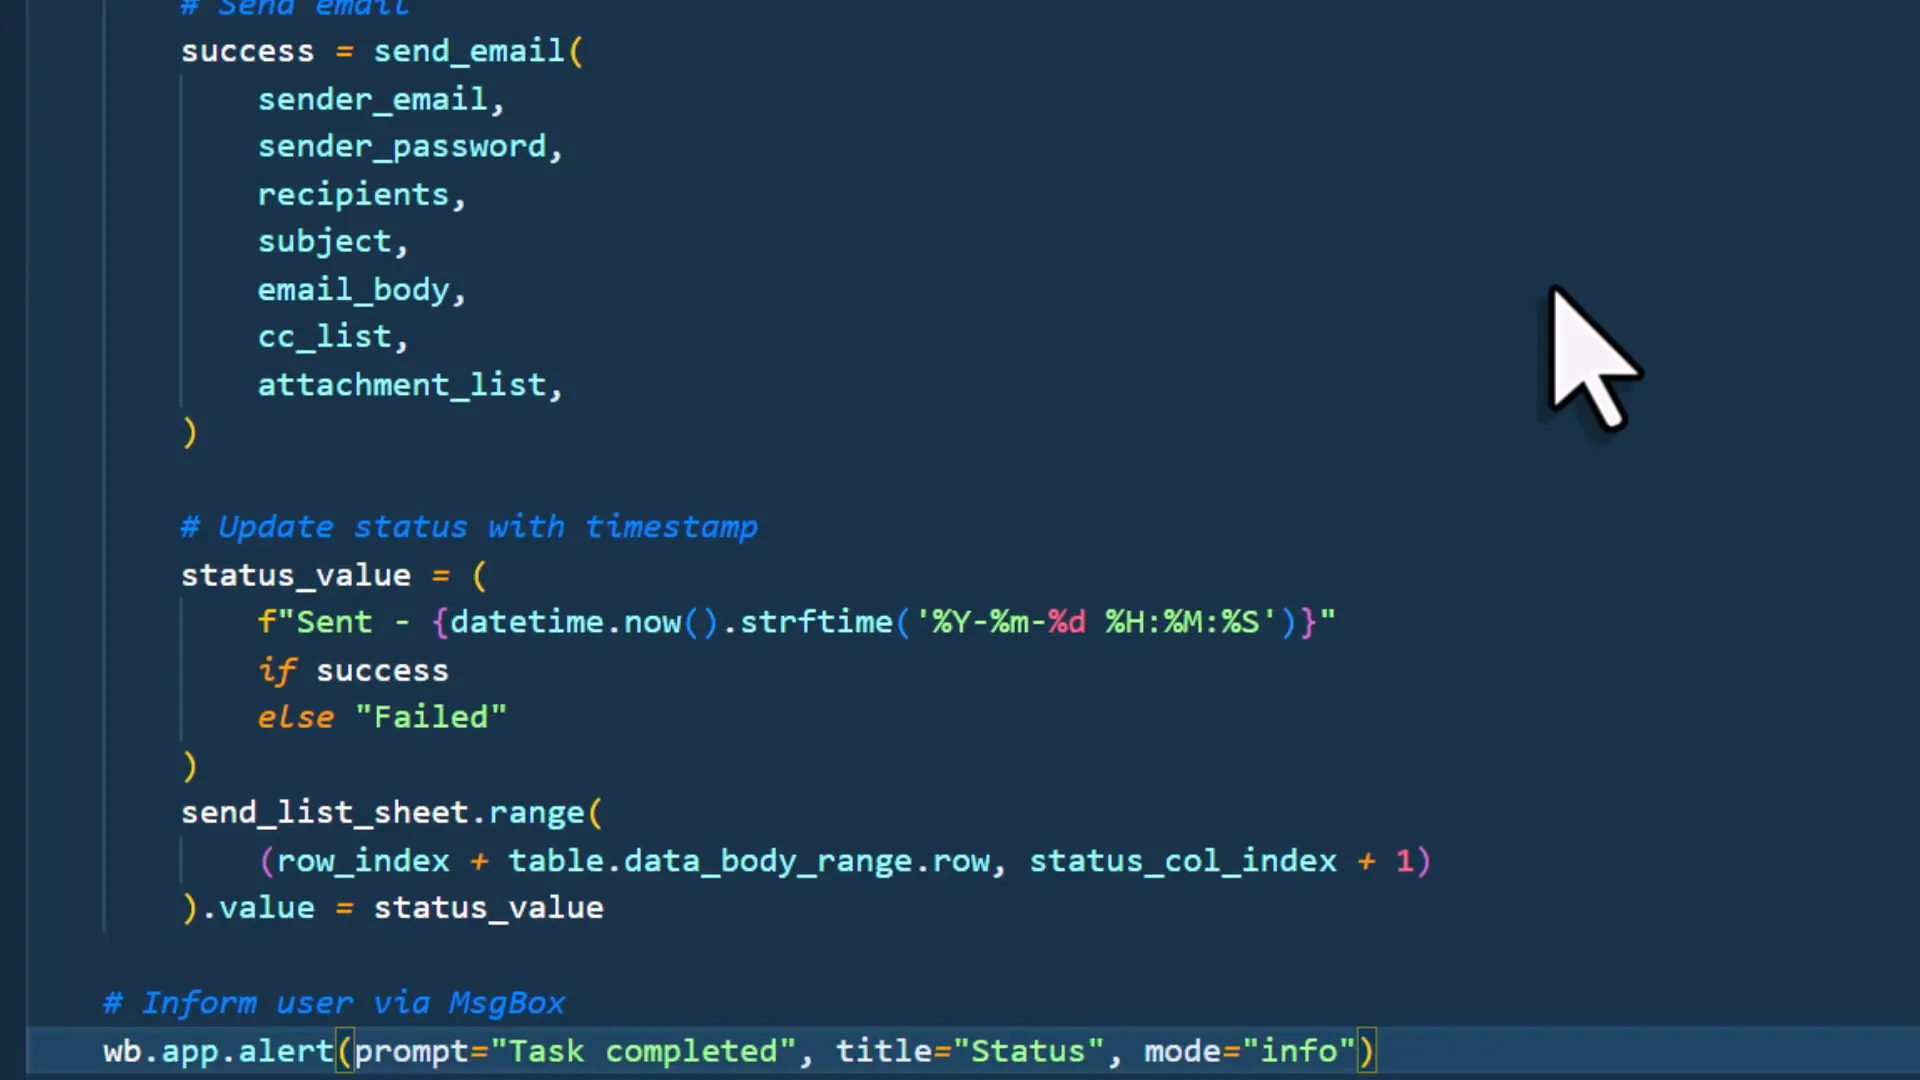
Finally, the script will update the status column in Excel to reflect whether each email was sent successfully. If any errors occur during the sending process, these will be captured and noted in the status column, providing clear feedback on which emails were sent and which encountered issues.
Advanced Template Built with VBA
For those who prefer a solution that doesn’t require Python, I’ve developed an advanced template using VBA. This template is designed to be a robust alternative, allowing users to send emails directly from Excel without needing to install Python or any additional libraries.
The VBA template includes many features similar to the Python version, including the ability to send emails to multiple recipients, use of placeholders, and attachment support. The main advantage of using VBA is that it operates entirely within the Excel environment, making it more accessible for users unfamiliar with coding.
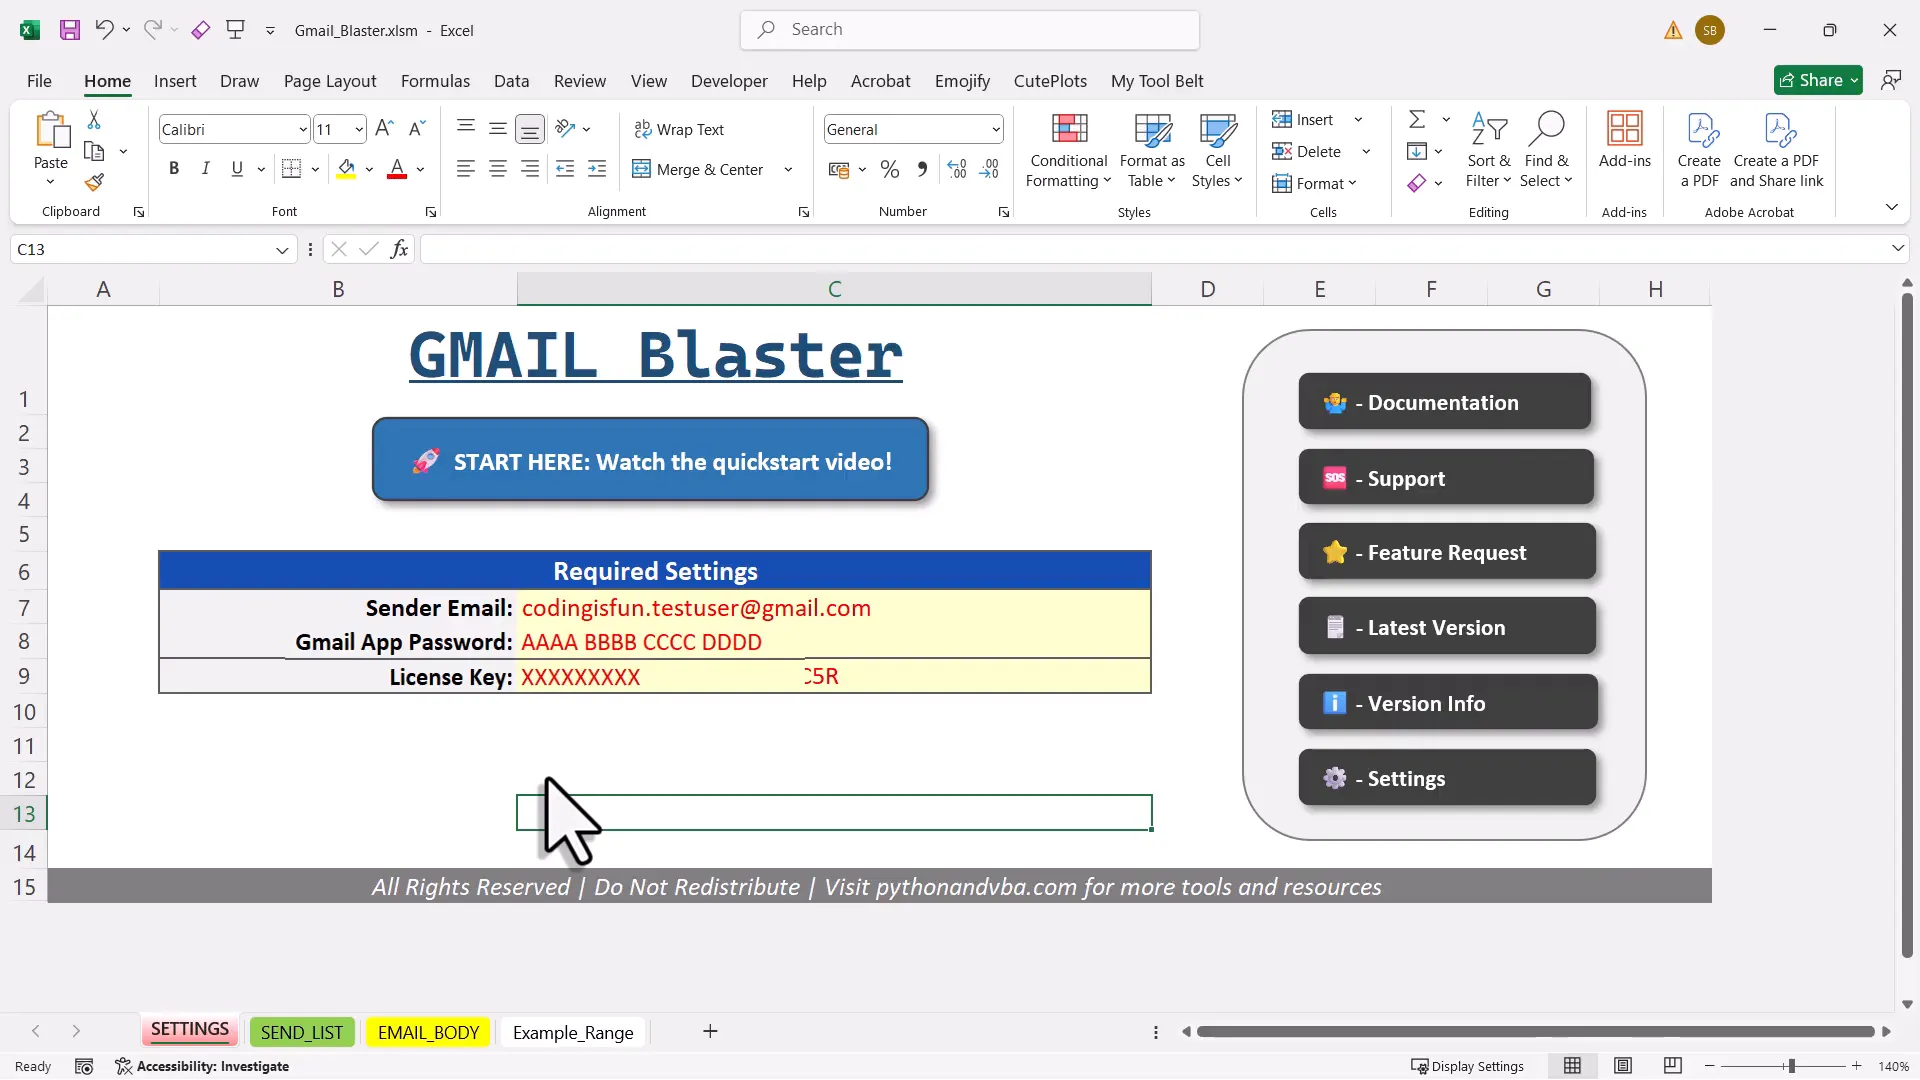
To get started with the VBA template, users simply need to download it from the provided link. The template is preconfigured, allowing users to enter their email details directly into the Excel sheet. The process for sending emails is similar: users fill out the necessary fields and click a button to send the emails.
In this version, users can also embed Excel ranges directly into the email body. This feature allows for dynamic content to be included in the emails, making them more informative and visually appealing.
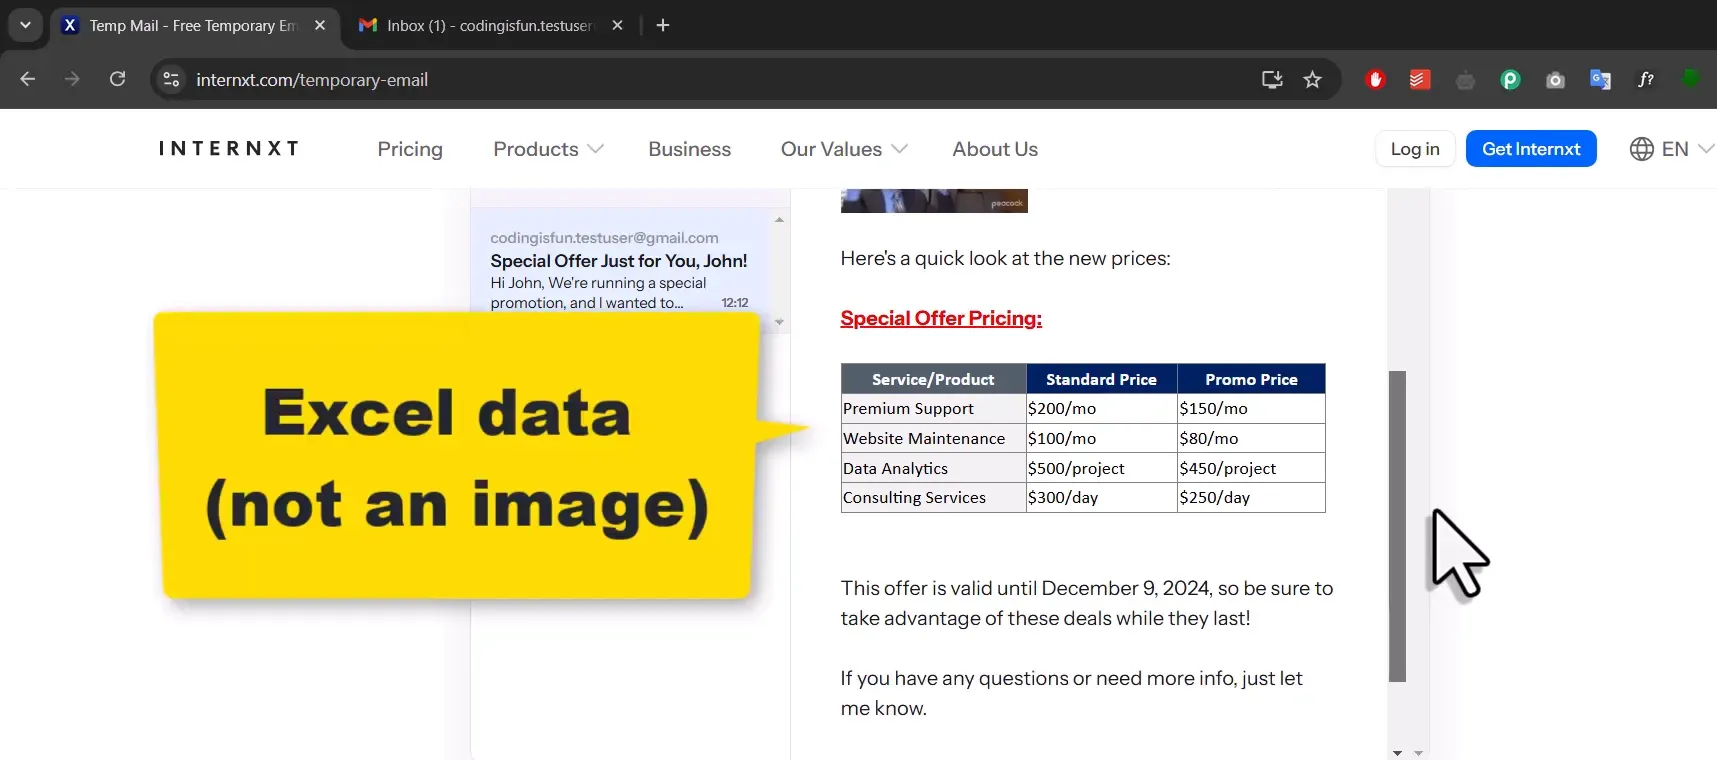
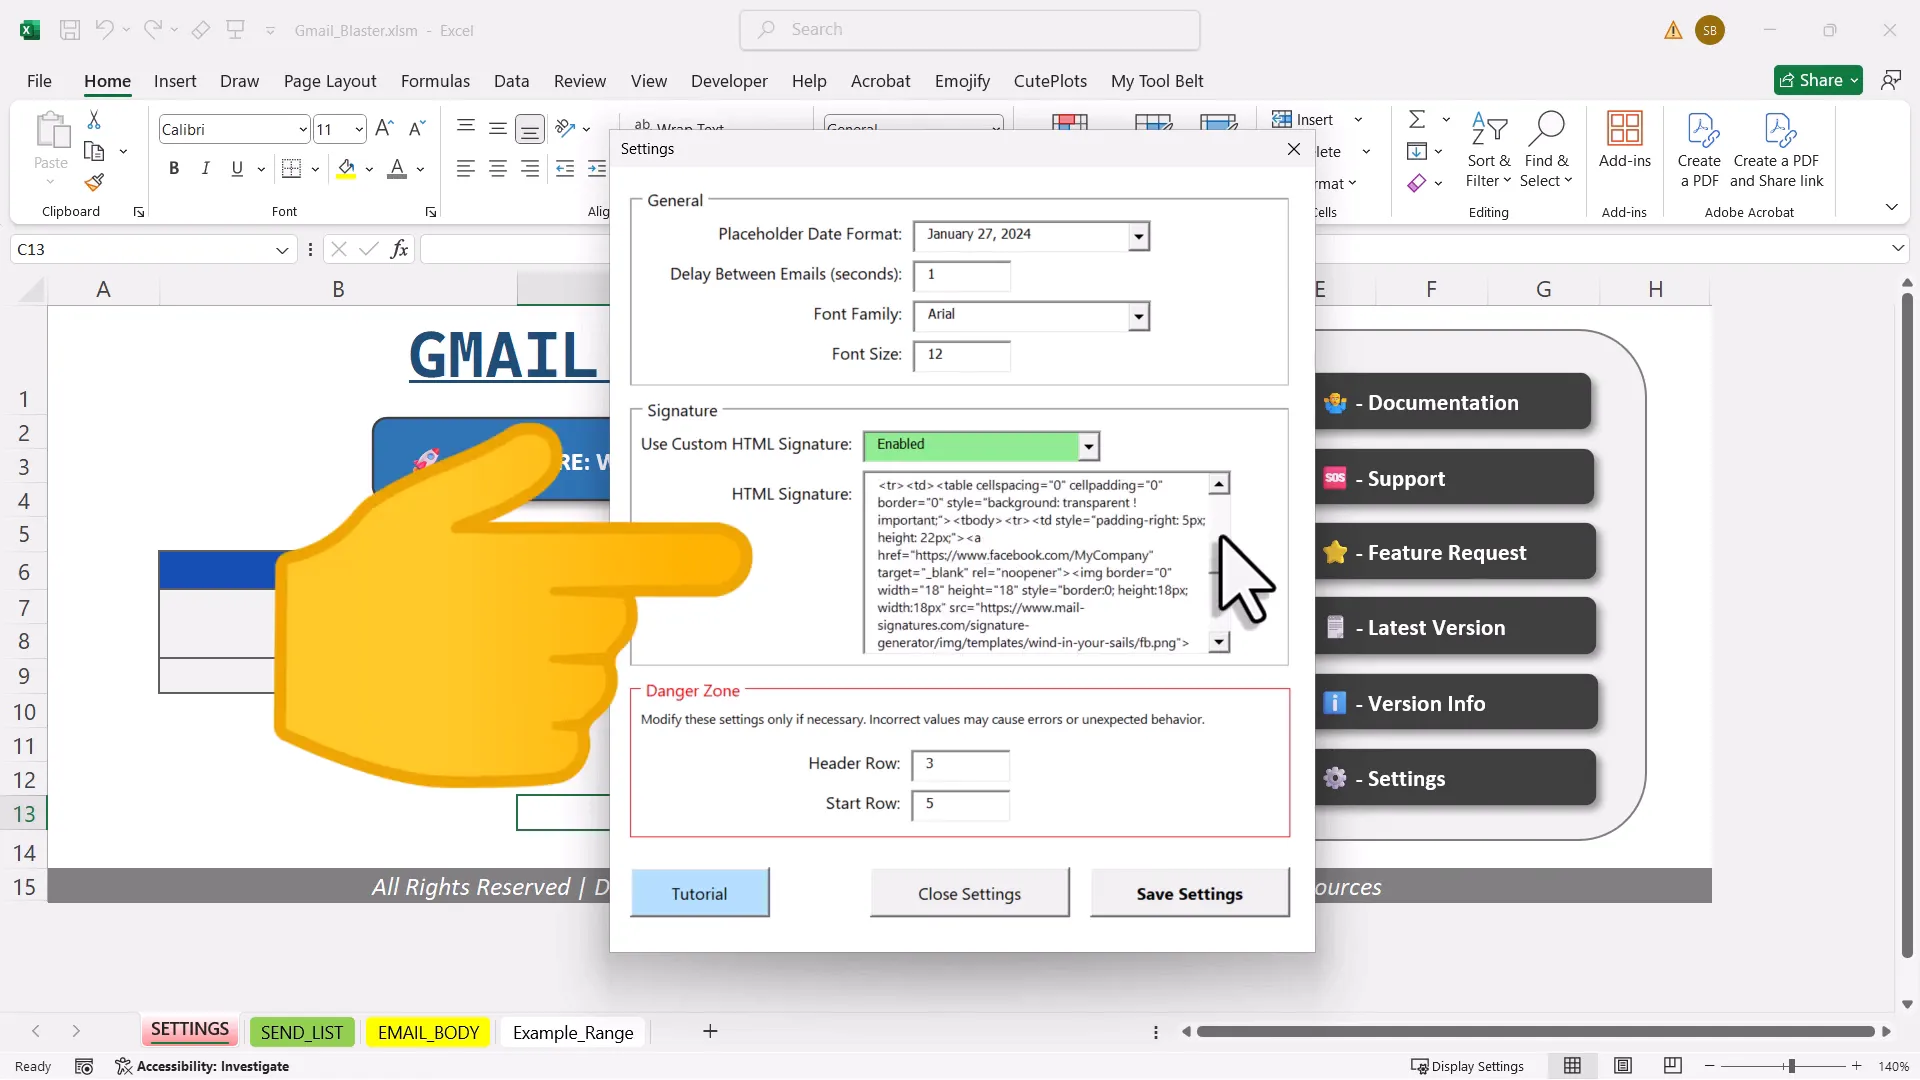
Additionally, the VBA template supports HTML formatting, allowing users to customize the appearance of their emails further. Users can change font colors, make text bold, and include images, all while using the familiar Excel interface for input.
To enhance user experience, I’ve also included a signature option within the VBA settings. Users can paste their HTML signatures, which will automatically be appended to each email sent, maintaining a professional look.
Gmail Sending Limitations
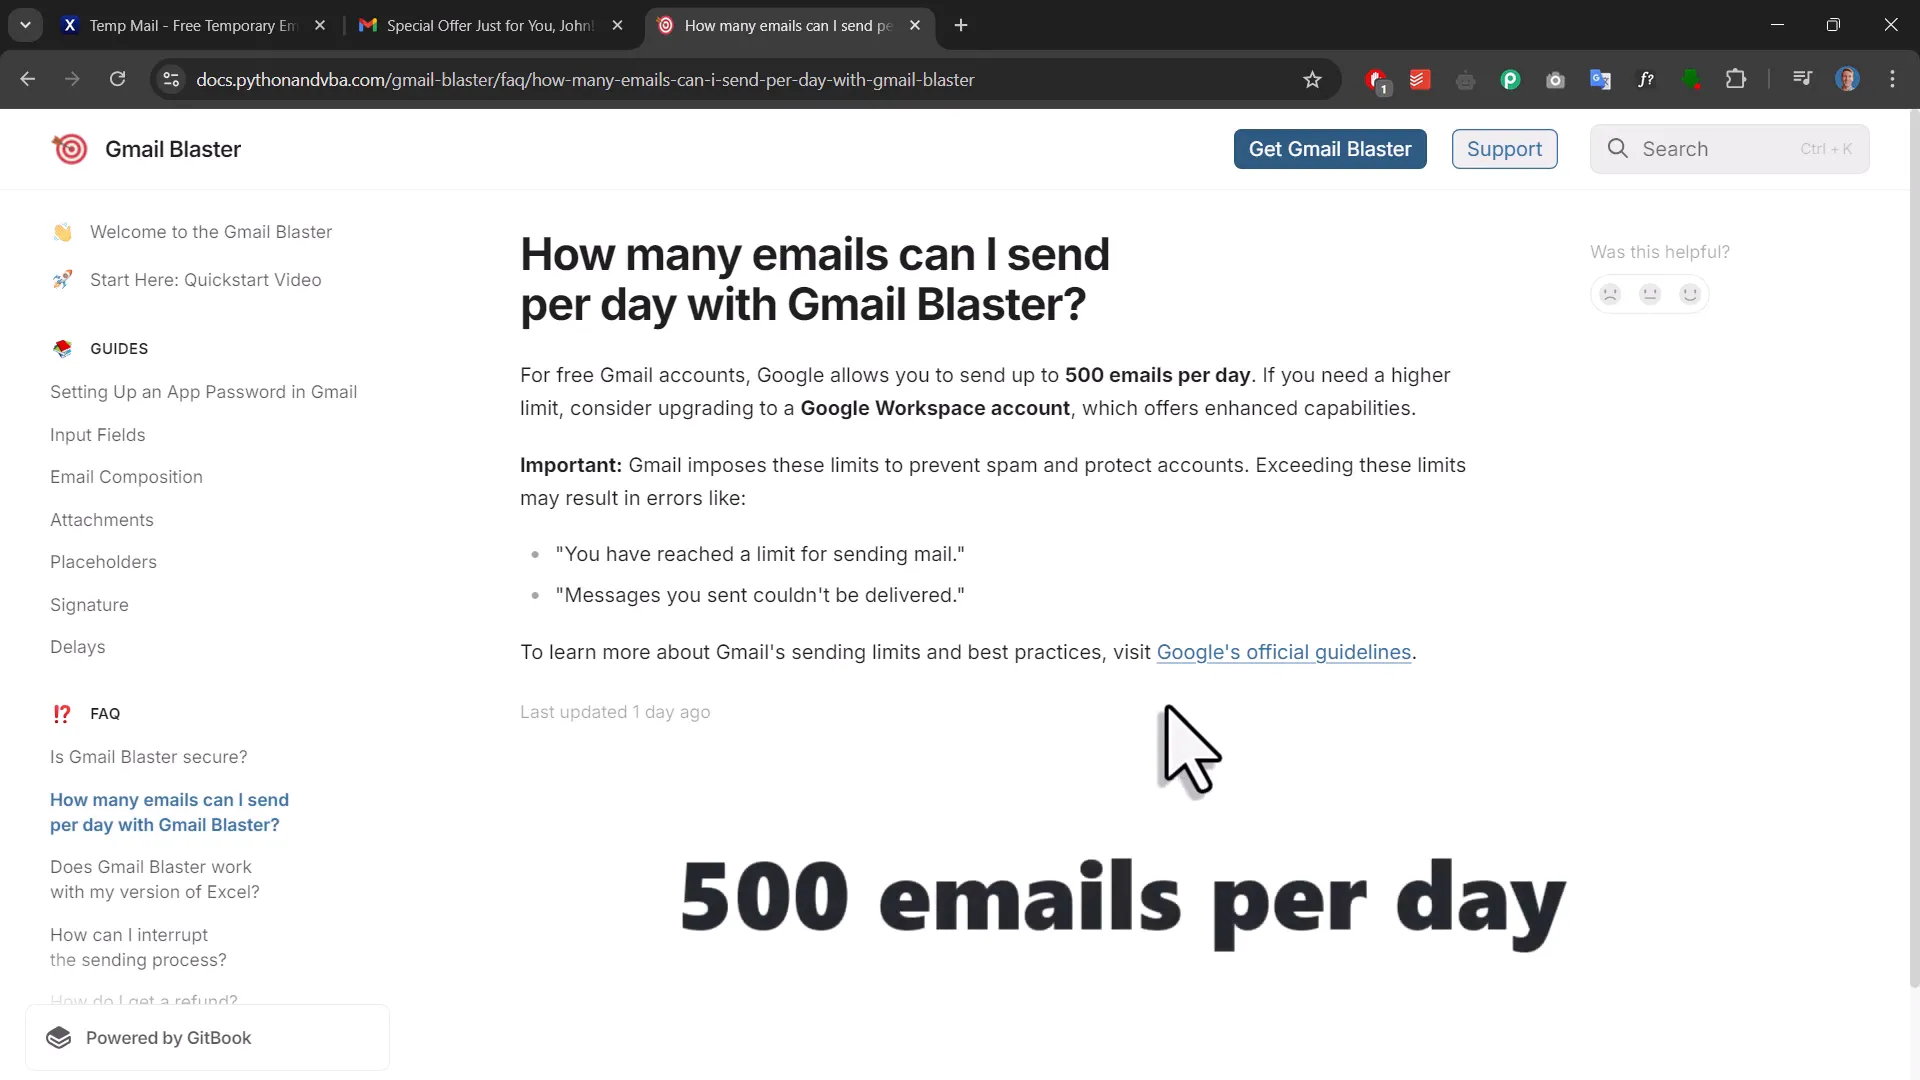
It’s essential to be aware of Gmail’s sending limitations when using these email automation tools. Gmail is not designed for large-scale email campaigns, and there are specific restrictions on how many emails can be sent in a given timeframe.
According to Google’s guidelines, personal Gmail accounts can typically send up to 500 emails per day. If you exceed this limit, you may encounter temporary restrictions on your account. For users needing to send larger volumes of emails, it’s advisable to consider using dedicated email services like SendGrid or Postmark.
For those who only need to send a few hundred emails per day—whether to clients, customers, or students—the Excel Gmail blaster tool should be sufficient. Just be sure to monitor your sending activity to stay within the limits set by Google.
In summary, both the Python and VBA options provide useful tools for automating email sending from Excel. Each has its advantages, allowing users to choose based on their comfort with coding and specific needs.
Conclusion
In this post, I covered how to automate email sending from Excel using both Python and VBA. I walked through the process of setting up your Gmail account for secure access, building an Excel user interface, and creating the necessary scripts to send personalized emails efficiently.
With the tools provided, you can easily manage email communications directly from Excel, saving time and enhancing productivity. Whether you choose the Python-based solution or the VBA template, both options offer robust features to meet various emailing needs.
Thanks for reading.