
About three minutes from opening BarcodePop to your first barcodes. You do not need your own list: the sample data gives you 20 made-up products to try everything with. No account and no key: the free version makes up to 50 barcodes per workbook in every 1D type.
1. Add BarcodePop to Excel #
You need Excel on Windows or Mac with Microsoft 365, Excel 2021 or Excel 2024, or Excel on the web. BarcodePop is coming soon to Microsoft Marketplace; the BarcodePop page shows when the listing is live. Once it is listed, add BarcodePop from the Add-ins menu on the Home tab (More Add-ins, search for BarcodePop, Add). The steps are in Installation.
2. Open the pane #
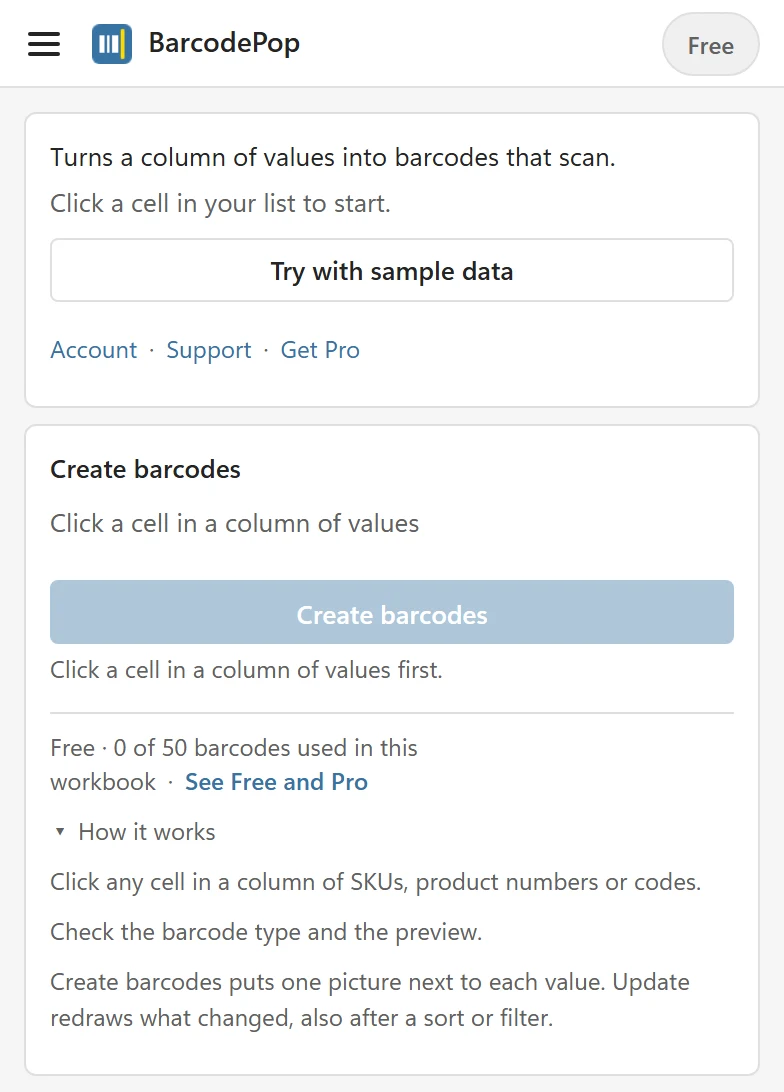
On the Home tab, find the BarcodePop group and click BarcodePop. The pane opens at the side of the sheet. The first time, a start card at the top says Turns a column of values into barcodes that scan. Click a cell in your list to start., with one button, Try with sample data, and the links Account · Support · Get Pro under it. At the foot of the Create card, the free version shows Free · 0 of 50 barcodes used in this workbook with See Free and Pro, and the How it works help under it is open. The menu at the top left has Sample data, Free and Pro, on the free version Get BarcodePop Pro, Enter license key, Settings, Getting started, Docs, Support, Account, About and Reload add-in.
3. Add the sample data #
Click Try with sample data on the start card, or choose Sample data in the menu. BarcodePop adds a new sheet called BarcodePop sample with the columns Product, SKU, EAN-13 and GS1 data and 20 made-up products, and selects the first SKU. The status line says Sample data added. Click Create barcodes. Once BarcodePop has read a column of values, the start card makes room and How it works folds; click it to open it again. The EAN-13 numbers come from the example range GS1 uses in its own documents, never from a real company.
4. Check the Create card #
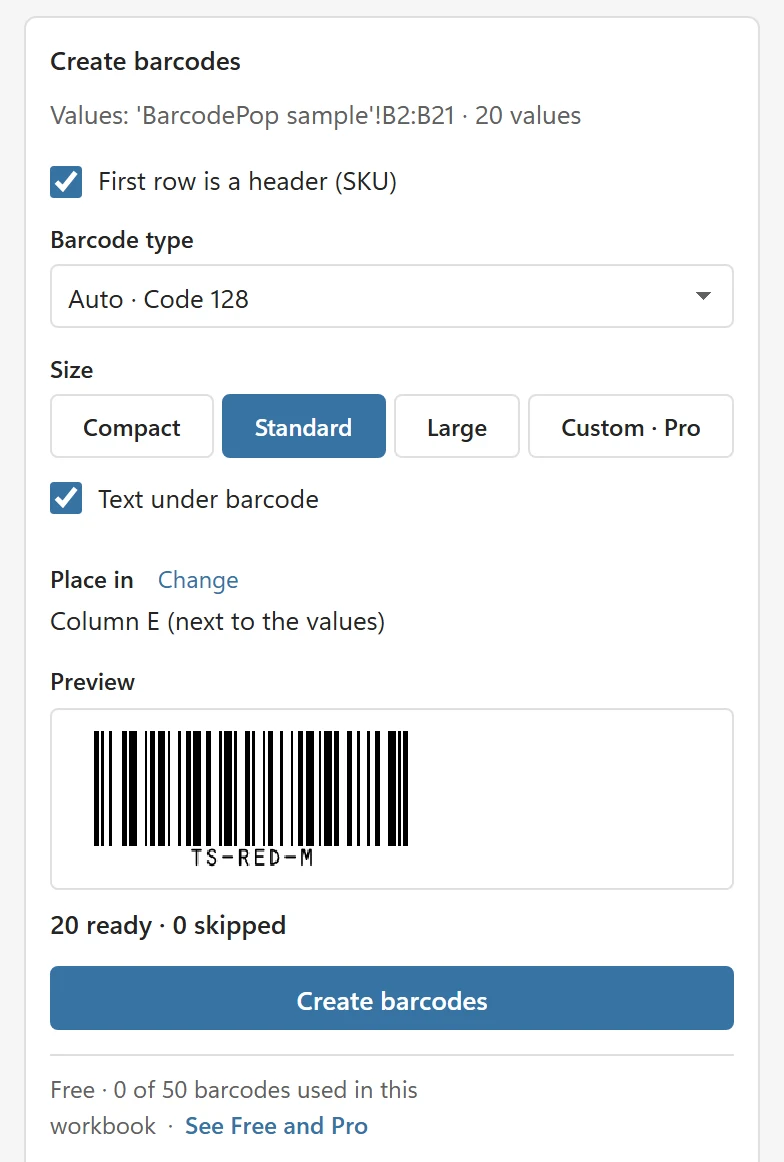
The Create barcodes card now shows what BarcodePop found:
- The values line, for example Values: ‘BarcodePop sample’!B2:B21 · 20 values. The header row (SKU) is left out by itself.
- Barcode type: Auto · Code 128. SKUs such as TS-RED-M hold letters, so Code 128 is the right type.
- Size: Standard, and Text under barcode ticked.
- Place in: Column E (next to the values). Columns C and D hold data, so BarcodePop picks the first empty column to the right. Barcodes never cover cells with data.
- Preview: the first barcode and the line 20 ready · 0 skipped.
5. Click Create barcodes #
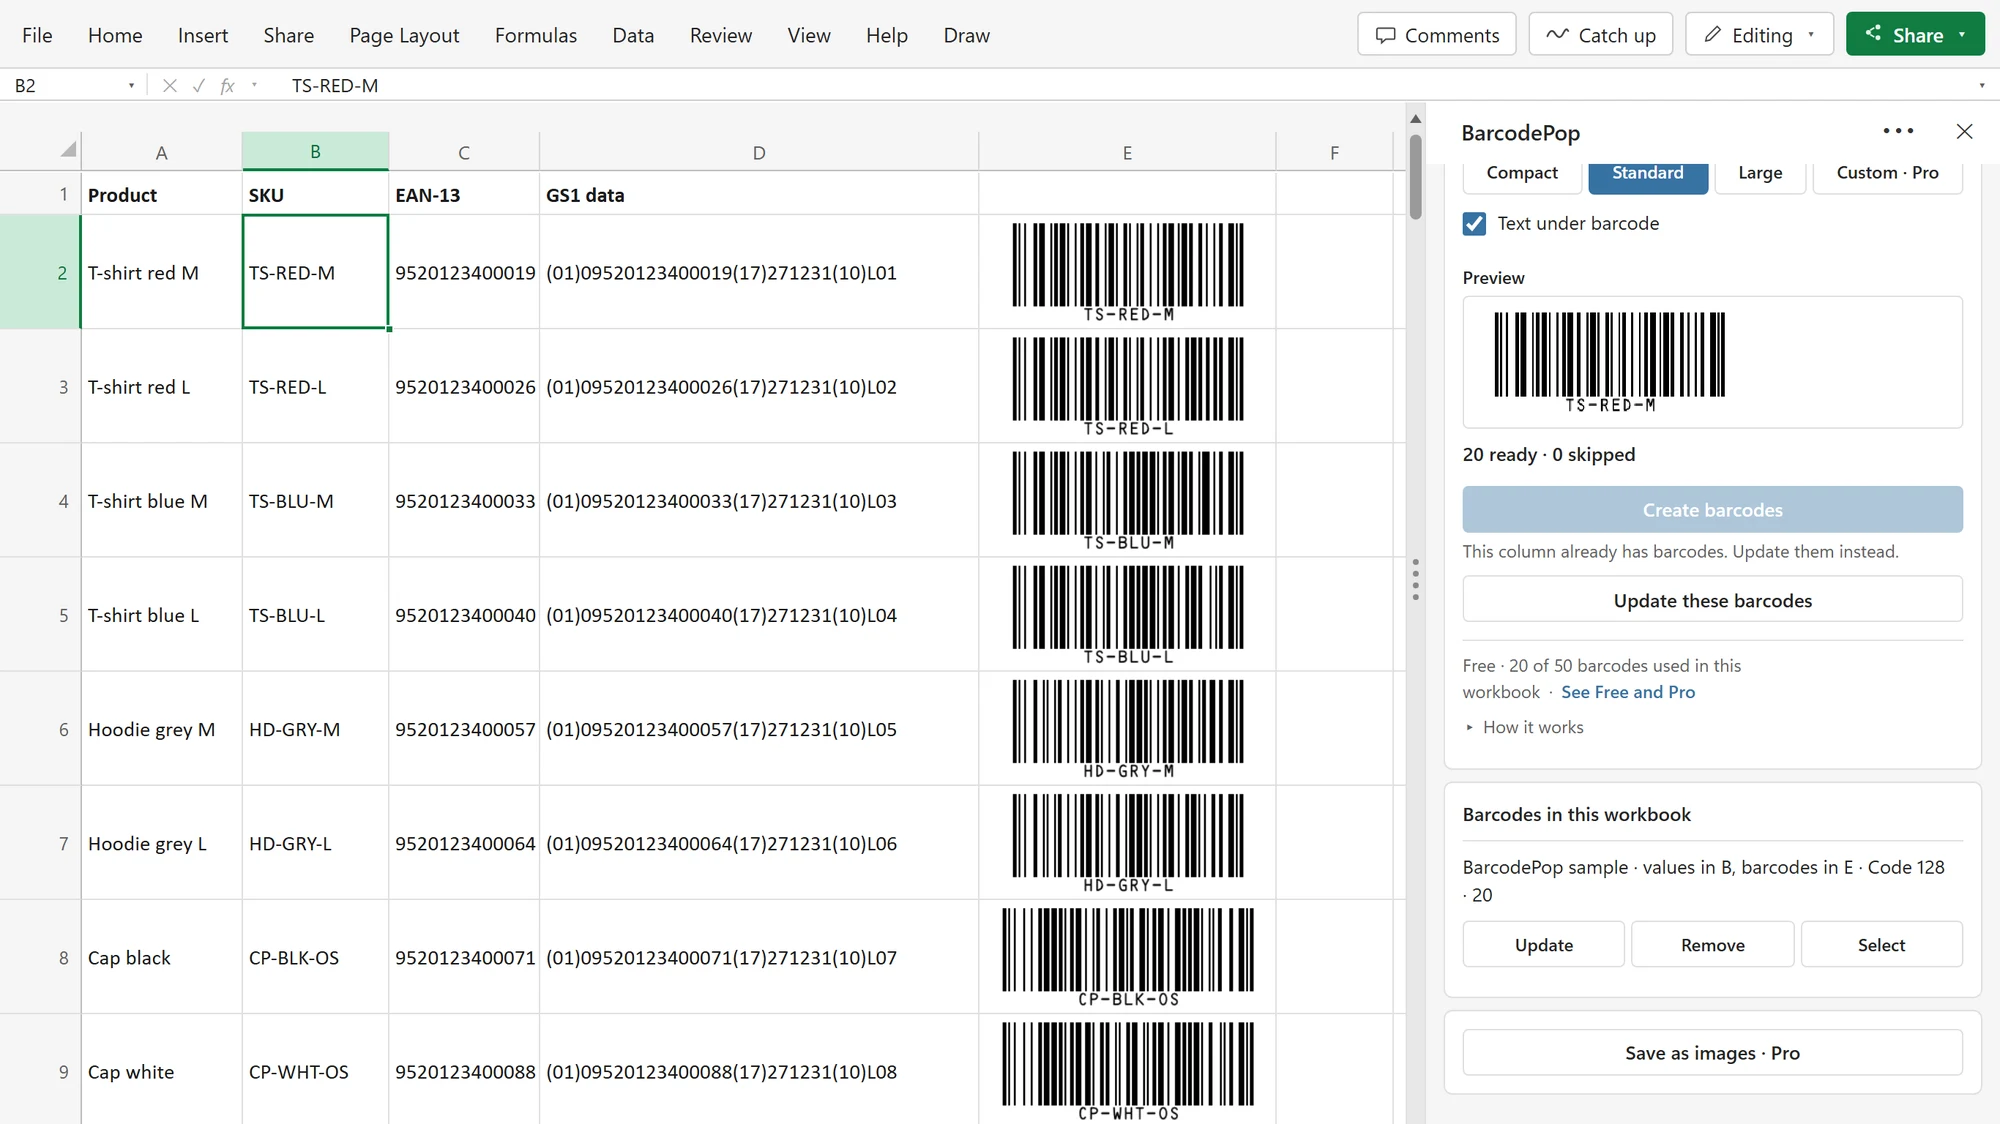
Click Create barcodes. BarcodePop draws the 20 barcodes, places one picture next to each SKU in column E, and makes the rows tall enough to fit. The status line says Created 20 barcodes in column E. The new set appears under Barcodes in this workbook, the card right under the Create card, with the buttons Update, Remove and Select.
6. Change a value and update #
Type a new SKU into cell B3 and click Update on the set. BarcodePop redraws only the barcode of that row and leaves the other 19 alone; the status line says, for example, Update · 0 new, 1 changed, 0 removed, 19 unchanged. After sorting the list, Update moves each barcode back next to its value.
Next steps #
- Use your own list: Create barcodes from a list.
- Try the EAN-13 column of the sample: click C2 and BarcodePop picks Auto · EAN-13. See UPC and EAN barcodes for products.
- Not sure which type you need? Choose the right barcode type.