
TablePop turns a table in your Excel workbook into a live web page at its own address. This guide takes you from nothing to a published page in a few minutes.
What you need #
- Excel on Windows, Mac or the web
- An email address you can open right now, for a confirmation code
No credit card. The free plan has no trial clock.
1. Install the add-in #
TablePop works in Excel on Windows, Mac and the web.
TablePop is on its way to Microsoft’s add-in store. Until it is listed there, add it with its manifest file:
Excel on the web
- Right-click this manifest link, choose Save link as, and save the file as
manifest.xml. - Open a workbook in Excel on the web.
- On the Home tab, open Add-ins and choose More Add-ins.
- Go to My Add-ins and choose Upload My Add-in.
- Choose the
manifest.xmlfile you saved and upload it.
Excel on Windows or Mac
Contact support and we will help you set it up.
If your company deploys add-ins centrally, TablePop may already be there for you. Once TablePop is listed in the store, you will find it under Home > Add-ins by searching for TablePop.
Once it is installed, a TablePop button appears on the Home tab of the ribbon. Click it and the TablePop pane opens on the right. Leave it open while you work: everything happens in it.
2. Create your account #
You sign in to TablePop with your email address and a password. The first time, you create the account from the pane:
- Press Create account.
- Enter your Email address and a password in Choose a password. It needs at least 10 characters. A short sentence is easy to remember and hard to guess.
- Press Create account.
- Check your inbox. We send a six-digit code to confirm the address. It is valid for 10 minutes.
- Type it into Six-digit code and press Verify and continue.
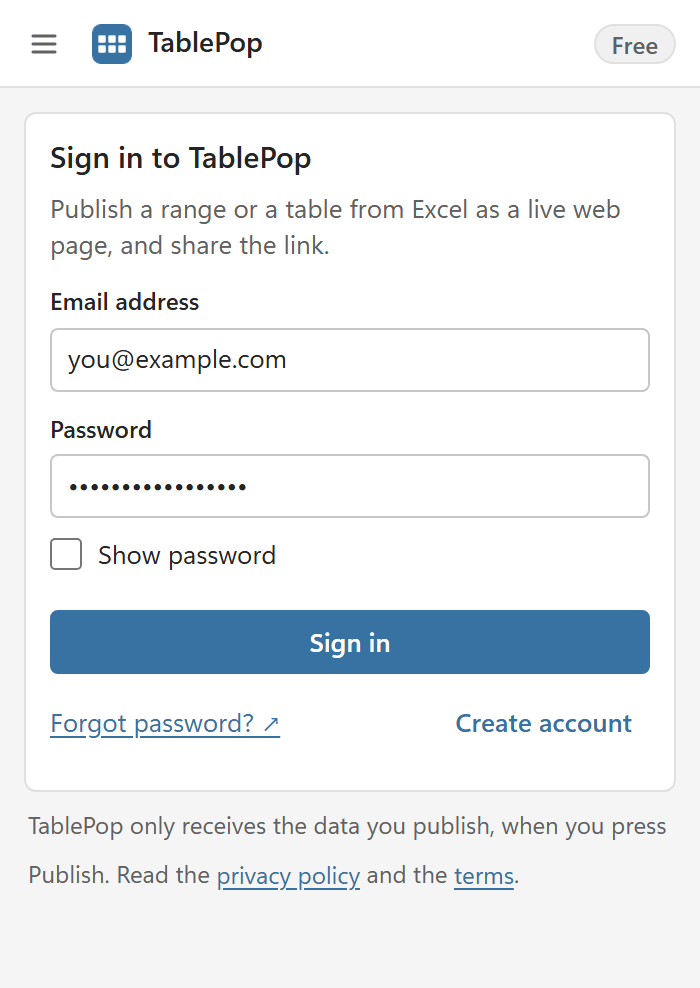
From then on you sign in with your email and password, in the pane and in the dashboard. The pane keeps you signed in, so you only do this again after signing out or on another computer.
Already have an account? If you try to create one with an address that is already registered, we email you a way to reset your password instead of a code. Use Forgot password? on the sign-in form if you do not remember it.
3. Choose your data #
The Data card at the top of the pane says what will be published.
- Range: click any cell inside your data and TablePop takes the whole block. The Range line shows exactly which cells, for example
Sheet1!A1:D50. You can also type an address there. - Excel table: pick one of the workbook’s tables from the list. New rows are picked up whenever you update, so this is the better choice for data that grows.
Leave First row is headers ticked when your first row holds column names such as Product, Category and Price. Those become the headings on the page.
No table handy? Open No data handy? Insert sample data and pick a template. It lands on a new worksheet, so nothing in your own data changes.
4. Name it and publish #
- In the Page card, give the page a Title. Readers see it at the top of the page and in the browser tab.
- Check Who can see it. New pages start as Unlisted: only people with the link can open them, and search engines are asked to skip them. Choose Public if you want the page to be found in search.
- Pick a look in the Look card if you like: a theme, an accent colour, a font, and Table or Cards. The Preview card shows the result.
- Press Publish page at the bottom of the pane.
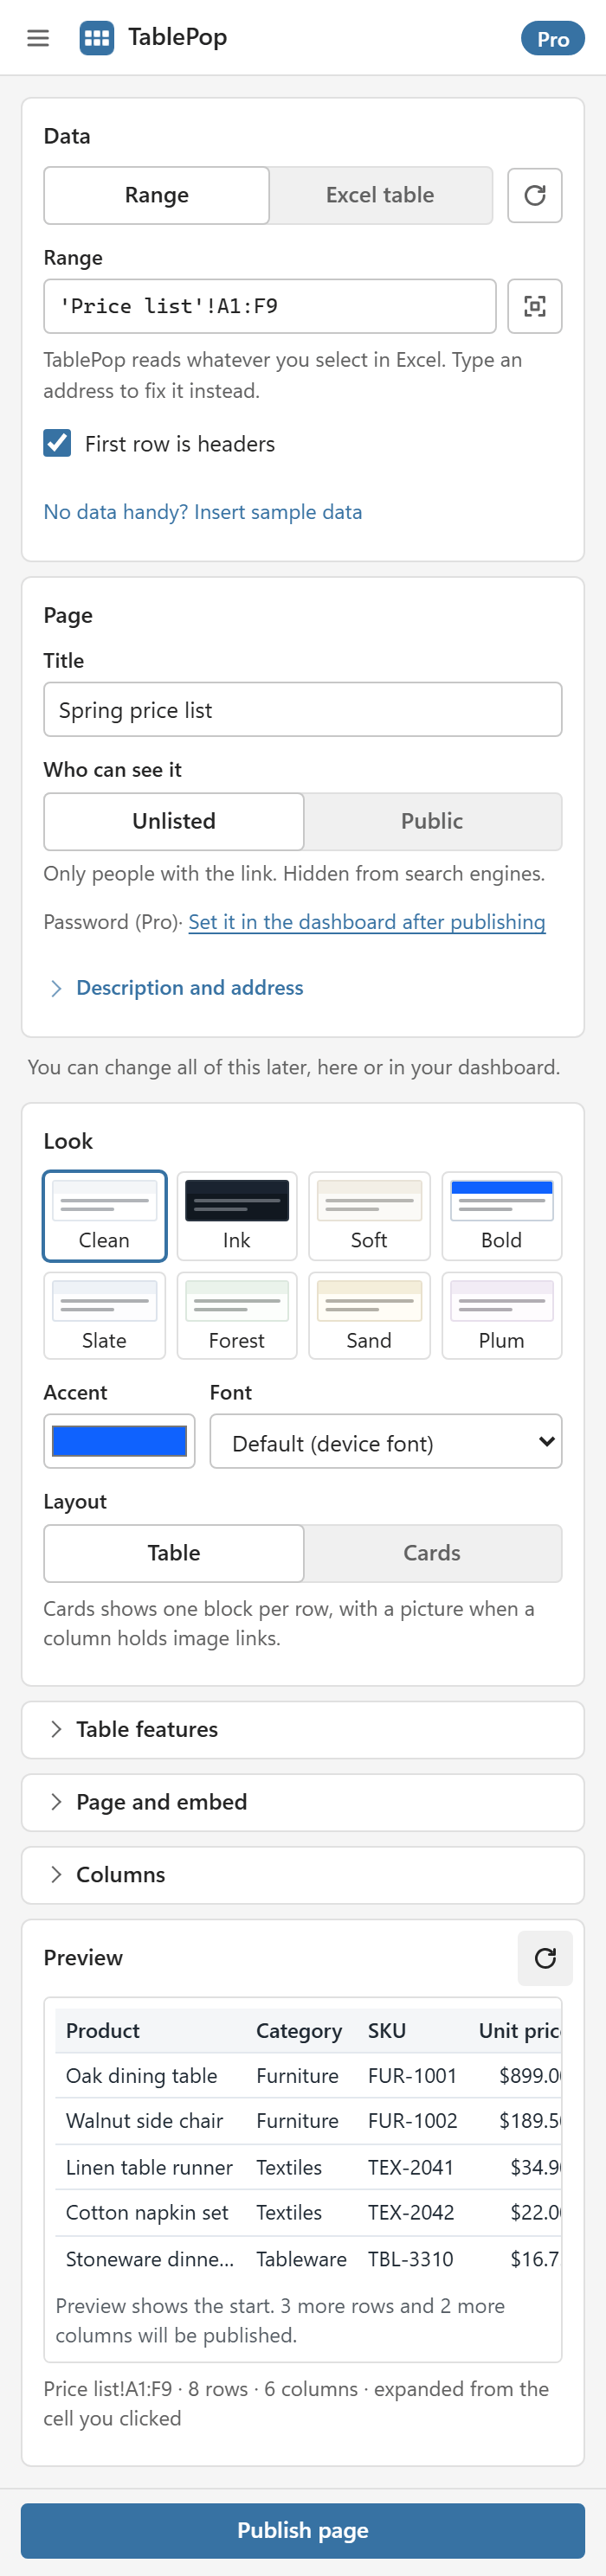
Everything else, such as a description, the search box, the export buttons or a footer, is optional. You can change all of it later, in the pane or in your dashboard.
5. Your page is live #
A second or two later the pane says Your page is live and shows the address. On Free it is assigned for you and looks like indigo-pantry-4043.tablepop.app. On Starter and Pro you can choose it yourself, like spring-price-list.tablepop.app in the picture below.
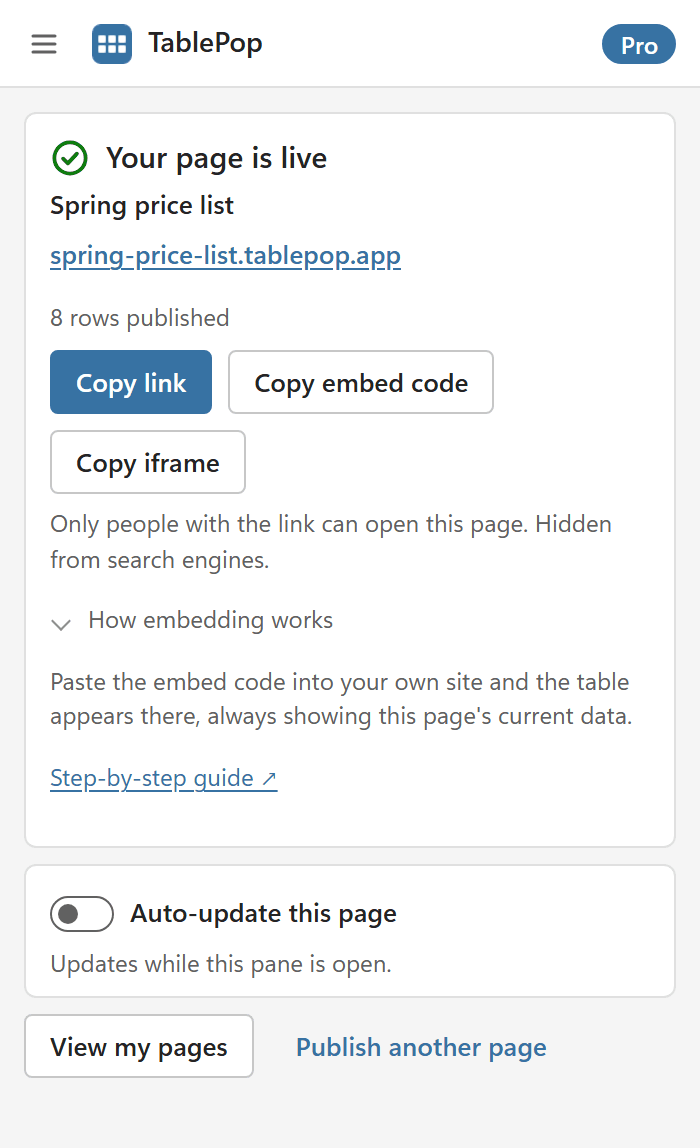
- Copy link copies the address to send to people.
- Copy embed code and Copy iframe copy a snippet for putting the table on your own website.
Readers need no account, no sign-in and nothing to install. The page works on phones too.
Where your pages live #
Every page you publish is listed in two places:
- My pages in the pane (open the menu at the top left). Update, copy, insert or delete a page from there.
- The dashboard at my.tablepop.app. Sign in with the same email and password. The Pages list shows every page with its status, rows and views, and each page opens into tabs for its design, data, domain and settings.
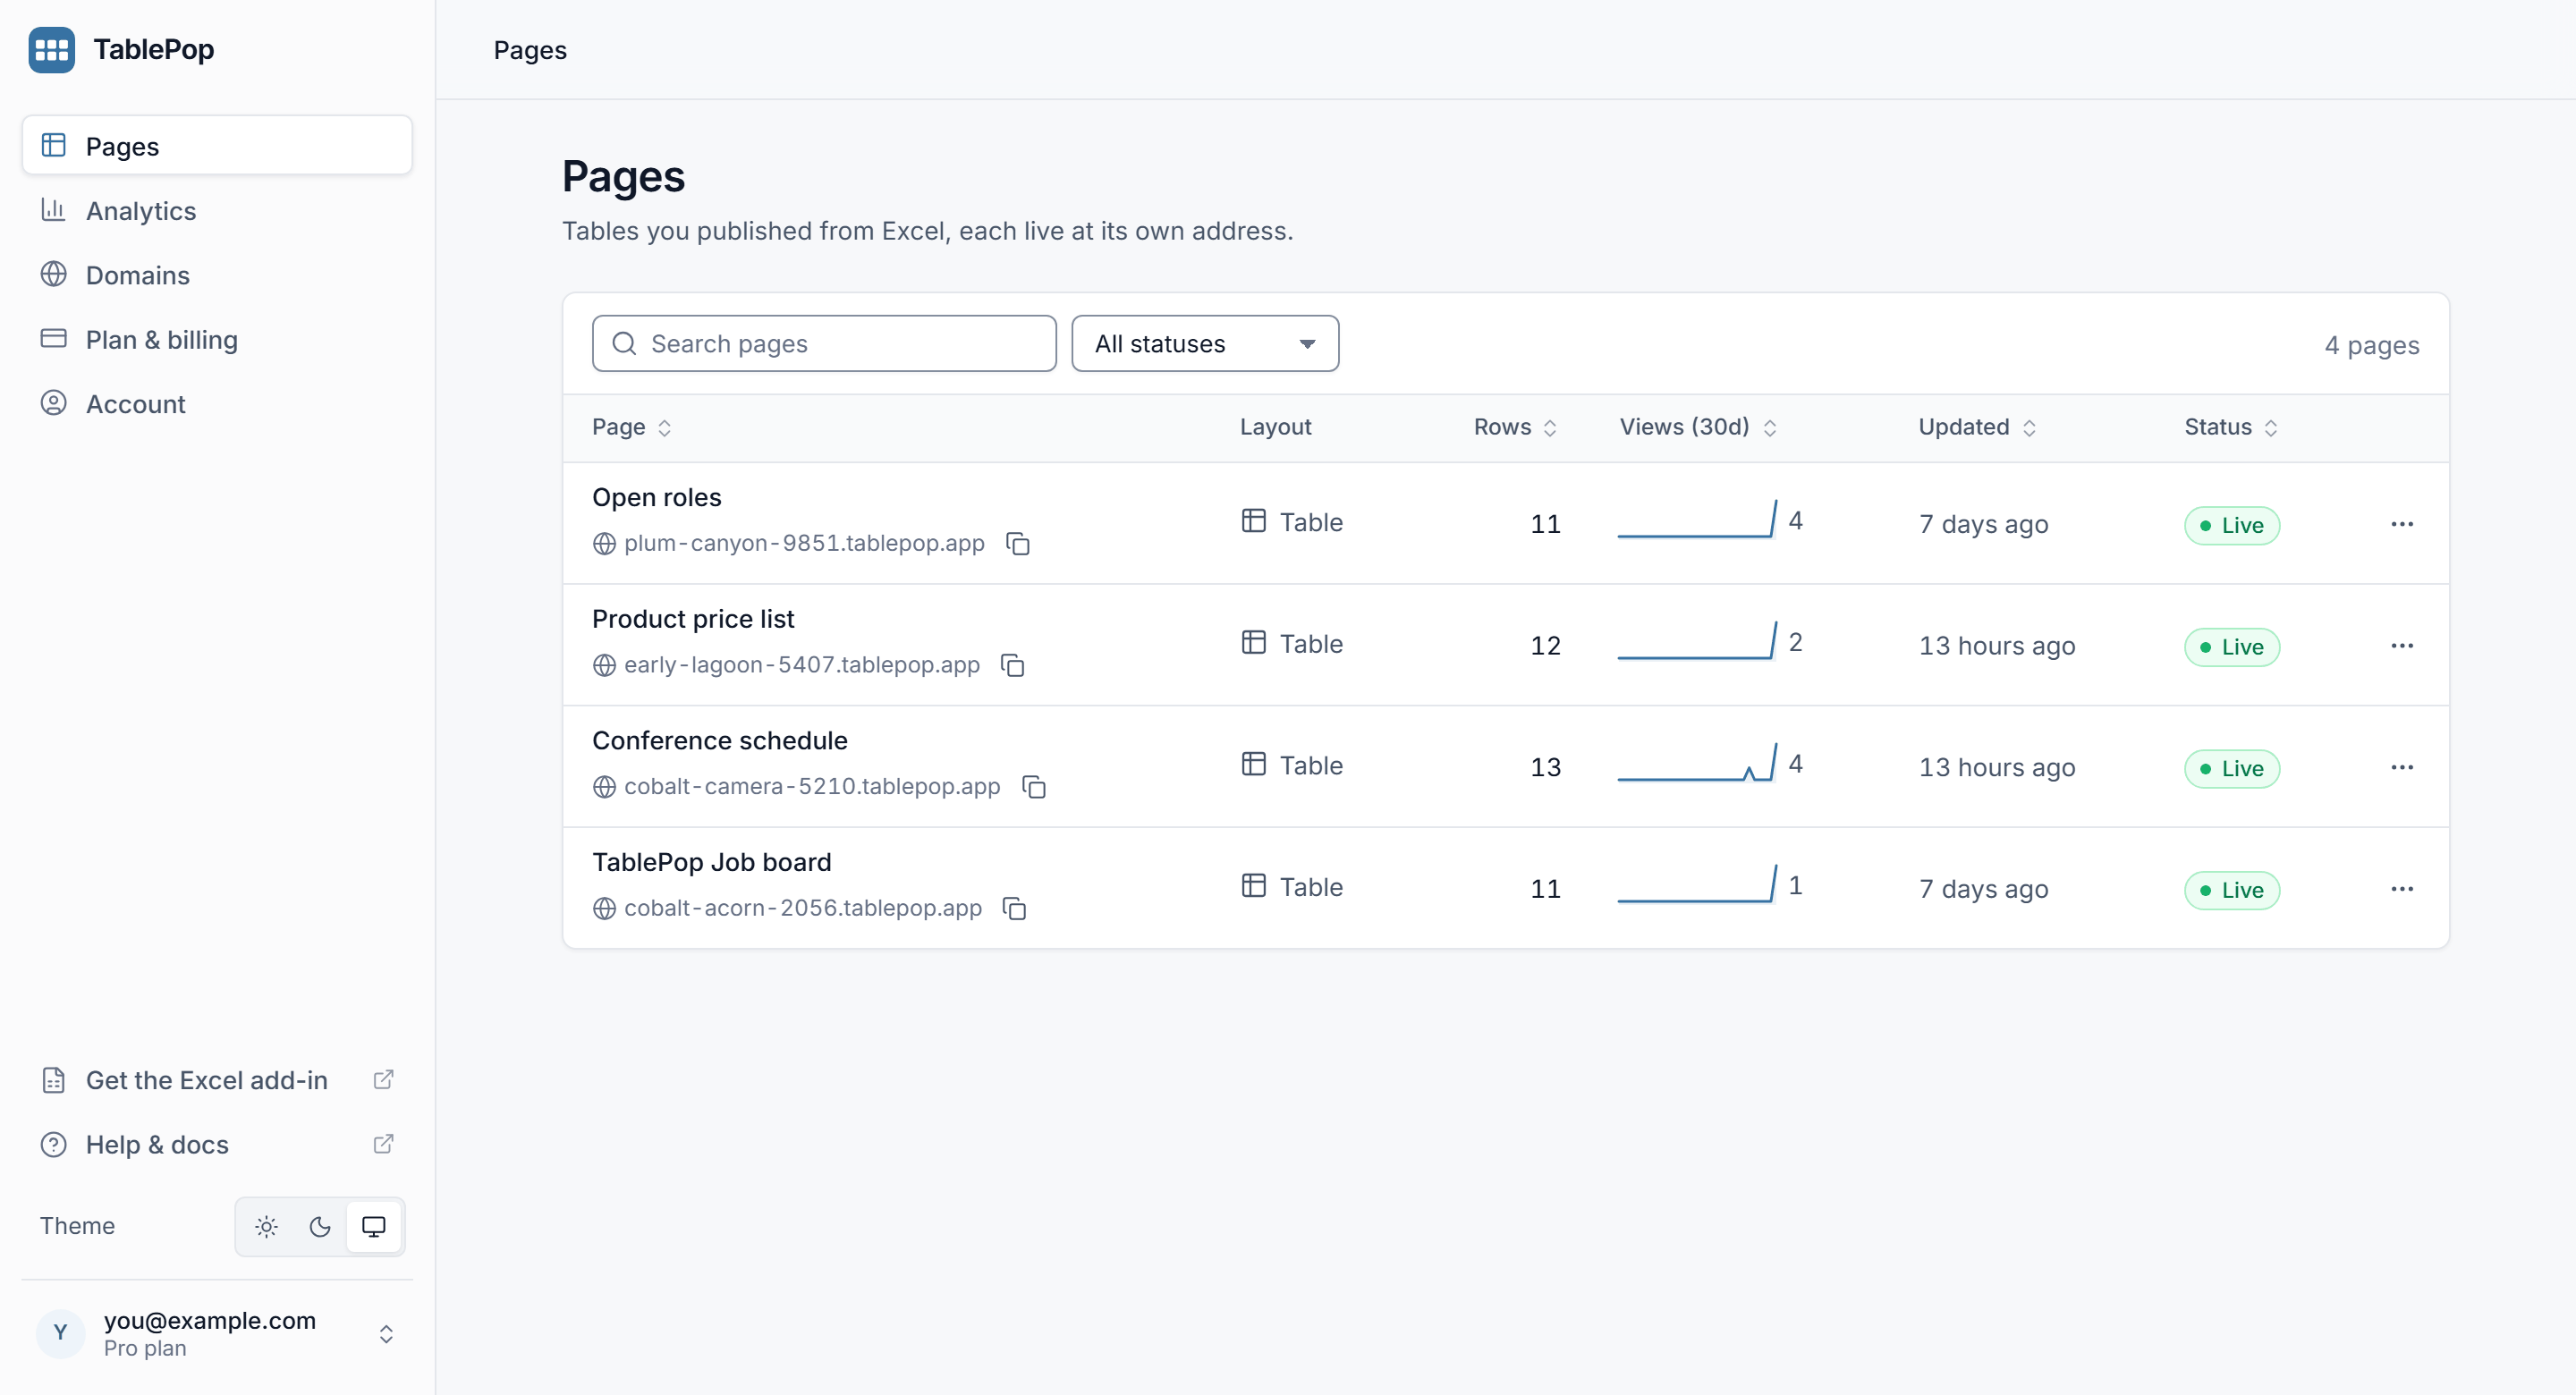
The data always comes from Excel. To change what a page shows, open the workbook and update the page from the pane.
What next #
- Publishing and updating explains Update, the review step, auto-update and version history.
- Choose who can see a page covers Unlisted, Public and password-protected pages.
- Sharing and embedding shows how to put a page on your own website.
- Themes and page settings covers colours, fonts, the header, the footer and the reader tools.
For what is stored and where, see the privacy policy.