
Setting up QuickText takes about 5 minutes, and you only do it once. The video below walks you through the whole thing, from installing the app to sending your first text.
The same steps in writing #
QuickText sends your texts through your own Android phone, using the free KDE Connect app on the phone. You do not need KDE Connect on your PC; QuickText connects to your phone itself.
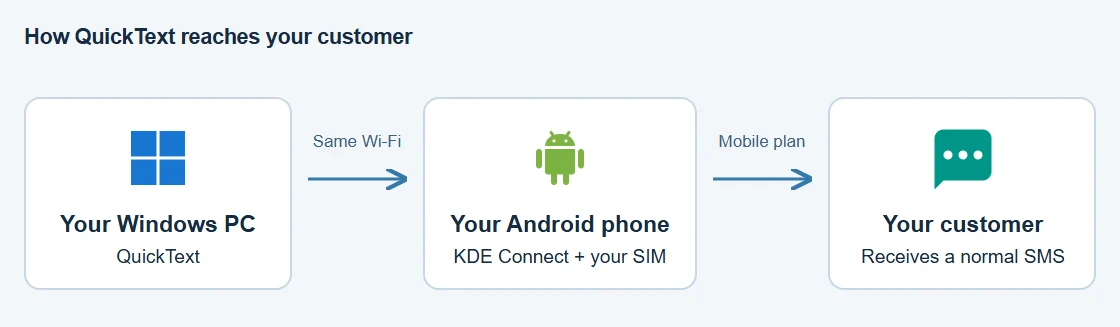
The Your phone page walks you through all of this as a checklist, one step at a time, and ticks each step off as it happens.
Step 1: Install QuickText
Get QuickText from the Microsoft Store and open it.
Microsoft Store app blocked on your PC?
If the Microsoft Store app is unavailable, try the official Store listing in your browser. A browser installer may still be subject to your organization’s installation policy; contact IT if installation is blocked.
https://apps.microsoft.com/detail/9P4C9H7HNNN0
Open that page, click Install (or Download), run the file it saves, and carry on with Step 2. You get exactly the same app, and updates still arrive automatically.
Step 2: Get KDE Connect on your phone
Open the Your phone page in the left sidebar. It shows a QR code: point your phone camera at it and the Play Store opens on the right page. Install the free KDE Connect app and open it once.
Step 3: Put both on the same wi-fi
Your phone and your PC must be on the same wi-fi network. Mobile data does not work, and guest networks usually block devices from seeing each other. Once the phone is on the same network with KDE Connect open, it appears in the list on the Your phone page by itself.
Step 4: Pair your phone with your PC
Click Pair next to your phone. A code appears on your PC, and the same code appears in the request on your phone. Check that the two match, then tap Accept on the phone.
You are not limited to one phone. Pair as many as you like and pick the one that sends: Send from more than one phone.
If your phone shows a different code, do not accept it. The codes matching is what proves you are pairing with your own phone and not with something else on the network. On the phone, your PC is called QuickText on followed by your computer name.
Step 5: Allow SMS on your phone
Android asks once whether KDE Connect may send text messages. Tap Allow. This is the one step your PC cannot check for you, so do not skip it. Full details with screenshots: Allow SMS on your phone.
Step 6: Send yourself a test message
On the Your phone page, type your own mobile number in the test card and send. QuickText waits for your phone to confirm that the text really went out. When it arrives as a normal text, your setup works.
Keep it connected when the screen locks: follow Keep KDE Connect running for your phone brand’s battery settings and step-by-step instructions.
Step 7: Add your contacts
Open the Contacts page. You can bring people in from a CSV, Excel or vCard file, or click Import from phone to take them straight from your phone’s address book. Then write your message on the Compose page.
Step 8: Compose, preview and review
- Open Compose to see Compose message. Choose all contacts, selected lists or individual contacts, and check the recipient count. View recipients shows the exact people selected.
- Write your message or use a saved template. Insert contact field opens a panel where you choose a field and optional fallback text for people missing that detail, then click Insert field. Add variation offers wording choices or a builder for your own.
- Check Message preview. Use the arrows to see each person’s personalized message.
- Open Sending options to choose the phone, change timing, send in batches or add a campaign name for your history. Each batch starts only when you start it.
- Click Review and send. Check the final details, then confirm or return to editing. In test mode the button says Review test run and no SMS is sent.
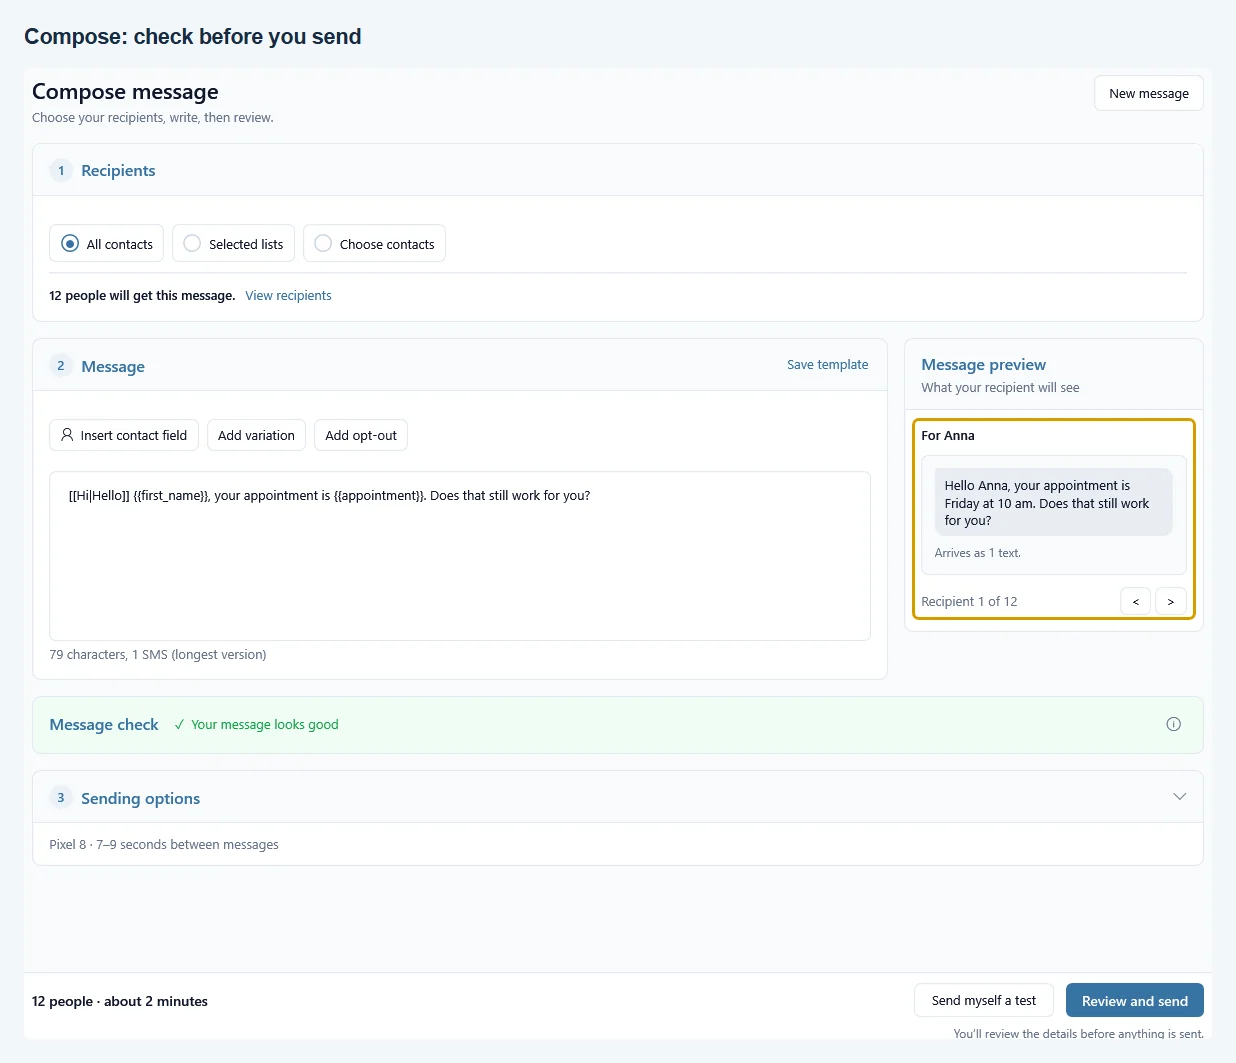
To check the actual text on your phone first, click Send myself a test. Save your number under Settings > Phone numbers > My number for test messages to prefill the confirmation. You still confirm the destination before every test, and the valid number you confirm is remembered. The result appears beneath the test button. Test SMS sent means the sending phone confirmed it sent the SMS; it is not a recipient delivery receipt.
For a different message or audience, click New message. It clears the current draft and selection while keeping your contacts, templates and history. Undo new message brings the draft back. You do not need to reinstall or delete your app data.
If a step does not work, click Check my setup on the Your phone page. It checks each part of the connection, from your network to your phone, and tells you exactly what is missing.